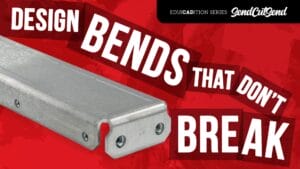
This series was filmed and edited by Keaton Bowlby
Sometimes when working on sheet metal projects welding just isn’t practical. Maybe you don’t have a welder, or the job requires a solution that allows for easy disassembly later. In this video, we’re diving into a method that’s both simple and effective: Captive Nuts. This no-weld solution is perfect for those who need to put metal parts together without the hassle of specialized equipment.
Captive Nuts 101: We start by explaining what captive nuts are and how they work. A captive nut is designed to stay in place within a metal structure, holding firm while you thread a bolt into it. This is especially handy when you’re working in tight spaces where you can’t easily get a wrench on the backside.
Getting the Fit Right: One of the most important aspects of using captive nuts is getting the fit just right. We’ll walk you through how to measure and adjust tolerances depending on the thickness of your material. For example, thinner materials might need a snugger fit to prevent the nut from spinning, while thicker materials might require a bit more clearance due to variations in the cutting process. These little adjustments can make all the difference in your final assembly.
Step-by-Step Assembly: We’ll show you exactly how to set up and use captive nuts in a real-world project. Whether you’re building a custom part for your car or putting together a new tool or fixture, this guide will help you do it right the first time. You’ll see how captive nuts can save time and simplify your work by reducing the need for extra tools and making assembly easier.
While welding is a solid method for joining metal, it’s not always the best option, especially if you’re working in a home garage without all the pro gear. Captive nuts offer a way to put things together that’s strong, reliable, and doesn’t require the intense heat or special equipment that welding does. Plus, they give you the flexibility to take things apart later if needed—something that’s a lot harder with a welded joint.
Adhesives as an Alternative: We’ll also touch on other options like panel adhesives, which can sometimes be even stronger than a weld in certain situations, especially with thin materials. These adhesives are worth considering, particularly if you’re working on projects where you want to avoid heat warping or need a clean, seamless finish.
Order Your Hardware First: One piece of advice that can save you a lot of headaches is to order your nuts, bolts, and other hardware before you finalize your design. This lets you measure everything with calipers and make sure your dimensions are spot-on before you start cutting metal. We’ve all been there—thinking you can trust the specs online, only to find out that what you ordered isn’t quite what you expected. Get your hands on the actual parts first, and you’ll avoid a lot of frustration down the line.
Avoid Bottoming Out: Another common issue is “bottoming out,” where the screw is too long and hits the back of the material, preventing it from tightening properly. We’ll show you how to avoid this by choosing the right screw length and leaving some extra room for different grades or sizes of bolts.
Dealing with Thin Materials: If you’re working with thinner materials, keeping everything aligned can be tricky. We’ll discuss ways to add bends or other features to your design that help maintain a proper angle, so your final assembly is both strong and accurate.
Thicker Materials and Taper: When working with thicker materials, you might notice a slight taper due to the cutting process. This can affect how well your pieces fit together. We’ll go over how to account for this and make any necessary adjustments, so everything comes together smoothly.