More axes sound better, but in CNC machining, more axes can also mean more time on the machine and more money on your quote. Understanding the difference between 3 axis, 3+2, and 5 axis machining can help you design parts that are easier, faster, and less expensive to make.
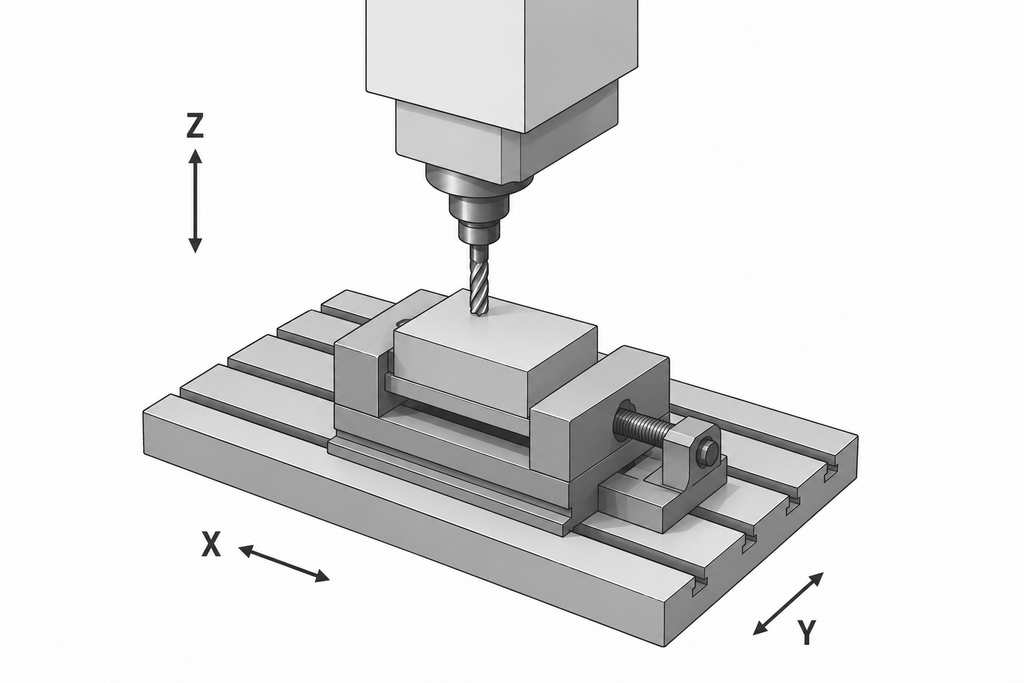
First things first: an axis is just a direction the CNC machine can move in, which is required to cut parts (otherwise, it’s just a drill!). Stand in front of a mill: the cutter goes left-to-right, front-to-back, and up-and-down — three straight-line directions, three axes, the ones we call X, Y, and Z.
A 3 axis machine has those three and nothing else. Add the ability to tilt or spin the part and you’ve added a fourth and fifth axis. Those two extra aren’t linear motion, they’re rotations, and that rotation is the main difference between the machines in this article.
Quick note: The number of axes in a machine is not a quality thing. It’s an access thing – I.E. what can I get to in order to cut. In general, a part cut on three axes and a part cut on five come off the table holding the same tolerance — at SendCutSend, ±.005″ either way. Axes don’t buy precision. They buy the cutter access to more of your part. This is important because access costs time, and outside of material, time is the main thing you’re really paying for.
3 Axis: The Baseline
Three axes, X, Y and Z. The cutter comes straight down from the top, and the part sits still, clamped flat in a vise.
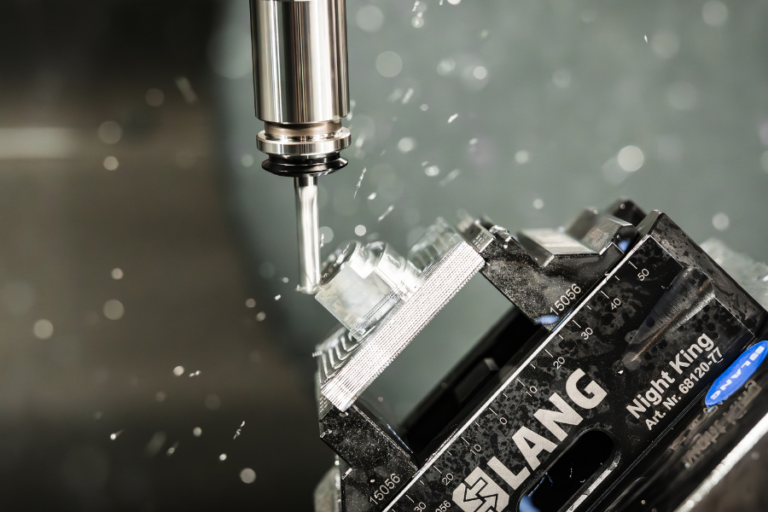
Point your finger straight down at a block of aluminum. Everything your fingertip can touch from that one position (the top face, a pocket milled into it, a hole drilled straight down) are things a three axis can cut. Drag the side of your finger along the edges and you can “profile” the walls too.
What you can’t do is reach underneath anything, or get to a face pointed away from you, without picking the part up and re-clamping it. This is where additional axes come into play, to enable that. The overwhelming majority of parts (brackets, plates, mounts, housings, spacers) are just features on one or two faces. They were made to be cut on three axes.
Cost: this is the most affordable option. One setup, the tool takes the short path to the metal, and the cycle runs fast — the fewest minutes on the machine, and minutes are mostly what you pay for. Every other number in this article is measured against this one. When someone tells you to “keep it simple,” this is the simple they mean.
3+2: Three Axis From a Better Angle
Now take that exact 3 axis cut and give yourself an axis of rotation. Rotate the whole part, tilt it to a fixed angle, and lock it there. Then do it again in the other axis. Then cut — same straight tool, coming down the same way, at a part that’s now facing a new direction.
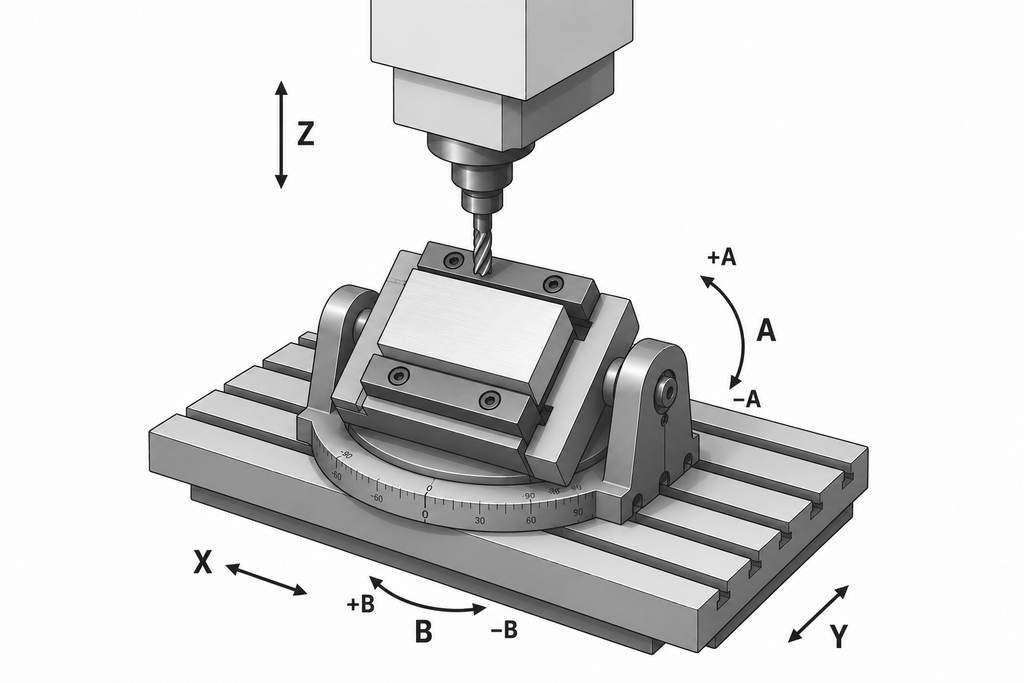
That’s 3+2. Three axes doing the cutting; two axes doing nothing but aiming the part and then holding perfectly still. (The “+2” points the part. It never cuts.) A block with a bolt pattern on top, a pocket on one side, and a counterbore on the back isn’t an exotic part — it’s a 3 axis part you have to turn three times.
Cost: here’s where time creeps in. Every time you turn the part to a new face, the machine has to stop, swing to the new angle, find its position again, and start a fresh cut. That reset takes time. Do it on five faces and you’ve stacked five cuts and five resets where a simple part had one. You’re not paying for better cutting. You’re paying for the clock that starts over every time the part rotates.
5 Axis: The Part Moves With the Tool
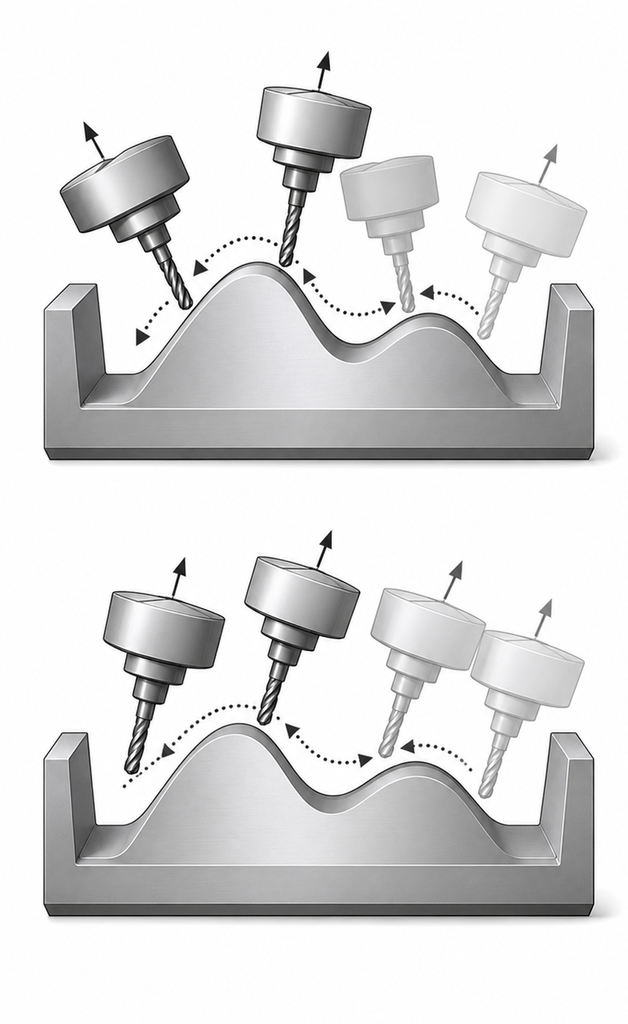
3+2 and 5 are almost the same, with a key distinction: the part tilts and rotates while the tool is cutting — not stop-turn-cut like 3+2, but all of it at once, the part rolling under the cutter so the tip stays pressed against a surface that’s curving away beneath it.
See the image below for the difference: in 5 axis (top), all axes move in unison to allow for contour machining. 3+2 by comparison (bottom), can only approach the workpiece from one angle relative to the endmill.
Another example: picture a turbine blade, an impeller, a shape that flows instead of a shape built from flat faces and square walls. To cut a surface like that cleanly, the tool has to chase it through five directions at the same time.
And chasing takes forever. A flowing surface isn’t one confident pass — it’s hundreds of tiny steps, the machine creeping along and laying down a smooth contour a sliver at a time. The more the surface curves, the more passes it takes, and the longer the machine runs.
Cost: this is the top of the ladder, and the reason is simply time on the machine. A part covered in organic, compound-curved surfaces will live under the spindle far longer than a bracket ever will, and you pay for every minute of it. The geometry that demands five axes is, almost by definition, geometry that’s slow to cut.
It’s All Time
See the pattern? Every step up the axis ladder is really a step up the time ladder. Three axis: cut and go. 3+2: cut, stop, turn, cut again. Five axis: cut slow, and keep cutting in complex and compound curve paths, because the shape forces it. Time is money.
What This Means When You Hit Upload
At SendCutSend you don’t pick the axis. You upload a .step file and the instant quote works out how to make the part and what it costs. The axis strategy is our problem, not yours. Which means there’s no “5 axis” button to dodge — there’s just a price that climbs as your geometry gets slower to cut.
So the only lever in your hand is the geometry. Keep your features reachable from as few directions as possible. Run the finger test in your head: if the fingertip can get to everything without spinning the block around ten times, you’ve designed something the machine gets through fast. If half your features are tucked around corners, you’ve designed something that has to be turned, and turned, and turned.
And know the one thing no axis count fixes: the finger doesn’t bend. An undercut, a sealed internal cavity, a sharp inside corner tighter than the tool is round — those aren’t expensive, they’re impossible, and no machine reaches them. That’s not an upsell to five axes; it’s a redesign. Open the feature up to line of sight, split the part in two and fasten it back together, or round that inside corner to at least a 0.0625″ radius, because the tool is a cylinder and cylinders leave radii. Keep your floor to wall corners in pockets sharp to minimize cost, but if performance is critical, include a radius.
Design for the Finger
More axes buy reach. Reach costs time. Time is the number on your quote. The part you’ll pay the least for is the one a straight finger can already touch. Design for that finger. Give the machine a shape it can reach from the top, and it never has to spend the minutes that turn into dollars.