In this tutorial, we’ll show you how to prepare laser-ready text in Adobe Illustrator. Follow along with the video or this article to learn how to prepare laser cut text in Illustrator in just a few simple steps.
Video Guide to Creating Laser Cut Text in Illustrator
Setting up your Illustrator File for Laser Cutting
First, we need to look at how to prepare an Illustrator file for laser cutting. To start, create a new artboard, change the units to inches, and input the dimensions you want for your final product. For example, we’ll use 40 inches for the width and 8 inches for the height in this tutorial.
Add Your Text
With our new artboard created, we can activate the Text feature from the Tools Panel. Simply click anywhere and drag to create a text box. We’ll worry about the size later; just make sure it’s large enough to preview the text.
At this point, you can type out the name, word, or phrase that you’d like to laser cut.
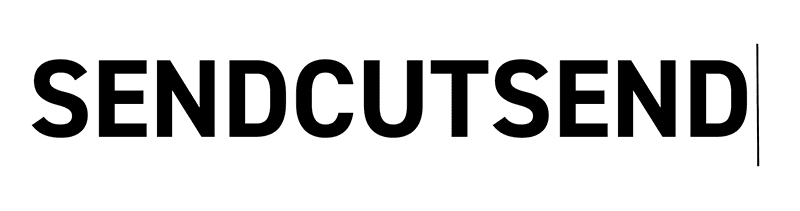
If you are just following along to learn, type out “SENDCUTSEND” in all caps as an example. Capital letters often result in better laser cuts as they’re larger and have more area to cut from the raw stock. They also avoid ascending and descending parts that are often found in lowercase letters.
Use the Character pane to set the size and font to your desired needs. For this tutorial, we’ll change the font size to 5 inches and the font to Helvetica Bold. Keep in mind that some fonts, including cursive or custom fonts, may have small areas that are hard to laser cut.
Now we can now adjust the text box to be the same width and height as the artboard. Simply select the corners and click and drag them until they snap to the artboard edges. Then just center the text in both directions.
Convert Illustrator Text to Outlines
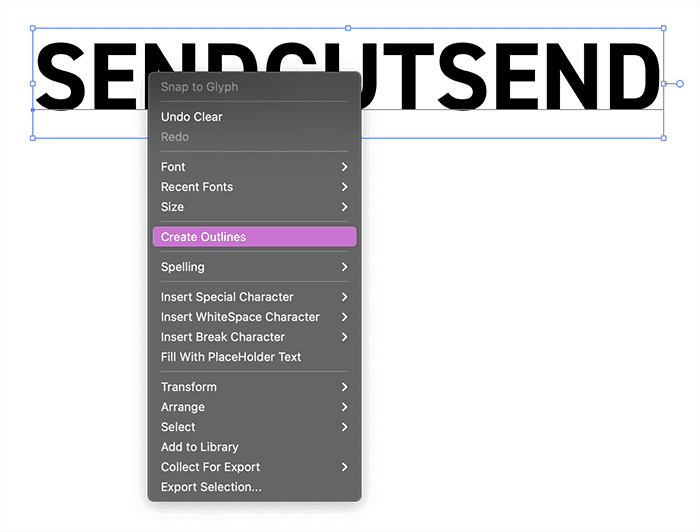
Once you are satisfied with your chosen font, you’ll need to convert the text to outlines. Turning a font to outlines essentially means you’re changing the Illustrator text to shapes, or making it into a vector graphic that can no longer be altered with the Text command. (Vector graphics scale without losing quality and here at SendCutSend, we require that all text and files be uploaded as a vector.)
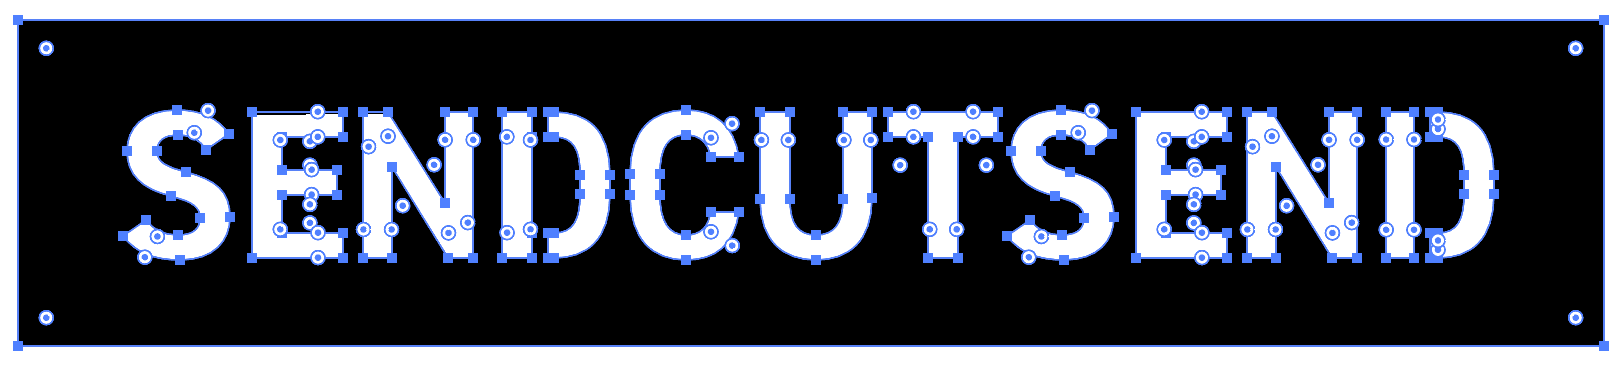
Simply right-click on the text and select “Create Outlines.” Create Outlines can also be found in the Type dropdown menu. Hit the shortcut letter “A” to switch to the Direct Selection Tool. You’ll notice each letter is now created with anchor points and line geometry, resulting in a vector graphic. The text is now a group of vector shapes.
If your project needs the laser cut letters to be individual, then you’re all set and ready to go.
If you’re looking to remove or “reverse” the letters from an outer shape, then we’ll need to complete one last step to prepare the text for laser cutting. This step is critical if you’re looking to make laser-cut signage.
Dealing With Problem Letters for Laser Cutting
Create Bridges
When laser cutting letters, any letters that have inner holes or negative shapes will need to be attached to the rest of the letter. For example, each letter “D” in SendCutSend includes a negative space. We can prepare these letters by creating “bridges” in those areas, which connect the negative spaces to the rest of the signage.
Let’s activate the Rectangle tool from the Tool Panel. We can then draw a rectangle that we’ll use to bridge the gap. It’s important to note that the width of your bridge must be at least the minimum bridging/webbing width required for the material you’re cutting from.
Learn how to confirm minimum bridging requirements for any material.

We can then zoom in and click and drag the rectangle until it snaps to the inner side of the letter. Then simply select the rectangle and copy and paste it for any other letters that require a bridge. This can also be done by holding Option on Mac or the Alt key on Windows. Simultaneously holding the Shift key will allow you to quickly duplicate the shape while keeping it at the same Y position.
Use the Trim Tool
From here, we need to open our Pathfinder pane from the Window dropdown menu. We’ll use the “Trim” pathfinder by first selecting the letters and all of the rectangles. Once selected, simply hit the Trim tool.
Next, we’ll need to double-click on a rectangle. This will isolate the shape’s layer, allowing us to hit the Delete key to remove it.
Remove Negative Shapes
You will find the Trim tool also leaves a shape in the negative space of the letters. It’s critical that we remove all of these leftover shapes as well.
Throughout this process, you can switch to the Outline mode from the View dropdown menu or with CMD or CTRL + Y. This will help you double-check that you’ve removed all unwanted geometry. While in Outline mode you should only see 2D paths that you’d like the laser cutter to follow.

Be sure to exit the isolated layers once you’re finished removing unwanted shapes.
Exclude from Your Main Shape
Lastly, we can create the overall shape for the signage. In this case, I’d like a rectangle the same size as the Artboard. After scaling the rectangle, I’ll double-click on the corner radius and change the radius size to 1-inch.
To remove the letters from the overall shape we can use the Exclude tool in the Pathfinder pane. Exclude creates a compound shape and excludes all overlapping shape areas, making it an efficient way to remove many shapes.
All letters in your text are now “laser cutter ready” with bridges, and the text has been removed from the outer signage. You’re ready to export your file for the laser cutter!
Be sure to check out our other tutorial on Exporting a file in Adobe Illustrator for Laser Cutting and then reference our checklist for laser cutting text in Adobe Illustrator to confirm that your file meets our latest requirements. After that, upload your file to our website for an instant quote!
Laser Cut Text in Adobe Illustrator FAQs
The best fonts for laser cutting are stenciled fonts. Using stencil fonts eases a lot of the pain points involved in preparing your text for laser cutting. With stencil fonts, you don’t have to worry about creating bridges or removing negative shapes because it’s already done for you. However, as we’ve shown you here, you can make just about any font suitable for laser cutting as long as it meets the minimum part size requirements!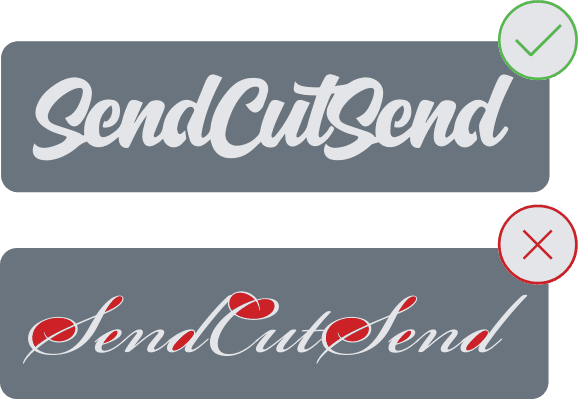
Of course! Connected fonts like cursive or calligraphic fonts are great for laser cut typography that you don’t want to have reverse cut out of a bigger shape. You do have to be a bit careful when it comes to calligraphic fonts because they can often be too intricate for laser cutting. A good rule of thumb is to just keep it simple.
Since laser cutting text is a 2D process, you really only need a vector based design software. Our favorite is Adobe Illustrator for its high-quality user interface and ease of file exporting, but we know it’s also pricey. A good alternative is Inkscape, which is totally free and relatively easy to learn with our awesome tutorials on preparing Inkscape text for laser cutting.
