Exporting your design in Adobe Illustrator for laser cutting is a simple process. In this video, we’ll walk you through the process, including our checklist of items to achieve the best laser-cut results.
See our Set Up Adobe Illustrator Files for Metal Bending guide for help preparing designs for bending services.
1. Confirm Units & Scale
For starters, make sure your document units are set to inches, as that’s what we prefer to work with at SendCutSend. Units can be found in the Document section of the Properties pane.
You’ll then want to confirm that your part is in fact at a 1:1 scale. Select the largest contour and double-check that the dimensions are correct for your project. If not, fix the dimensions to what your final part should be before proceeding.
2. Check for Open Contours
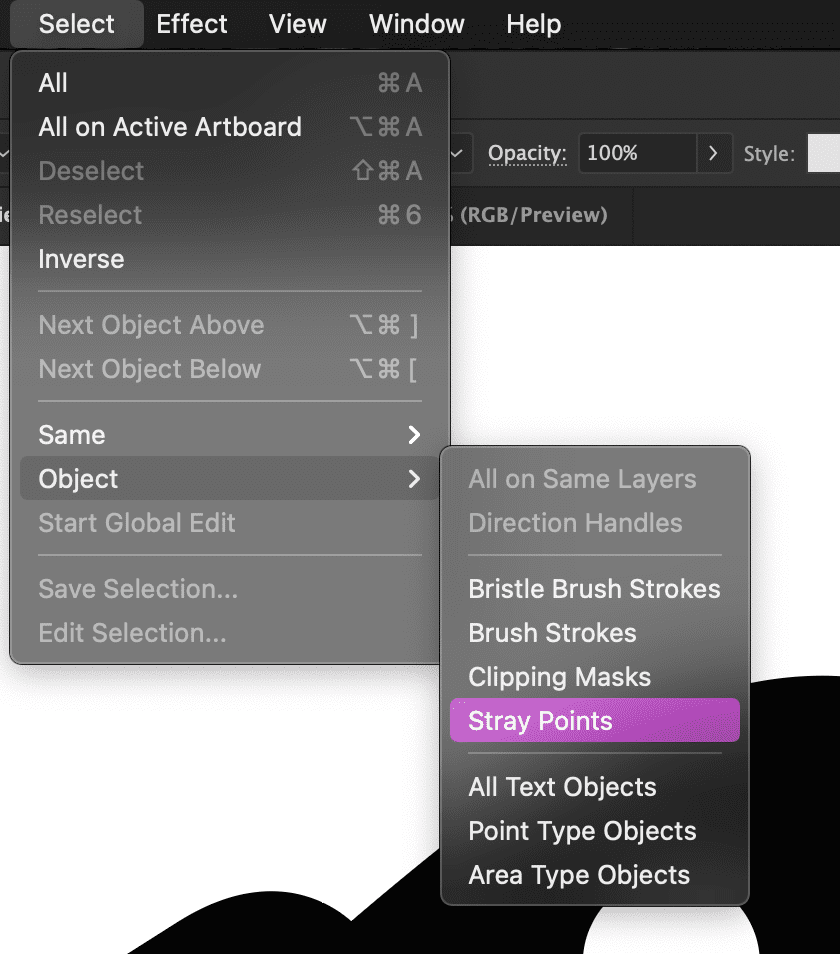
To ensure the success of your laser cut part, you’ll want to check your file for open contours and stray points. Head to the Select dropdown menu > Object > and Stray Points. This will select any stray points that may be floating around your design or out in space. If you do have any, go ahead and hit the Delete key to remove them. (Check out our tutorial on Finding and Fixing Open Contours in Illustrator for more info on how this works.)
We can also use “select all” to check that everything fits on the Artboard. Saving the design will include only geometry on the Artboard, so your Artboard must be large enough. If not, simply activate the Artboard tool from the Tool Panel and drag the corners to make it larger. Ensure everything fits into the Artboard now before moving on to the next step.
3. Check for Multiple Layers
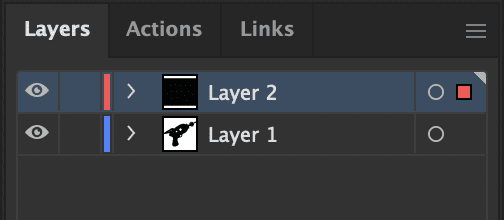
Next, head to your Layers Pane. Everything must be on a single layer, including any text and bend lines. If it’s not, you can drag things to the same layer and then delete the remaining empty layers.
4. Convert Text to Outlines
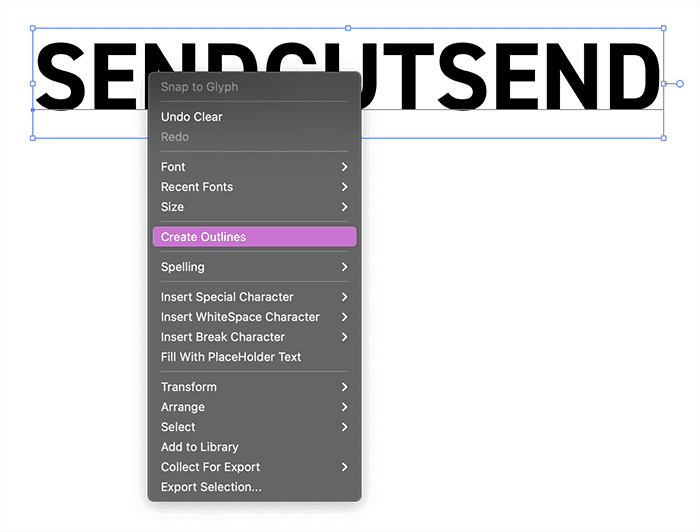
When your designs include text, be sure that all text has been converted to outlines or paths. In addition, cut-out text or “reversed text” has to have “bridges,” or in other words, the text needs to be “stencilized.” (Take a look at our tutorial for Preparing Text for Laser Cutting in Illustrator for more details.)
You’ll also want to make sure all non-text holes and cutouts are at least 60% of the material thickness, which ensures they can be laser cut.
5. Combine and Merge all Shapes
All shapes will need to be united, combined, or merged, using the Pathfinder tools. This is particularly important if you drew shapes that overlapped with each other. For more detail on this, see our Welding and Merging Shapes for Laser Cutting in Illustrator guide.
If everything looks good, head to the View dropdown menu and select the Outline mode. Viewing your design in outline mode will help you catch any unwanted geometry and triple-check that you have clean and continuous paths.
Tip: you can quickly view your design in Outline mode by pressing Ctrl Y.
6. Ensure All Fills or Strokes are at 100% Opacity
Add either a fill or a stroke to your shapes and ensure it is set to 100% opacity. Otherwise our system will not recognize your design. You can find this in the Transparency settings.
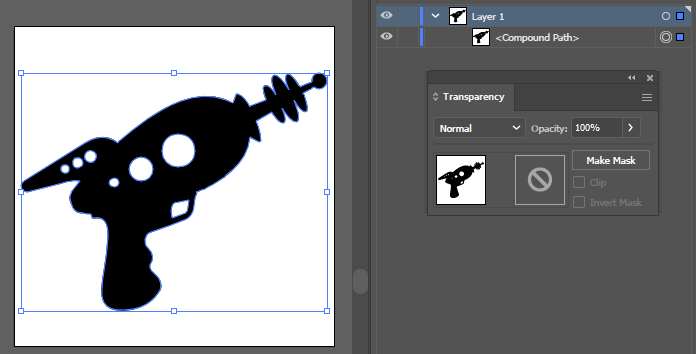
We generally recommend that closed, merged shapes have a fill applied. This enables you to see if there are any open contours that need to be closed.
Any bend location lines will need a solid stroke applied. Learn more about preparing Adobe Illustrator files for bending services.
7. Save and Export
Once satisfied, head to the File dropdown menu and save your design.
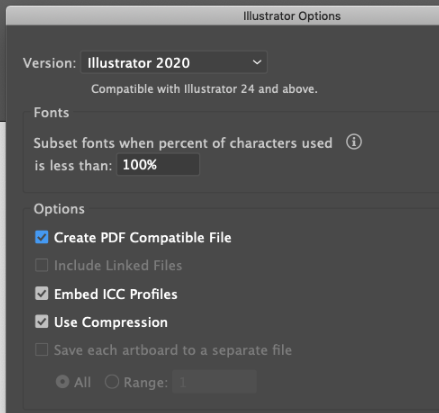
Since you are designing in Illustrator, go ahead and save your file as .ai and upload it to us directly. Be sure that “Create PDF compatible file” is checked in the File > Save As options before saving your file.
We prefer this over DXF files, which can add complexity due to there being many variations and years supported. You can also Save a Copy of your design if you’d like to have a backup or a “final” file. Either way, simply upload the .ai Illustrator format files directly from your computer to our website, choose your material and quantity, and you’ll be ordering parts in no time.
We hope this tutorial has been helpful for exporting your file from Adobe Illustrator for laser cutting. Now upload your prepared file and get a custom quote today!
