Inkscape is an open source software for creating and editing vector graphics. It’s a useful tool for designing for laser cutting because it allows you to create 2D design files for both simple and complex parts, and since it’s completely free, it’s one of the more accessible software available for designing laser cut parts. The only downside to Inkscape is that for people unfamiliar with other comparable design software, it has a pretty steep learning curve. Not to worry! We’re here to show you the best way to create files for laser cutting in Inkscape to produce the best possible results.
In this tutorial we’ll show you how to prepare your text for laser cutting in Inkscape. Most manufacturing and laser cutting software cannot “read” or interpret text boxes in a design file, so the text must be converted to vector shapes and paths in order to cut properly. We’ll be covering exactly how to make those conversions, as well as how to add bridging to your reversed text designs, so your parts will come off the laser looking as awesome as you imagined them.
How to Prepare Text for Laser Cutting in Inkscape
It’s important to make sure your text is 100% ready for laser cutting. There are two key aspects to this: converting your text to paths or vector shapes and adding bridges to your reverse cut-out text. Although these aren’t the only things to keep in mind when designing text for laser cutting, they are the fundamentals that every text design needs to consider and incorporate.
The information we’re about to cover will be affected by the font you choose for your design. Although we don’t cover font choices in this article, we do have another article with several fonts we suggest for laser cutting and some tips on how to select the right font for your project. All fonts you choose will need to be converted to shapes and vector paths, and most will need bridging as well, including stencil fonts.
Convert Text Into Vector Shapes
This is the fundamental part of designing laser cut parts with text and is absolutely necessary for uploading your files for quoting. Here’s how to convert text to vector shapes step by step in Inkscape:
- Select all your text
- Open the “Path” menu
- Select “Object to Path” or press CTRL+Shift+C
- Your text is now a vector path! Keep in mind that it cannot be edited as text from this point forward. If you need to edit the text, you will have to create a new text box and start the conversion process over.

Creating Bridges for Reversed Laser Cut Text
If you were going to cut each letter individually, what you have here would be ready to go. The only problem is if you wanted to hang the lettering as signage. You would need to line up and level each letter individually, spending a lot of time on the final look. For most signage and other designs where you need a lot of text, it’s best to “reverse” cut the text out of a larger piece of material.
When reversing laser cut text, you have to take a few more things into consideration during the design process, namely whether or not any of your letters contain internal cuts (O, P, B, A, etc.). If you are creating reversed laser cut text, you will need to add bridging to these letters so the centers of each letter don’t fall out of the design once it’s cut. This is also sometimes referred to as “stencilizing.” There are many stencil type fonts which already have bridging for these letters, but the bridging is often not wide enough for most manufacturing processes and material thicknesses so you will still need to know how to customize the text.
Something to keep in mind as you create bridges for your text is the minimum geometry required for cutting. You’ll want your bridges to meet the minimum bridging/webbing thickness required for the material you’re cutting from. Learn how to confirm the minimum cut geometry requirements in our Material Catalog.

Let’s get into how to create the bridges themselves using the Boolean Operations in your Path menu.
(Hint: Before you start, make sure you Enable Snapping [%]. This will snap your rectangle to the edges of your letters.)
8 steps to creating bridging in text
- Draw a rectangle using the Rectangle tool (F4) where you want your bridge to be. In this example with the SendCutSend logo, we’ll place them at the bottom of the Ds.

2. Now using the Edit path by nodes tool (F2), select one of the letters you want a bridge in and the rectangle you just made.
3. Go to the Path menu and select Division (CTRL + /). This will cut the bottom object by the path of the top object. In other words, it will cut the rectangle out of your letter.
4. Repeat this process for any additional bridges you need in your text.

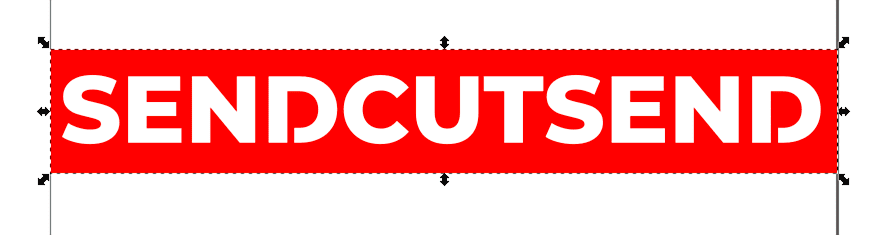
5. Your next step is to create the shape you want your text reverse cut from. We’ll use a simple rectangle for this tutorial. Draw your rectangle around your text using the Rectangle tool (F4).
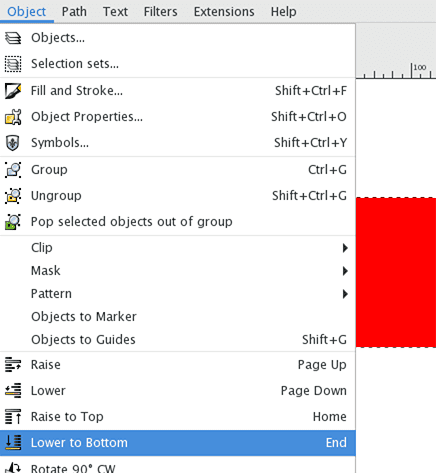
6. You are going to want your rectangle to be underneath the letters for the next step. Select your rectangle, go to the Object menu, and select Lower to Bottom (End).
7. Using the Edit path by nodes tool (F2), select each letter and your rectangle.
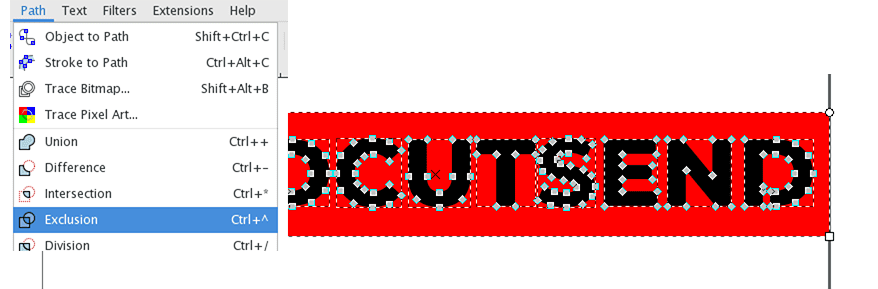
8. Return to the Path menu and select Exclusion (CTRL + ^). This will cut the letters from the rectangle below.
You can see the letters as they’ll appear cut out of your rectangle/shape. Now you know how to add bridging to your laser cut letters in Inkscape!
Many different fonts can have bridging added without compromising the integrity of the design, so don’t worry about text bridging ruining the aesthetics of your project. It’s better to have a well-designed, successful final project than skip the necessary steps and end up with an unsatisfactory result.
Mastering Your Designs to Skyrocket Your Laser Cut Projects
Making sure your text designs are ready for laser cutting is crucial to the success of your final product. So crucial, in fact, that we’ve created tutorials just like this one for several of the most common design software we see our customers use, including Fusion, Adobe Illustrator, and SolidWorks. Knowing how to create and prepare text in your chosen design software will help ensure success when it comes to your SendCutSend laser cut projects, and increasing your skills in CAD and design with valuable tutorials will set your parts a cut above the rest.
There are a lot of things to keep in mind when designing your parts for laser cutting, and luckily we have all the information you need to create the best possible design. If you have already prepared your text designs for laser cutting, be sure to check out the rest of our blog for helpful content and make sure your designs fit our guidelines before you upload them.
You’re ready to get started on your next SendCutSend order! Just upload your cut-ready files and get instant pricing today.
