In this tutorial we’ll cover all the basics for designing for laser cutting in Inkscape.
Before you begin
Before you begin, make sure that your display and document units are set to inches, and your document size is a little larger than your final part size.
As you are designing, we recommend periodically viewing your document in the Outline display mode. This will make it easier to find empty objects and stray points.

Object sizing
Be aware of the material thickness you want when designing parts in Inkscape. Keep all holes and cut-out areas (including text) the minimum required hole size for the material and thickness you will be using. You can find the minimum hole size and bridging or webbing sizes required in the Material Details on each individual material page found in the Material Catalog.
Learn more about confirming material specifications.

Common issues when designing for laser cutting in Inkscape
Avoid sharp angles and extreme detail in smaller objects. Details and small features should never be smaller than the minimum requirement listed for the material thickness in the specifications.
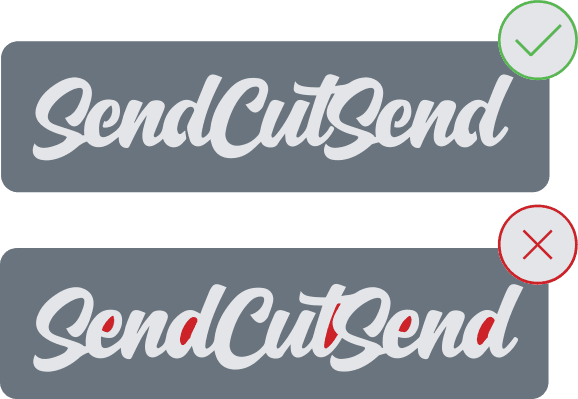
If you’re cutting type or fonts out of your design, like a stencil, be sure to use a font with stencil properties. If the font you want to use isn’t stencilized, you can easily add bridges inside the type to make sure nothing gets lost in the laser cutter. Check out our tutorial on Preparing Text for Laser Cutting in Inkscape to learn how to do this.
Be sure that none of your objects have open contours or non-continuous geometry. In other words, all shapes should have a fully connected outline. An easy way to find these openings is to view your design in Outline display mode.
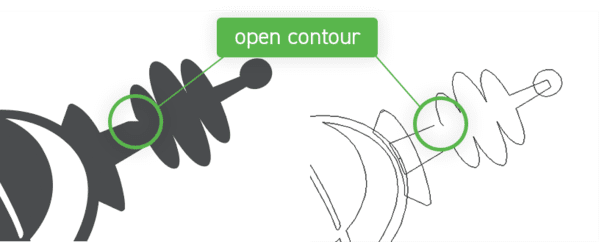
If you do find open contours, you should join or close the nodes. To do this, use the “edit paths by nodes” tool (F2 or N.) The nodes are the gray boxes you see around the outline of your object. Select the two nodes you want to join. They will turn blue when they are selected.
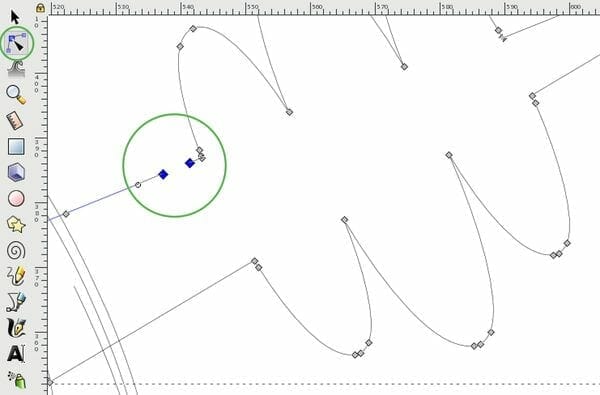
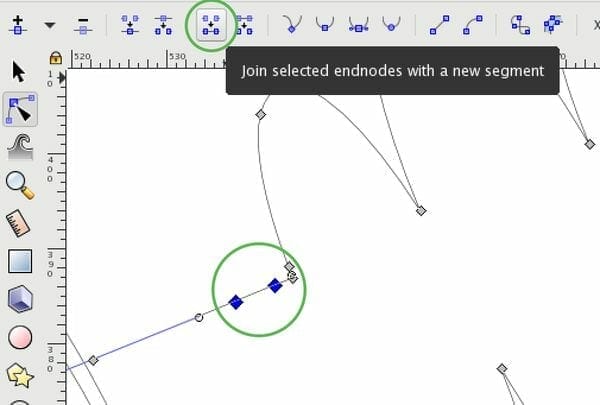
Click the “join selected endpoints with a new segment” button that appears in the top left corner when you have two endpoints selected. This will connect your nodes and close your contour.
In addition to disconnected lines, you need to make sure your design does not have any intersecting lines. Intersecting lines or lines that cross each will yield unwanted results in the laser cutter, creating more cuts in the material than you want. You can find these once again by viewing your design in Outline display mode, and you can remove them with the “break path at selected nodes” button.
Finally, you should be on the lookout for multiple shapes overlapping each other. When you find these, use the Boolean Operations in the Path menu to combine or exclude your objects. You will use the Union, Division, and Exclusion tools often while designing for laser cutting in Inkscape.
Cleaning up your file
Before you export your file to upload to us, be sure to remove everything that you do not want cut. Move your main objects slightly and then view your document in Outline display mode. You will quickly see any empty or duplicate objects that may be leftover from previous functions.
Make sure all your objects are on the same layer. Additionally, you should not leave any dimensions or design notes in the file. What you upload to us from Inkscape should be a clean .eps with only your laser cut design in it, with no markings or unnecessary non-design additions.
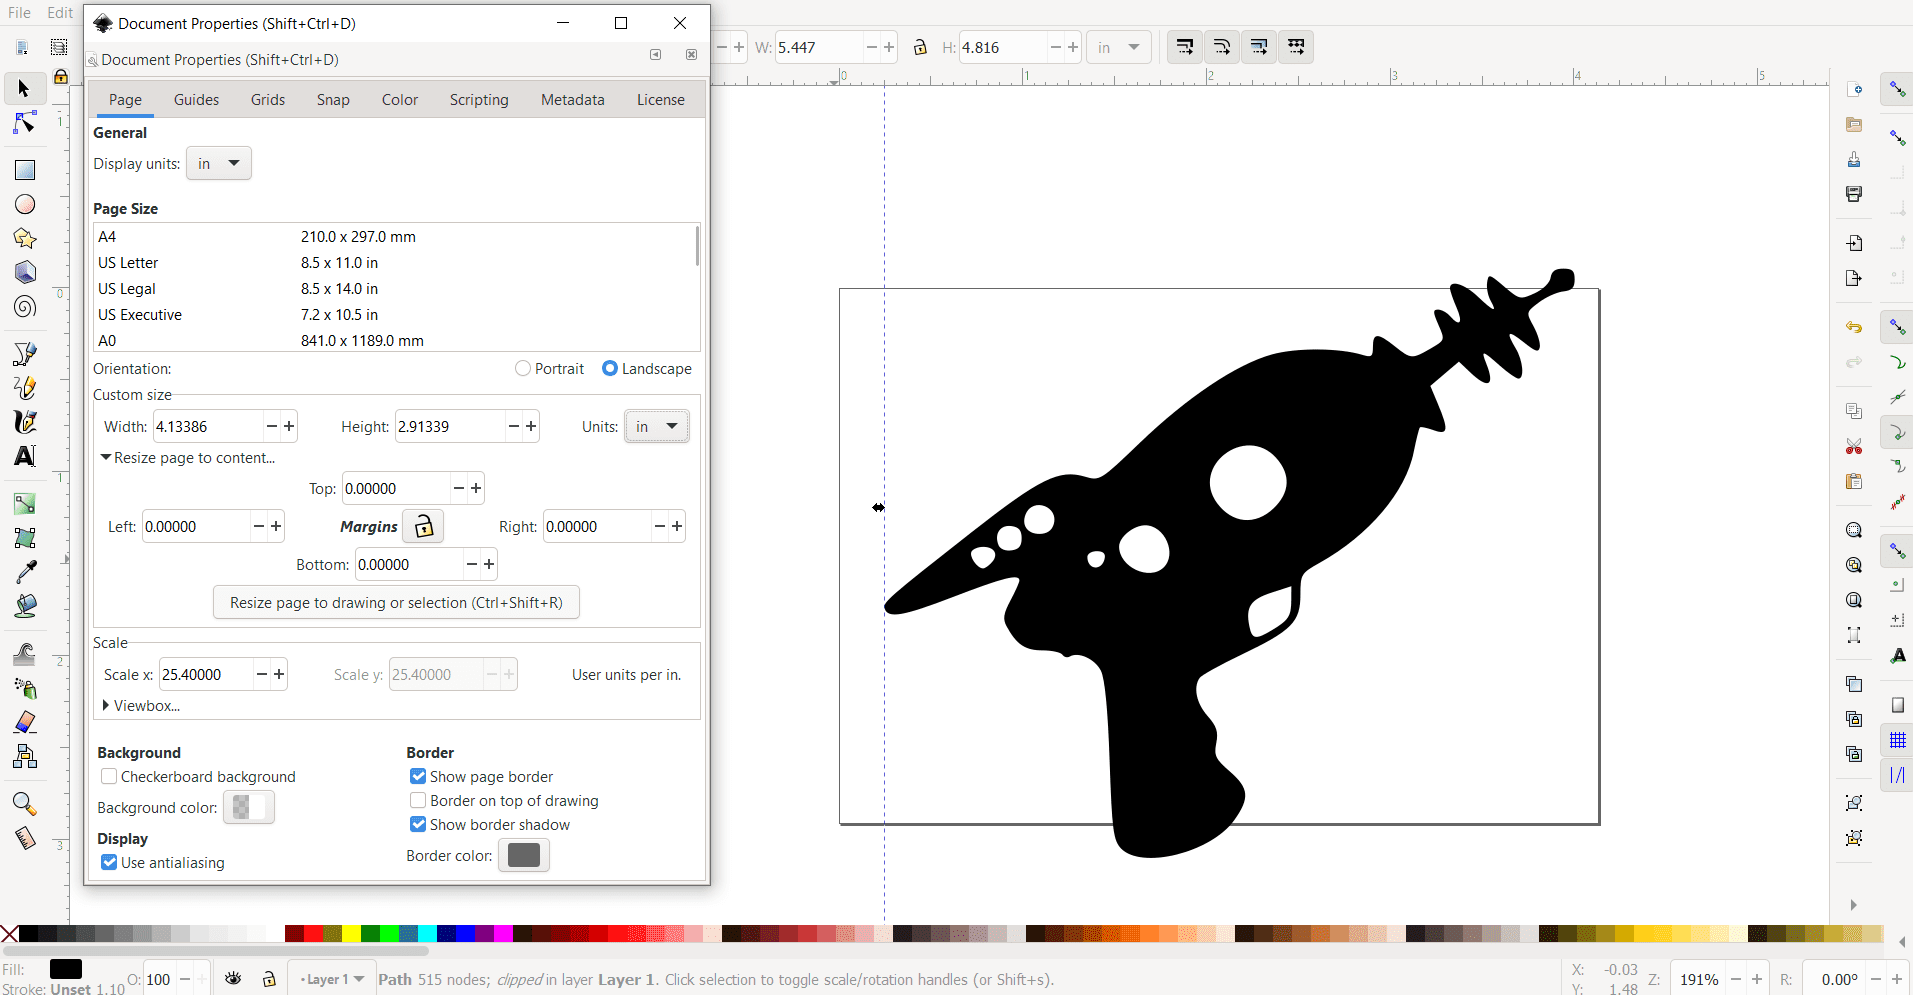
Finally, make sure all your artwork fits within the artboard. While the artboard doesn’t act as a border or a cut line on your final design, the artboard border will cut off anything left outside of it during exporting. To do this, go to the Document Properties under File (or you can use the hotkeys Shift+CTRL+D). Under Custom Size, select the dropdown next to Resize Page to Content and click Resize Page to Drawing or Selection. This will automatically resize the artboard to include all of your artwork with room to spare.

Exporting your design
We’ve set everything up on our end to make exporting and uploading as painless as possible. All we ask is that you save your files in .eps format, which you can do by clicking “Save As” (CTRL+Shift+S) and scrolling down to “Encapsulated PostScript” (.eps) in the pop-up. And you’re all ready to go!


