Not only can laser cutting produce high precision end use parts, but it can also make quick and easy tooling to assist with intermediate steps in any project. Whether the need is for a specialized one-off application or for repeated use, laser cut tooling improves accuracy, repeatability, and reduces build time for your projects.
This article will go into detail on these four ways laser cut tooling can apply to your project:
- Jigs and fixtures
- Templates
- Inspection
- Shop Accessories
Jigs and Fixtures
Cutting and drilling by hand can be incredibly tedious. It’s next to impossible to make perfectly consistent and accurate cuts by hand. How about a jig? (No, not a lively dance… Although that can’t hurt.)
A jig is a tool that restrains the work piece and guides a cutter. For example, a jig specifically for drilling is known as a drill jig. A drill jig locates on top of the work material and has holes to guide a drill bit. As a result, the holes are dimensionally accurate, consistent, and perpendicular to the work piece.
A drill jig is a great investment if the holes are difficult to locate by hand, there are a lot of holes, or if the hole pattern is to be repeated several times.
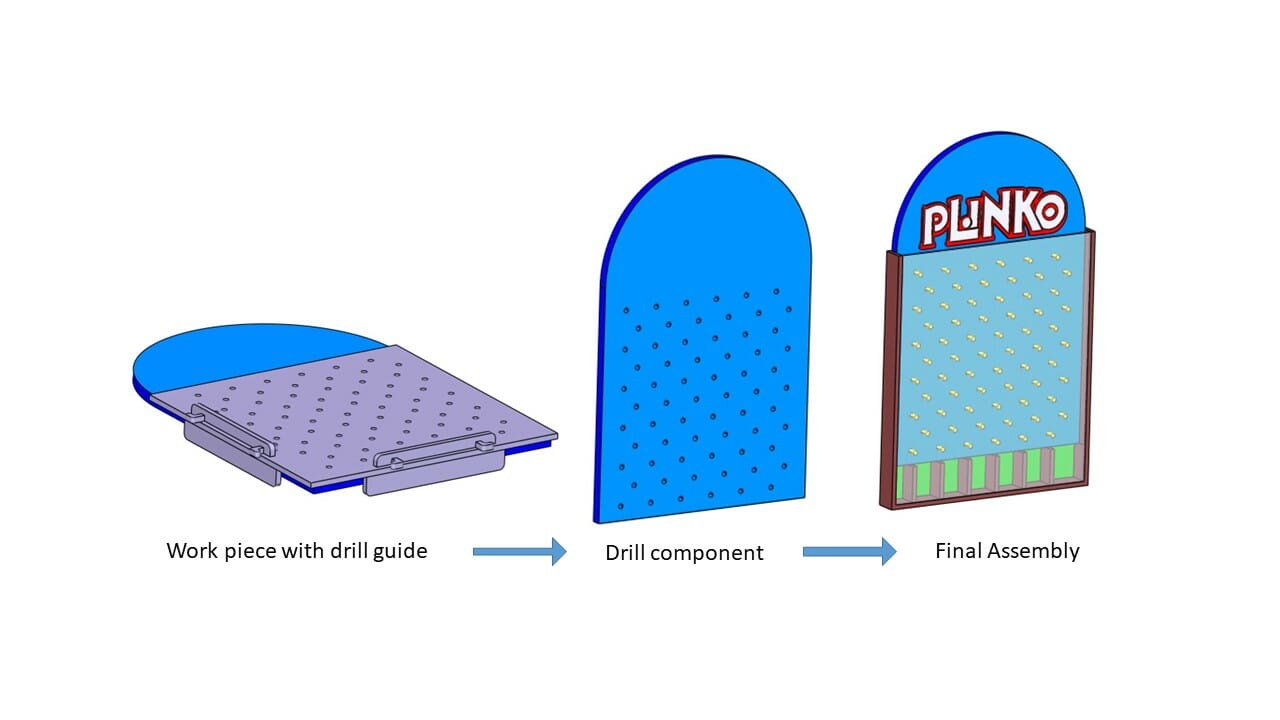
Below is an example of a drill jig used to place the holes for a homemade Plinko game. The jig has two legs to index off the side and bottom of the workpiece, allowing for accurate and consistent placement. Locating all these holes by hand would take some serious time, and one askew hole would ruin the aesthetic.
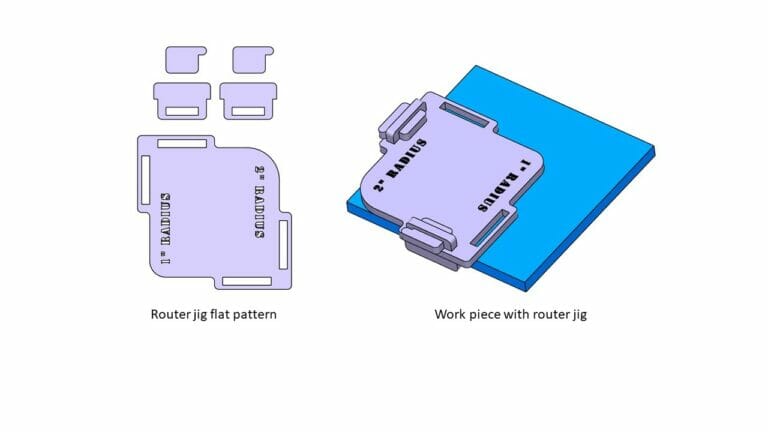
Like a drill jig, a router jig locates on top of a workpiece and guides a router. Routers are used to carve or cut out features, such as decorative corners for handmade furniture, pockets for joints or hardware, and many other uses. But routing by hand often yields uneven results, especially for particularly unique or challenging geometries. A jig takes out the guesswork and guarantees a precise and dependable cut.
The example below shows a routing jig for a simple curved corner. Legs on the side of the jig index to the edges of the work material, making sure the corner is centered. A single jig can feature multiple routing patterns. The example below is reversible, with the opposing corners having differing curvature.

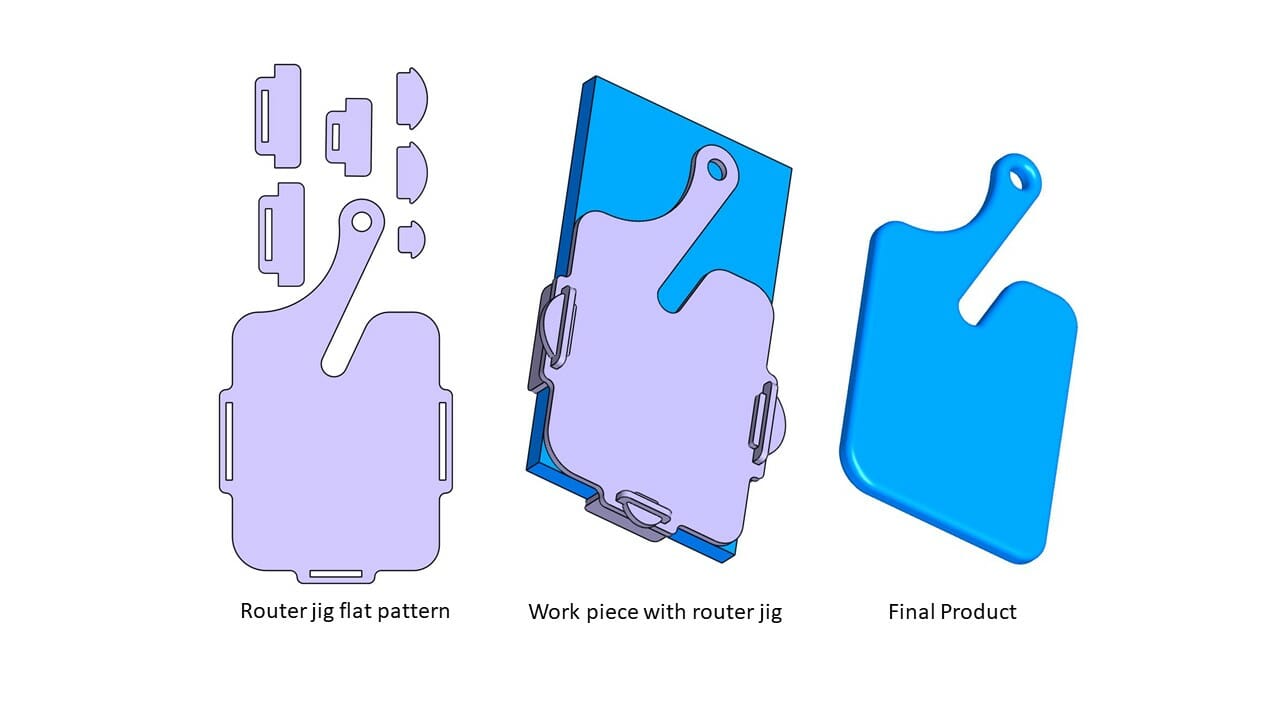
Router jigs are especially advantageous when routing the same pattern multiple times. Whether making holiday gifts for your entire family, or making products for the next craft fair, a routing jig can save substantial time while ensuring all the cuts are the same. For example, the jig below is used to rout a handmade charcuterie board. Thanks to this quick and easy jig, every charcuterie board will be a perfect match.
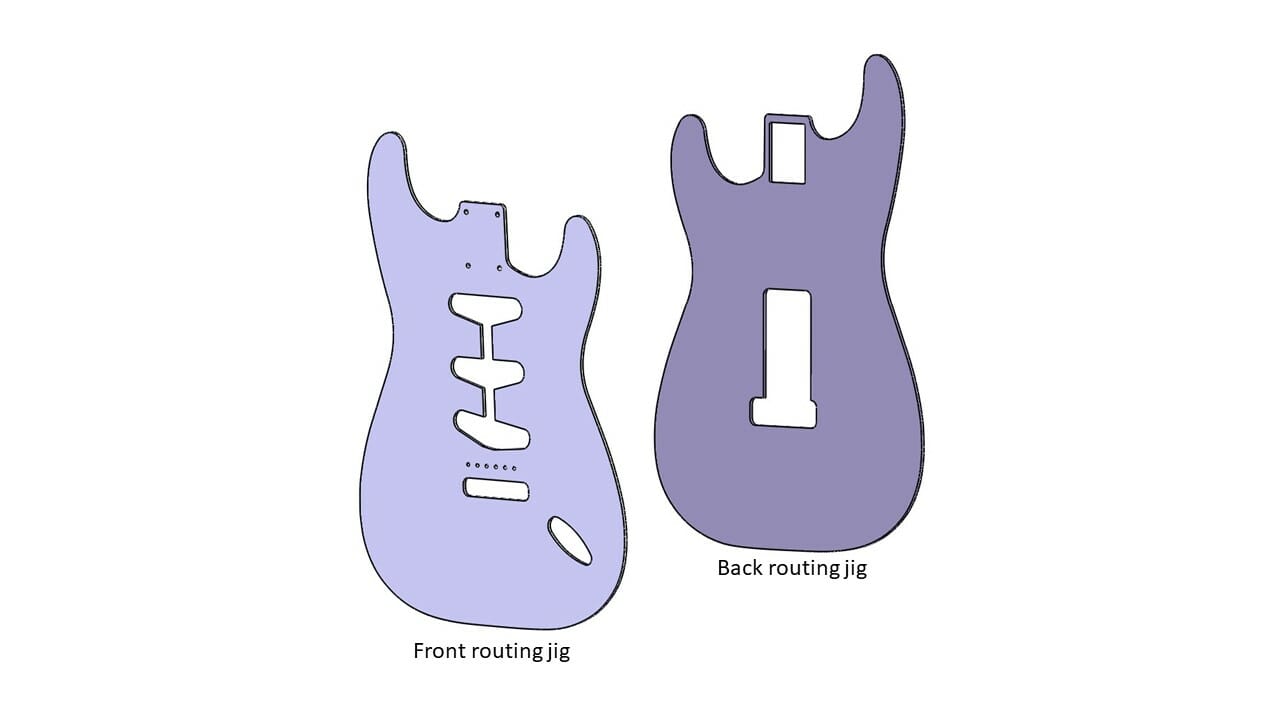
A jig ensures that the cuts made match your design, no matter how complex. The example below shows a routing jig to make the body of a custom electric guitar. The jig profiles the work piece to perfectly match the designed profile, and also precisely locates the internal pockets for the hardware.
Templates
A template is a flat pattern used for painting, cutting, or assembly. A template specifically for painting is known as a stencil, which is a thin piece of plastic, wood, or metal with a pattern, letters, or image cut out of it. It recreates the cut out design when completely pressed against a working surface and paint is applied over the stencil.
Paper stencils with standard fonts and characters are typically single use and generic. Hand cut stencils are difficult to get fine details and exactly match the design. Laser cutting offers a quick way to get a highly precise, detailed, custom, and reusable stencil.
When preparing a stencil design, avoid shapes with internal holes. These internal holes are completely cut from the stencil and will not show through. For example, the letters “A, B, D, O, P, Q, R” all have internal holes. To remedy this, simply include a small bridge so the internal features stay intact.
Multiple stencils can be aligned and used to create images with different colors. The example below shows a stencil used to paint house numbers on curbs or mailboxes. Note the bridging in areas with large cutouts or geometry that could get lost in the machining process.

Laser cut stencils are a great way to get your company’s logo, inspirational quote, name, or anything else on your project.
Templates can also be used for scribing or cutting intricate shapes. For example, a laser cut template can be used to cut interesting shapes from stock paper for arts and crafts projects. Or cut sewing patterns for clothes or upholstery. Or even scribe lines for cutting or carving wood.
Inspection
Nothing is worse than spending hours making parts for a project only to have them not fit when it’s time to assemble. The key is check the parts as the project moves along, and not wait till the last minute. Remember the phrase, “measure twice and cut once?” But what if you need to measure something obscure? What if you have to measure DOZENS of the same part?
Laser cutting tooling is ideal for inspection tools that are unique to your project. An inspection tool allows you to visually evaluate your parts quickly without the need for calipers, measuring tape, or protractor. Making your inspection much more accurate than measuring by hand, resulting in a better final product, and saving a ton of time along the way.
So what’s the angle? A square is a common tool used to make sure two things are perfectly perpendicular. But it’s not as straightforward if two (or more) parts need to come together at an angle. Protractors are a pain to read and are particularly challenging if the desired angle is not a nice round number.
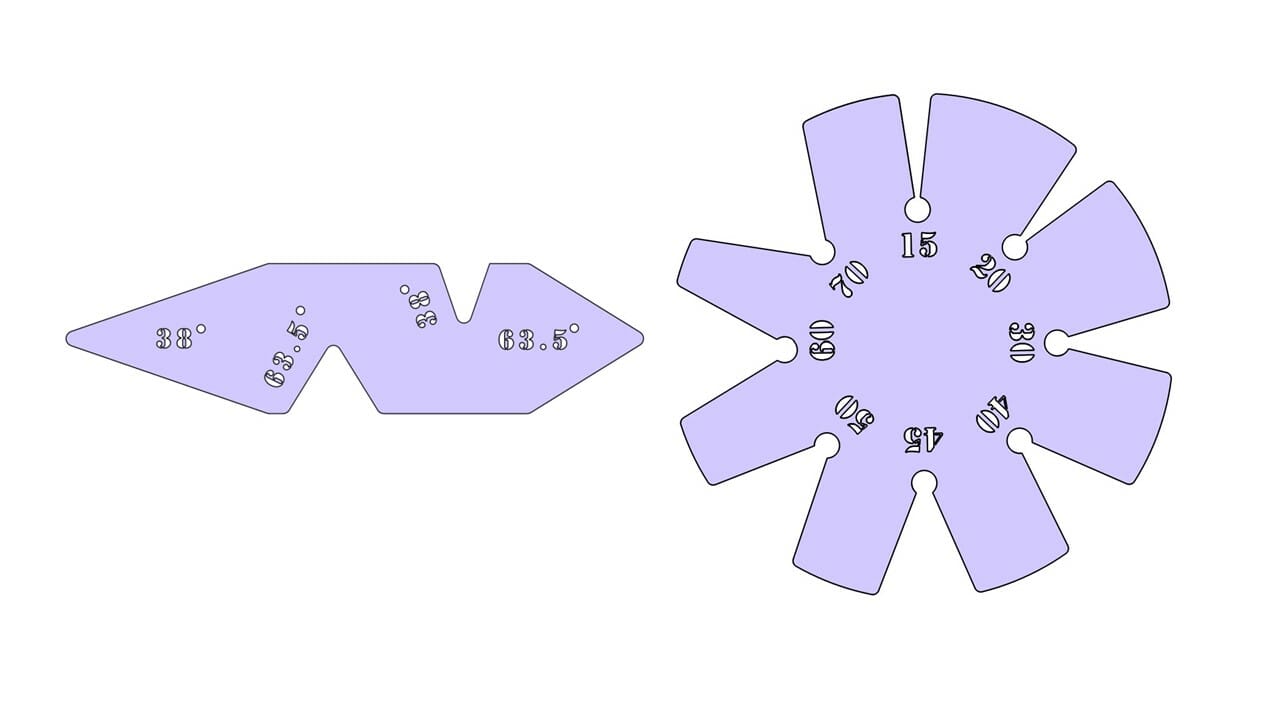
A laser cut angle gauge can feature any angle to match your project. Simply butt the gauge up to your parts to inspect. Multiple angles can be incorporated into the same tool, including interior and exterior angle. Added holes in the middle of the tool can assist in locating or provide extra visibility. The examples below show custom angle gauges with all the unique angles needed for a specific project.
Akin to an angle gauge, a profile gauge is used to inspect the profile of a part. This is especially valuable if the outline of the part to be inspected features complex curvature that is not easily measured.
Although this is similar to a router jig or template as discussed in the previous sections, a profile gauge fits and functions differently. Both a profile gauge and a router jig show the net edge of the part. However, a router jig shows the inner edge, acting as a male fit, while a profile gauge fits outside of the edge, acting as a female fit.
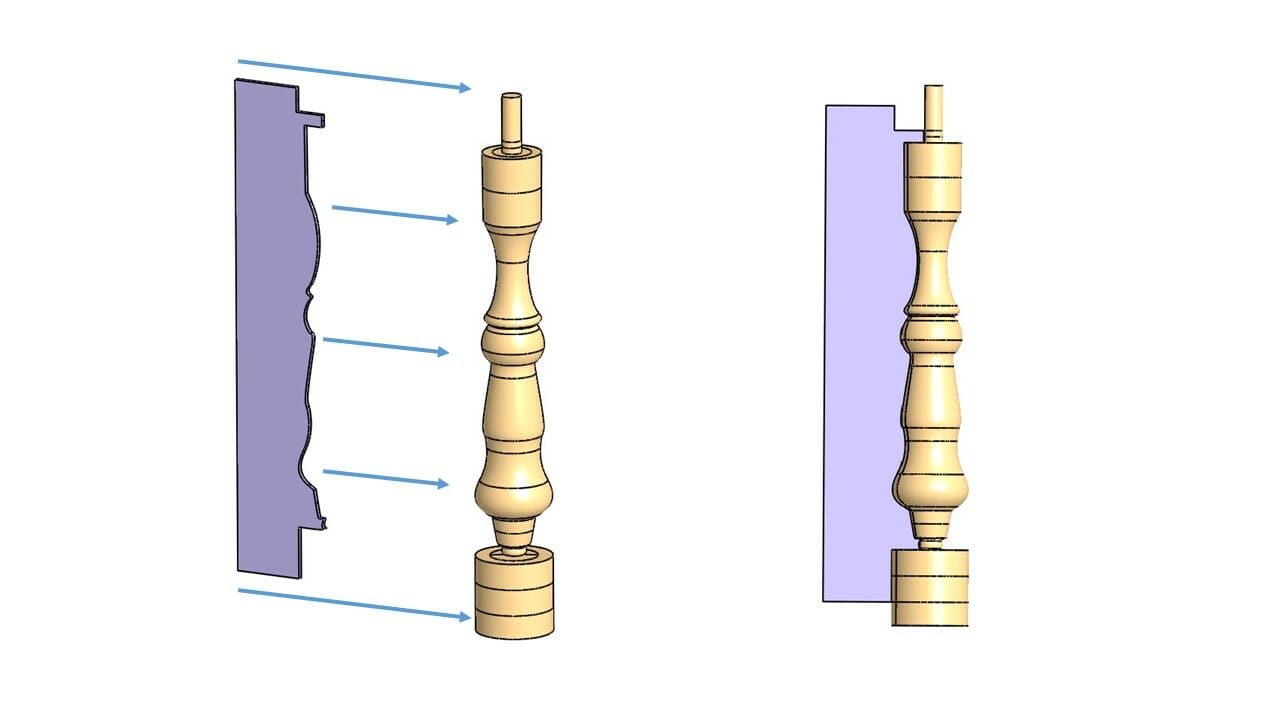
Profiles are more easily evaluated with a female fit, which is better at revealing high or low spots. A female fit also allows a profile gauge to inspect three dimensional objects, not just flat outlines. For example, parts that come off a lathe are three dimensional but can be inspected with a two dimensional gauge.
The example below shows a profile template used to inspect homemade banister legs for a staircase. This simple tool ensures that each leg is uniform, making the final project look like it was professionally done.
Even with industrial grade machining capabilities, nothing is ever absolutely perfect. Therefore, parts are designed with some wiggle room, known as tolerance. Depending on the application, tolerance permits a part to be a certain amount too long or too small.
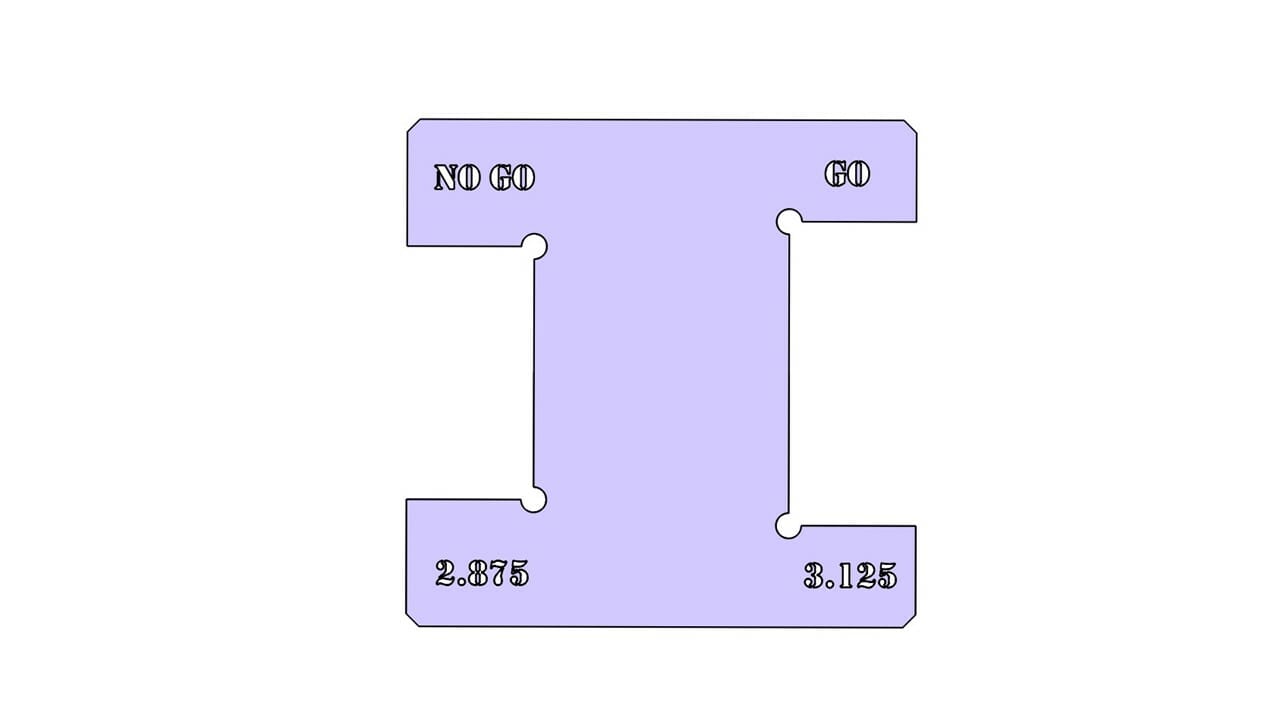
A Go No-Go gauge is an inspection tool that assesses if a part is within the designed tolerance. The “Go” side of the gauge has the dimensions for the upper limit of the tolerance. The “No-Go” side of the gauge has the lower limit of the tolerance. If a part fits in the “Go” section and NOT in the “No-Go” section, the part meets the tolerance. If the part fits in the “No-Go” size, the part is too small. If the part does not fit in the “Go” side, it is too big.
A Go No-Go gauge can be used for interior dimensions as well as exterior dimensions. This gauge can also be used for circular or square features. Often, several measurements can be incorporated into the same gauge. This simple tool saves a ton of time when needing to measure several of the same parts.
Shop Accessories
Sometimes, the best tool is the one that organizes the others. Nothing can make you want to throw a wrench across the garage like not finding the tool you just set down. Although organization is not necessarily required to make awesome stuff, it certainly helps.
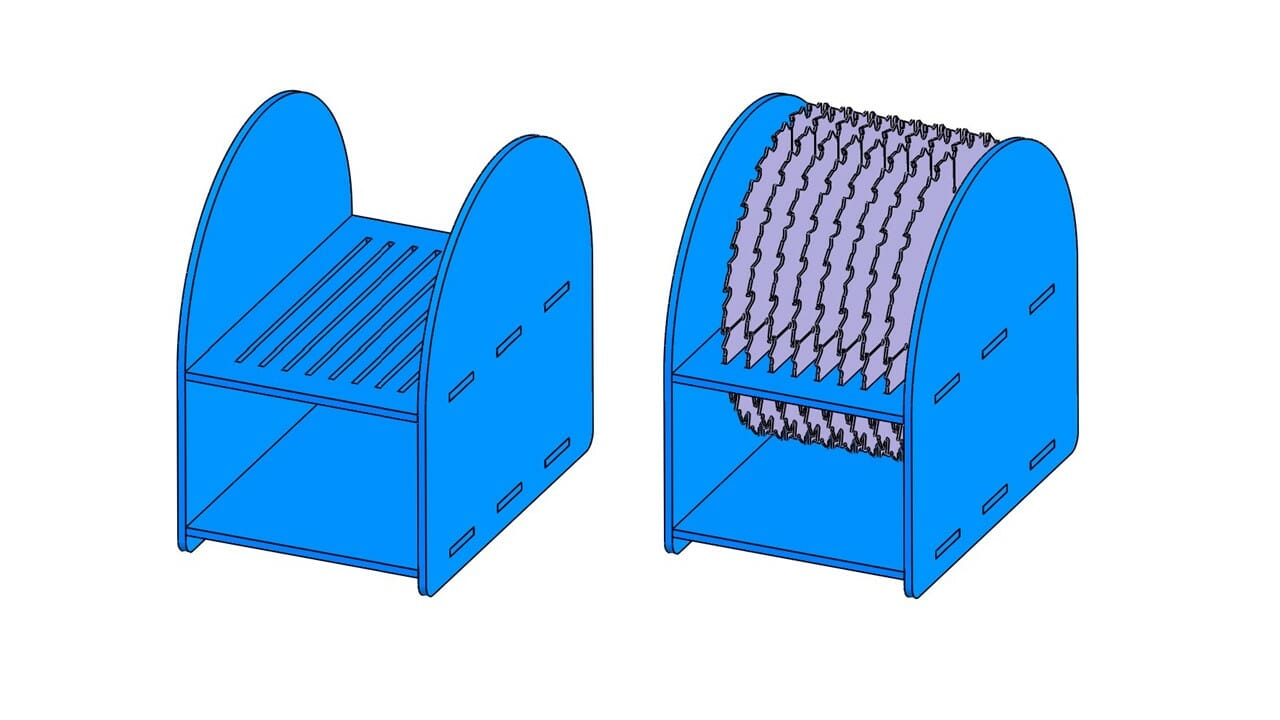
Instead of fishing through drawer after drawer of a workbench, laser cutting can make a custom storage solution for tool kits and parts to match your work station. For example, a simple laser cut fixture can store and consolidate hard to handle items like saw blades.
The example below stores several saw blades compactly in an upright position. This design can be modified to fit as many blades or accessories as needed. This quick improvement can save space, improve set-up time, and even prevent accidental injuries from mishandling dangerous items.
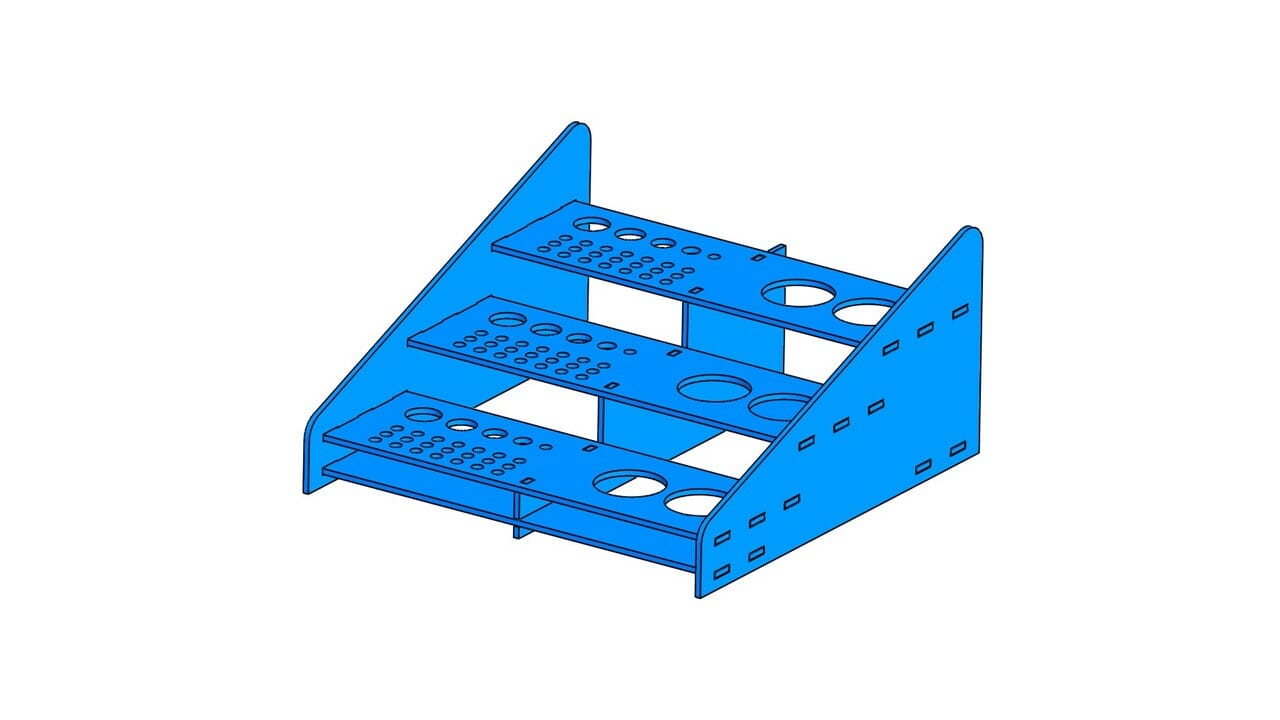
Drill bits and cutters present another great opportunity. A laser cut right-sized rack can organize and collect bits much better than an old shoe box or workbench drawer. Different size holes can sort the bits and the rack can be designed to fit most places. This rack can be customized to fit in a toolbox, mount to a wall, or sit on top of a workbench.
Organizing parts can be just as valuable as organizing tools. A laser cut rack can help to kit all the parts required for a project. This can visually display if a part is missing and help bring all the parts to point of use when assembling.
A Tool for Every Job
The right tool makes a hard job easy. Whether you need a tool for a specialized one-off project, or daily use in the shop, laser cut tooling brings accuracy, consistency, and efficiency to your project.
To recap, here are four ways laser cutting can make quick and easy tooling:
- Jigs and fixtures hold the workpiece and guide the cutter to make consistent and accurate cuts
- Templates can easily pattern paints or scribe lines.
- Inspection tools quickly and visually ensure parts match the design
- Shop accessories organize the chaos, bringing structure to the shop
All of which can be customized to your specific project and needs!
When ready, submit your tool designs to our instant quoting tool. As always, reach out to our support team with any questions to make sure you get what you need.


