A prototype is one of the most important things in the area of product development. In virtually every industry, a finished product rarely was created on the first try. Prototypes serve as the stepping stones to the finished product. They can be a proof of concept to win over investors, initial iterations of a design, or simply a rough fabrication of an idea that you have in your head. They are immensely valuable in giving real-world feedback to the designer in terms of understanding user experience or design changes that might need to be made. It helps the designer see how the idea might function, so that more informed design choices can be made.
What is a Product Prototype?
A product prototype is a physical representation of a product idea. A product is an object or service made available for a consumer. Therefore, a product prototype gives potential consumers a first glimpse into what the product is like.
Product prototypes can be visual or functional. Visual prototypes show how the product will look, but not always how it will function; such as a car body without an engine or transmission. Alternatively, functional prototypes show how the product will function, but not always how it will look; such as a bare-bones un-painted car, but containing a working engine and transmission.
What are the Components of a Prototype?
Just because a prototype is not a finished product, doesn’t mean there aren’t valuable components that should be included. Depending on what type of product is intended, these can vary, but generally include the tangible component, visual component, and functional component.
- Tangible component: How does it feel? Does the texture provide a realistic representation of the final intended product? This is important for products such as hand-helds devices, or wearables, where ergonomics and comfort is important.
- Visual component: How does it look? Is it attractive? This is important for products such as sculpture art, sports cars, or architecture, where aesthetics are important.
- Functional component: How does it work? Does it show functional feasibility? This is important for products that have a specific function or utility. Examples could be tools, or robotic arms, where the emphasis is on first proving the utility/working possibility.
The Importance of Prototyping: 4 Key Benefits
Prototyping has many benefits. Below are a few key benefits.
Early Detection of Issues
Prototyping allows you to identify and fix design or functional problems at an early stage of development, saving you time and money in the long run.
User Feedback
Prototyping allows you to gather feedback from potential users, which helps you refine the design and functionality of your product. This feedback can be used to improve the user experience and increase customer satisfaction.
Faster Development
Prototyping can help accelerate the development process by allowing teams to test and iterate on the product quickly. This speed can help teams bring products to market faster.
Cost-Effective
Prototyping helps you identify design flaws and functionality issues before investing in mass production. This can save a significant amount of money and resources in the long run.
Overall, prototyping is an essential tool for innovation and product development. It enables teams to create better products, faster and at a lower cost.
What is the Difference Between a Prototype and a Model?
As mentioned before, a prototype is a physical representation of a product idea. Usually, it is functional, however sometimes it might just be a visual prototype. There can be some commonalities between a model and a visual prototype since a model is also a representation of a concept or idea used to visualize a design. However, models tend to be only limited to visual or virtual representations.
For example, a model can be a sketch, diagram, or 3D computer aided design rendering. In many areas of engineering, CAD (Computer Aided Design) is used to create virtual models of the geometry before fabricating the prototypes. This is useful because it is much easier and cheaper to change a parameter of the design virtually, than it is to modify the design once it has been fabricated in real life. In other areas of engineering, physics models are also used to test CAD models. This allows the CAD model to be virtually tested with varying kinds of physics without needing to conduct physical experiments. However, testing a model will rarely be as accurate as testing a physical prototype in real life.
In summary, models are typically created early in the design process to explore and communicate design ideas visually with the use of sketches or virtual designs. Prototypes on the other hand, are usually created later in the process to physically touch, test and refine the design.
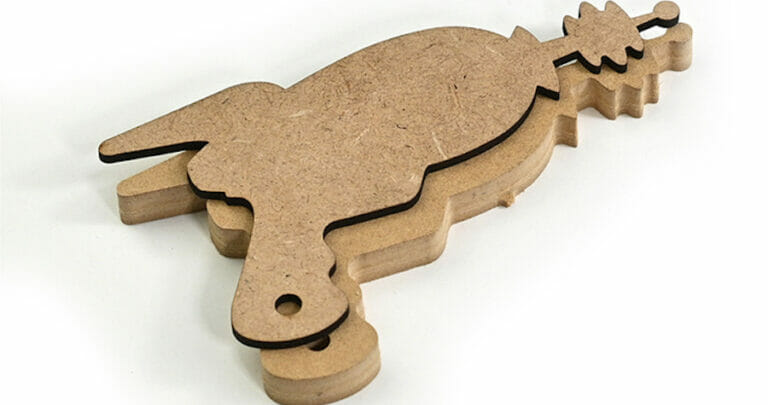
How Does Laser Cutting Make Prototyping Faster?
Often, prototypes are made after an existing model of the design is created by a sketch, or a computer program. In times past, fabricating a prototype based off of a sketch could take several hours, days, or weeks depending on the complexity, materials, and tools needed. Luckily, with advancements in manufacturing technology, prototyping has never been quicker. One significant manufacturing technology is laser cutting. Not only have laser cutters proven to be quick and incredibly precise, but they have also allowed for seamless integration between the CAD and prototyping process.
As mentioned before, CAD software allows for quick and easy model creation. Anyone with an idea in their head can learn to use a CAD software and create a virtual model/sketch. Laser cutting machines are able to interpret these CAD files and then translate the design into precise movements for the laser to take while it cuts – essentially bringing the design to life in the form of a tangible, precision-cut prototype with great accuracy. Furthermore, because of CAD, it is possible to easily make very intricate and complex designs without wasting time on refining features by hand. This can open the door to expediting the speed at which you make prototype iterations.
Laser cutting is done very quickly, and once the machine is cutting, it requires no human supervision. Thus, mitigating a lot of human error and saving time and money. The best part is that you can outsource your project to a manufacturer like SendCutSend and have your prototype in your hands in a matter of days.
6 Essential Steps to Make a Product Prototype
There are several essential steps to make a product prototype, and the exact steps may vary depending on the product you are designing and the materials and tools you have available. However, here are some general steps you can follow:
Define the Purpose and Scope of the Prototype
Identify the goal of the prototype, what it should do, and what features it should have. Determine the type of prototype you need, whether it’s a functional prototype, visual prototype, or a combination of both. This is the step where you vision cast and try to bring clarity to what components your idea needs to have.
Sketch and Design the Prototype
Create sketches, drawings, or CAD models of your design. This helps to visualize the product and identify potential problems or areas for improvement. SendCutSend offers many articles on their website highlighting recommended CAD programs to use. For simpler projects, SendCutSend also offers their “Parts Builder” feature to provide you with pre-designed templates you can use.
Choose the Materials
Decide on the materials you will use for the prototype, whether it’s foam, cardboard, wood, plastic, or metal. Take into consideration which materials will work best for the prototype’s function. You can take advantage of SendCutSend’s knowledge in materials. SendCutSend offers resources to educate you on material properties and advice on material selection.
Build the Prototype
Use the sketches and design to create a physical prototype using the chosen materials. Use tools such as 3D printers, laser cutters, or CNC machines to make precise cuts and shapes. SendCutSend offers instant pricing for a variety of services such as laser cutting, CNC routing, waterjet cutting, anodizing, bending/forming, countersinking, hardware insertion, powder coating, plating, tapping, and deburring.
Test and Refine the Prototype
Test the prototype to ensure it meets the design requirements and make any necessary adjustments. Get feedback from users or potential customers and refine the prototype accordingly.
Produce a Final Prototype
Once you are satisfied with the prototype, create a final version using high-quality materials and manufacturing processes. This may involve working with a manufacturer or production company to produce the final product. SendCutSend can help you through every step of the way. No quantity is too small. Whether it is one prototype or several, SendCutSend will quickly bring your prototype to life.
Remember that making a prototype is an iterative process, and you may need to go through several rounds of design, testing, and refinement before arriving at the final product. Throughout this process, do not give up! It is a rewarding experience to take a product idea from imagination to reality. SendCutSend is here to help you with that goal with top notch customer service. Simply upload your CAD file to the website or use the parts builder to get started. You can take advantage of instant pricing, fast turnarounds, and 100% money-back guarantee on all parts.
Proof of Concept: Testing Your Prototype
Once a product prototype is made, it is important to test the prototype. This is usually called a “Proof of Concept”. If the prototype works as intended and has met design requirements, it is considered a successful proof of concept. If not, the proof of concept is considered failed, and in need of redesign. Not all prototypes work successfully on the first iteration. In fact, more than likely there will be flaws that are identified during the first round of testing. That is why testing is so important in the product development process. The quicker you can identify flaws, the quicker you can redesign and save time and money in the long run. Catching problems early also means you can make necessary changes before it’s too late.
Testing a prototype also allows you to gather feedback from potential customers or end-users. This is an important factor when testing. Having a user from your intended audience assess the utility of the prototype gives a broader perspective compared to just testing it on your own. This feedback can be invaluable in determining what works and what doesn’t, identify areas where it may be confusing or difficult to use, and make adjustments to improve functionality. This all helps to refine the design and improve the overall user experience.
Take a minute to read about Foothill Products, a cycling company that uses SendCutSend for everything from prototyping to full production runs.
6 Signs to Know if Your Prototype is Ready
Determining when a prototype is ready can be dependent on the goals and needs of the project. However, here are some signs that a prototype may be ready:
Meets Design Requirements
The prototype meets the design requirements and specifications that were set out in the initial design phase.
Functional
The prototype functions as intended, and all features are working correctly.
Positive Feedback
Feedback from potential customers or end-users is positive, and they find the prototype useful and effective.
No Major Issues
There are no major issues or problems that need to be addressed in the prototype.
Cost-Effective
The prototype can be produced cost-effectively, and the materials and manufacturing processes used are appropriate for the intended product.
Stands Out in the Market
The prototype not only works as intended, but is different from other similar products in the market. It avoids infringing on other patents, and meets a need in the market in a unique and new way.
Tips and Things You Should Consider When Designing a Prototype:
Throughout the prototyping process, there can be a tendency to focus on the technical details and forget other important things that can ensure a successful product prototype. Here are a few things that should also be considered when making a prototype.
Get a Specialist in Intellectual Property Law
A lawyer may be needed for prototyping to help ensure that the product does not infringe on any existing patents, trademarks, or copyrights. They can also draft legal agreements, such as non-disclosure agreements and licensing agreements, to protect your intellectual property and ensure that your interests are protected.
Make Your Partners Sign a Confidentiality Agreement
A confidentiality agreement helps protect your intellectual property by preventing others from using or disclosing your proprietary information without your permission. It can help build trust, encourage collaboration, and provide legal recourse in case of a breach of the agreement. SendCutSend has an extensive privacy policy and we’re also happy to sign a NDA if necessary.
Look for Cost-Effective Ways to Prototype
By looking for cost-effective ways to prototype, you can save money, reduce risk of investing significant amounts of money in a design that may not work, and encourage more innovation by trying new ideas quickly without the burden of worrying about the high cost of a failure.
Outsource to Keep Costs Down
Outsourcing can keep costs down by selecting companies with specialized expertise to fabricate initial designs. This can save time and money by eliminating the need for you to learn new skills or invest in testing/fabrication equipment that might already exist at a local supplier or manufacturer. Outsourcing can also result in faster turnaround times giving you the freedom to work on new designs and iterations while the prototype is being made by someone else. SendCutSend is an excellent example of a company that you can outsource to. Check out the website to see all that SendCutSend can offer. SendCutSend can do one prototype at a time, or 100,000 production units and offers incredibly fast turnaround times.
Get Benchmarking and Competitor Analysis
Benchmarking helps identify areas for improvement by comparing your product or process to similar products in the industry. This can help you identify gaps and areas for improvement in your design or process. It also provides context by giving you a sense of what the industry standard is for similar products. This can help you set realistic goals and expectations for your prototype.
Transform Your Ideas into Prototypes and Create Your Products
Bringing an idea from a concept to a real-life product is a hard but rewarding experience, and prototyping is arguably the most important part of the product development process. Prototyping allows creators to test and refine their product ideas, identify and fix potential design flaws or issues, and gather valuable feedback from users before committing to a final, expensive production. By creating a prototype, creators can visualize their ideas and make necessary improvements to ensure a successful final product that meets user needs and expectations. It helps reduce the risk of failure, saves time and money, and ultimately increases the chances of a product’s success in the market.
In the modern age of rapid prototyping, choosing to partner with SendCutSend services can supercharge your product development process! SendCutSend offers instant pricing for a variety of services such as laser cutting, CNC routing, waterjet cutting, anodizing, bending/forming, countersinking, hardware insertion, powder coating, plating, tapping, and deburring. Designs can be uploaded and verified with the 3D viewer before checkout, and orders can be made using CAD files or the unique parts builder on the website. Standard orders are out the door in 2-4 business days or less, designs remain secure and confidential, shipping is free anywhere in the USA on orders over $39 ($19 for Canada), and you can follow your order with detailed order tracking! Offering all of these services and more sets SendCutSend apart from other competitors in the market.
FAQs Around Product Prototyping
A product prototype is a physical representation of a product idea. A product is an object or service made available for a consumer. Therefore, a product prototype gives potential consumers a first glimpse into what the product is like.
Depending on what type of product is intended, these can vary, but generally include the tangible component, visual component, and functional component.
There can be some commonalities between a model and a visual prototype since a model is also a representation of a concept or idea used to visualize a design. However, models tend to be only limited to visual or virtual representations.


