Here at SendCutSend we are always looking for ways that we can help streamline your design-to-build process. More often than not, that beautiful laser cut part only becomes functional when it’s fixed in place as part of the larger assembly. Of course, welding is a fantastic way to join many metals (here are some tips we wrote to prove it), and we love a clean weld bead as much as anyone, but welding is not a low-cost-of-entry process.
Enter, fasteners. Known collectively in the biz as “self-clinching hardware” SendCutSend now proudly offers over 60 different PEM nuts, studs and standoffs to suit your application.
What are PEM fasteners?
From electrical panels, to airplane frames, PEM has been offering innovative fasteners for over 80 years. Since they are highly corrosion and vibration resistant, PEM fasteners are used by 90% of top automakers, and that kind of track record makes us confident that with a few design pointers, your next build should stay together no matter the application environment.
Since a rock-solid fastening solution is desirable, we know that it also has to be affordable, so our Hardware Service starts at just $9 per order, with many individual fasteners under $1 each.
How do you get started with SendCutSend’s Hardware Insertion Services?
First of all, review the Hardware Guidelines which will give you valuable information on applicable materials (aluminum and steel), minimum and maximum parts sizes, and direction of force for each fastener type. In general, self-clinching hardware is an excellent alternative when your sheet metal part is too thin to Tap or Countersink. For tapping, the thinnest material we can effectively tap is ⅛”. In addition, most handbooks recommend a metal thickness of either one bolt diameter in steel or two in aluminum. Or at least three threads of engagement, so if you need a large diameter fastener, that rules out all but the thickest metals.
In contrast, with self-clinching hardware, sheet metal as thin as 0.04” (1mm) can be safely used.
Now that you’ve absorbed that information, let’s get the creative juices flowing with some more specific advantages, tips and tricks for each type of hardware fastener.
Press Fit Nuts
Picture yourself working under a dirty vehicle frame. You’re trying, with the tools you could find in your messy garage (or is it just me who can’t seem to keep it nearly as clean as all those tutorial videos seem to show?) to get a seized bolt out of a captive nut. Suddenly, through the WD-40 that just dripped in your eye (why weren’t you wearing safety glasses?), you notice that the bolt has broken free! After a brief moment of exultation at your victory over corrosion, you realize with horror that you’ve also broken the nut free. Congratulations, the bolt will have to be cut out, and since the nut is captive in the frame, it’s going to rattle around in there. Forever.
This is not just a cautionary tale, it’s happened to me and countless other resourceful individuals throughout the annals of time.
Why? More importantly, what can be done about it?
First: How was the nut secured in the first place? Typically, captive nuts–those out of reach of any conventional tool–are spot-welded in place. This process is theoretically great, but it’s extremely difficult to control the quality in production because the only real way to test a spot weld is destructively (to destroy it, for the uninitiated).
Enter our hero, the Press Fit Nut! Unlike the huge range in break-away torques for a spot-weld, our hardware is installed with exactly the same force every time, and the force rating is only dependent on the sheet-metal material. So it will be the same for each and every press fit nut in your part.
Second: Corrosion. As with any weld, the heat affected area around a spot-weld is more susceptible to corrosion than the base material. “So paint it” you say, and that’s a valid point, but the tiny spaces created around a spot weld are extremely difficult to coat uniformly, resulting in–you guessed it–corrosion. In contrast, all of our press fit hardware is zinc-chromate treated, meaning it will maintain better corrosion resistance than even the metal it’s fastened into. Specifically in reference to our mournful tale of woe, the threads are also coated, meaning with proper care, the kind of corrosion that would allow the frozen bolt to happen in the spot-weld example can’t even start.
Press Fit Nuts are also excellent for electrical sub-panels, which are difficult to access from the rear, or for any fastening application where it’s more convenient to not have to fiddle with two wrenches, one on either side of the assembly.
Self-Clinching Studs
While having a nut built into your part is useful, there are lots of applications where installing a stud is extra helpful. By way of example, we need look no further than the humble automotive hub/wheel assembly: If you’ve ever struggled to hold a truck wheel and tire in place while simultaneously trying to thread the lug bolt into the hub, cursing the fact that they didn’t use studs and lug nuts instead, congratulations, you can relate.
Because self-clinching studs are flush with the back of the sheet metal, they are also useful where a common nut and bolt combination would create an interference. Particularly where the sheet metal is too thin to use our Countersinking Service to make the fastener head sit flush.
Even if clearance isn’t the issue, having a bolt that will not rotate when the nut is tightened is helpful. While there are other solutions, such as a square-neck carriage bolt, they require a square hole in the substrate (we can laser cut those, but try and drill one sometime), plus they fall out easily without a hand to hold them in place.
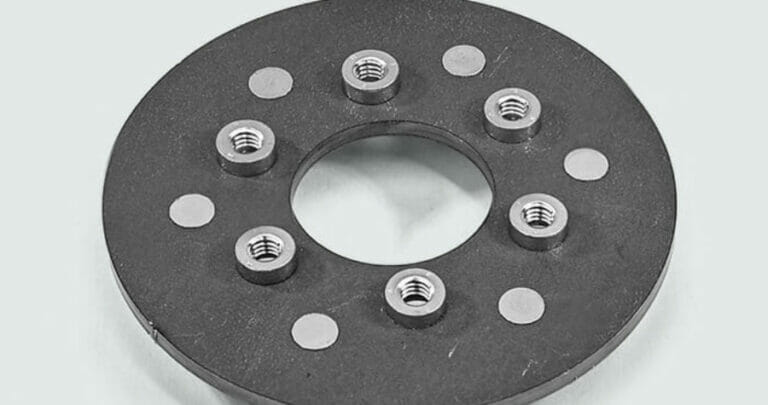
Standoffs
To round out our self-clinching hardware offering, let’s look at the unassuming standoff. These are commonly used to space a printed circuit board off the mounting plate so no shorting occurs and to maintain enough airflow around electrical components.
Since they are inherently square, or perpendicular to the face in which they’re installed, all of uniform length, and installed in holes precisely cut by our lasers, they are much less finicky than other standoff methods.
As with all our other press fit hardware, they are resistant to cyclical vibration and make mounting things like an automotive instrument cluster a snap.
A couple things to note when designing with standoffs:
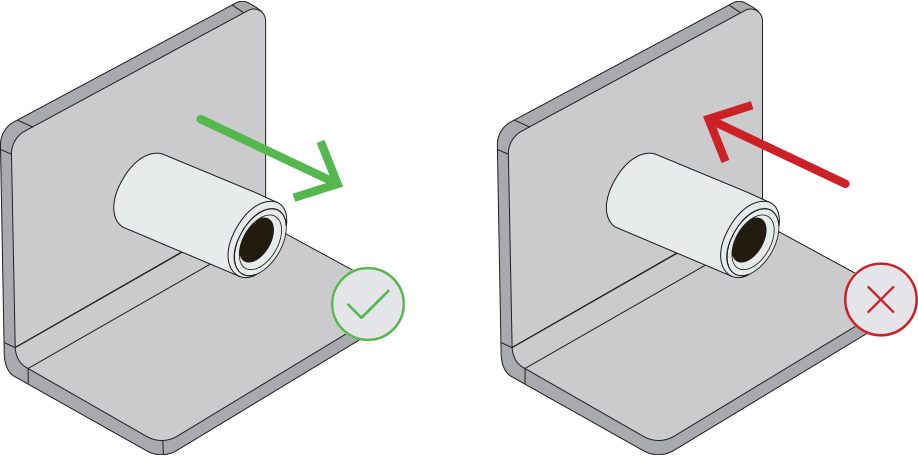
- The primary force direction is still out of the panel, so although any of the fasteners will withstand 100 or more pounds in the opposing direction, high impact loads in this direction are not a good application for standoffs. For that kind of loading a stud with a nut backing it could be useful.
- With standoffs as well as studs, remember that the listed length is the overall length of the hardware, so if you install a ¾” long standoff in a ⅜” thick sheet, only ⅜” of stud will remain.
In Summary
Selecting the right hardware to mount your laser cut parts doesn’t have to be a mystifying experience. Using our Hardware Catalog you can easily sort by unit or material, to see exactly what fasteners will work with the sheet metal material and thickness you select.
To make fastener placement a snap in CAD, drawings for every fastener we offer are available in the PEM Catalog. If SolidWorks is your software of choice, PEM fasteners are native to the Toolbox Wizard and can be inserted directly without ever leaving the program.
Whether you’re interested in fewer overall operations, faster and easier deployment of your parts, the ability to use strong steel fasteners with lightweight aluminum parts without having to worry about galvanic corrosion, or are worried about the thermal stresses and warping that come with welding, SendCutSend’s hardware offers a fast, affordable, solution.


