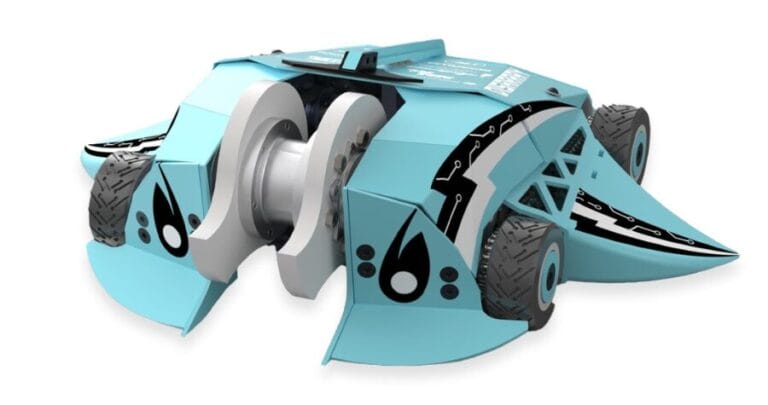
In the world of combat robotics, durability isn’t just important — it’s survival. Rapid prototyping plays a crucial role in ensuring these robots can withstand the brutal fights. On BattleBots, each match is an all-out brawl where 250-pound machines try to tear each other apart with spinning blades, flamethrowers, hammers, and crushing jaws. If your components aren’t built to take these massive hits, you’re not just losing, your robot is getting ripped to pieces.
Fortunately for our robot, Disarray, we have a powerful ally in our corner: SendCutSend. Their fast, precise manufacturing services have been essential in helping us test new designs, iterate quickly, and stay competitive in the arena.
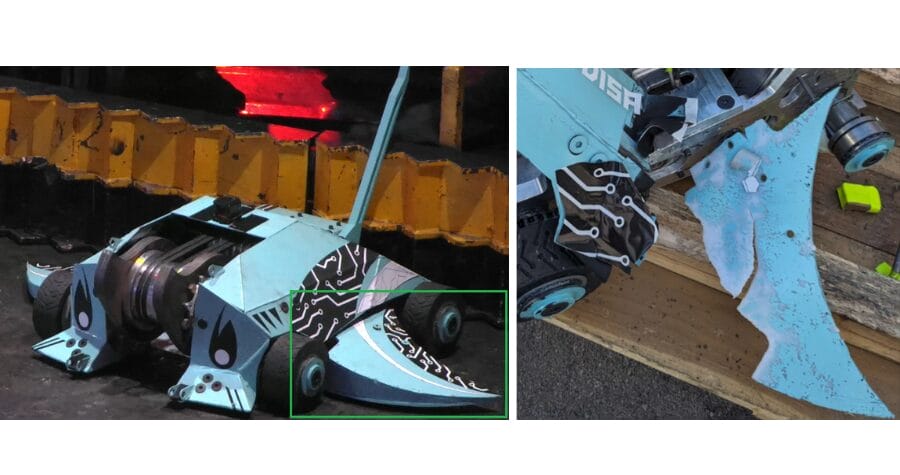
Among the many parts SendCutSend helped us bring to life, one of the most critical was our side armor pods. These modular armor pods take the hits so our drivetrain doesn’t have to and give us the flexibility to adapt our armor strategy based on which robot we’re fighting.
This article breaks down how we used an iterative engineering approach and leveraged SendCutSend’s capabilities to design, test and adapt one of our robot’s most important systems.
Step 1: Identify the Problem
What does the side armor need to do?
In combat robotics, you have to design for failure — because something will break. The real question is: what breaks first, and how badly does it affect your chances of winning?
For us, one of the top priorities in adding side armor, besides giving Disarray a distinctive look, was protecting the drive chains. If your robot can’t move, you are a sitting duck in the arena. In addition to those two core goals, the side armor needed to meet several key performance criteria:
Project Goals:
- Shield the drivetrain and chassis from direct hits
- Provide top armor mounting points
- Be modular and serviceable between matches
- Withstand repeated impacts
- Weigh less than 10 pounds
It sounds simple – but in Battlebots, where spinning blades are hitting at the force of a car crash, that’s a tall order.
Step 2: The Initial Prototype
As rookies entering BattleBots for the first time, we had a lot to figure out — and fast. When it came time to design the first iteration of the side armor, we needed a solution that was lightweight and that could be prototyped quickly.
That’s where UHMW came in.
Ultra-high molecular weight polyethylene is a tough plastic that’s popular in combat robotics because it absorbs impacts without cracking. But what really made it work for us was how quickly we could go from CAD to the physical part using SendCutSend.
The process to build this prototype was simple:
- Model the side pods and confirm the assembly fit in Solidworks.

- Export each face as a .DXF file (i.e. the faces to be cut)
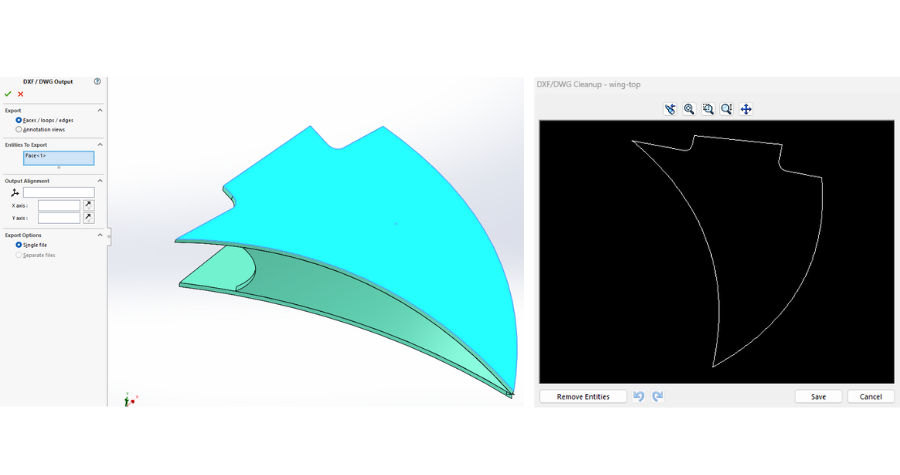

- Receive the parts and assemble them — all within a few days
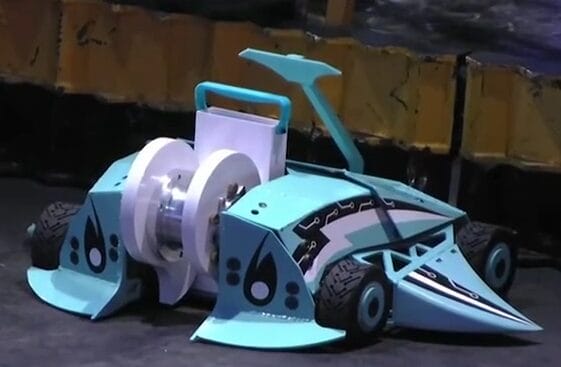
These flat-cut UHMW panels served two purposes: they provided a layer of protection for the drive chain and helped define the robot’s distinctive stingray-inspired silhouette. We were also able to heat-form the UHMW to create smooth, contoured surfaces.
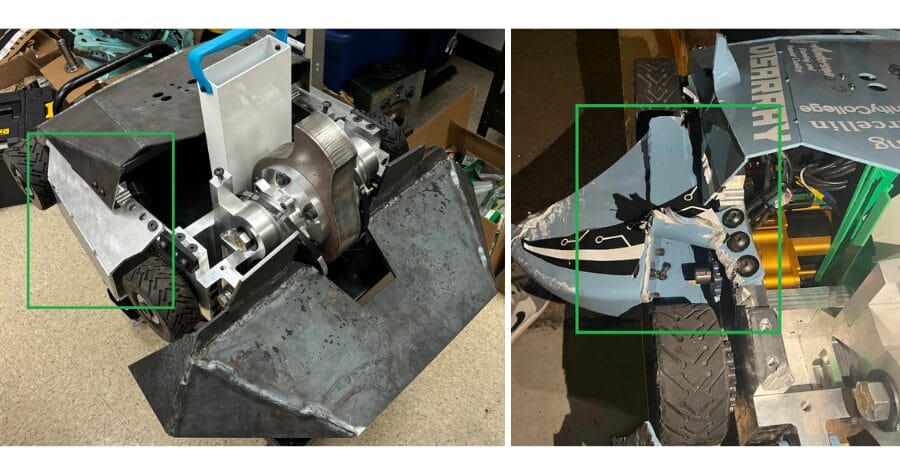
Against our first few opponents, the panels performed exactly as intended. They absorbed hits and kept the chains and chassis safe, all while being well under the weight requirement. But then we faced a seasoned BattleBots veteran… and everything changed.
It looked great, until it didn’t. After taking many massive hits, there wasn’t much left of the UHMW panels. Once it failed, it left our drive system and frame completely exposed.
| Pros | Cons |
| Full assembly < 5 pounds | Couldn’t survive large hits |
| UHMW could be formed to make complex surfaces | Time consuming to build and replace |
| Material choice supported early rapid prototyping | Did not shield critical systems |
Although this design ended up being damaged, it accomplished exactly what a prototype should, holding up enough to provide critical insight into the environment and challenges Disarray would endure in the arena. Going forward, especially against top-tier opponents, we needed to create a solution that acted more like armor while still maintaining the unique silhouette of the robot.
Fortunately, testing new ideas was easy with SendCutSend. Their wide range of materials, fast turnaround, and affordable pricing meant we could iterate quickly and learn what works (and what doesn’t) against different opponents.
Step 3: Design Iteration
Side Armor Version 2: Welded Isogrid Steel
Why we switched:
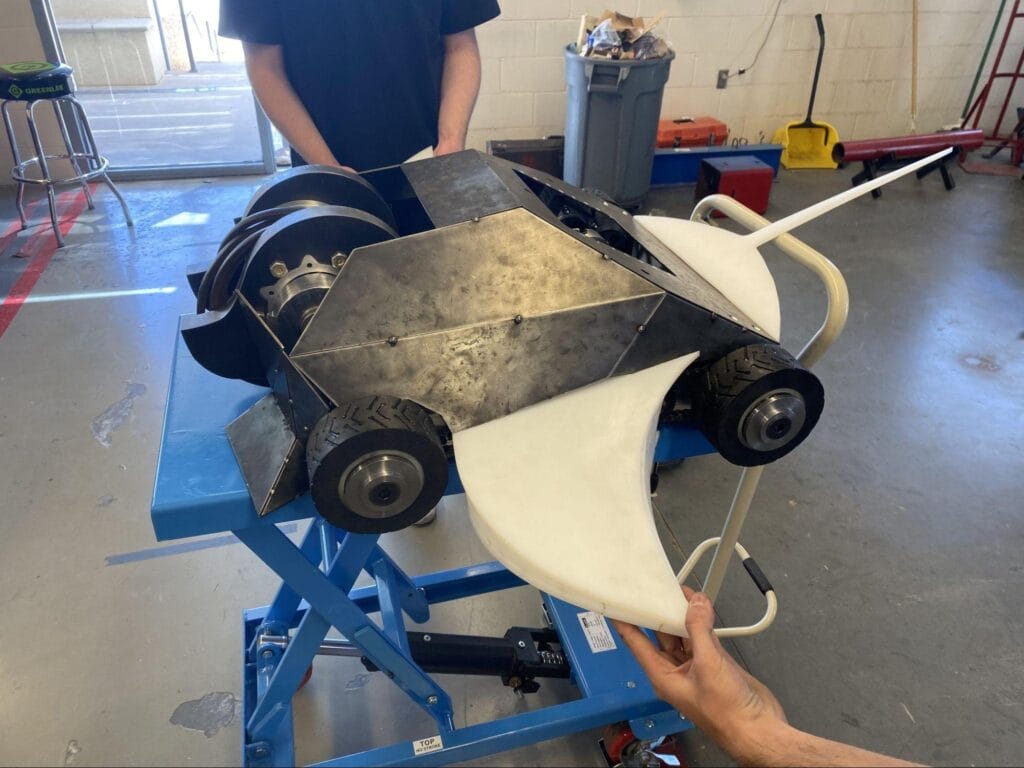
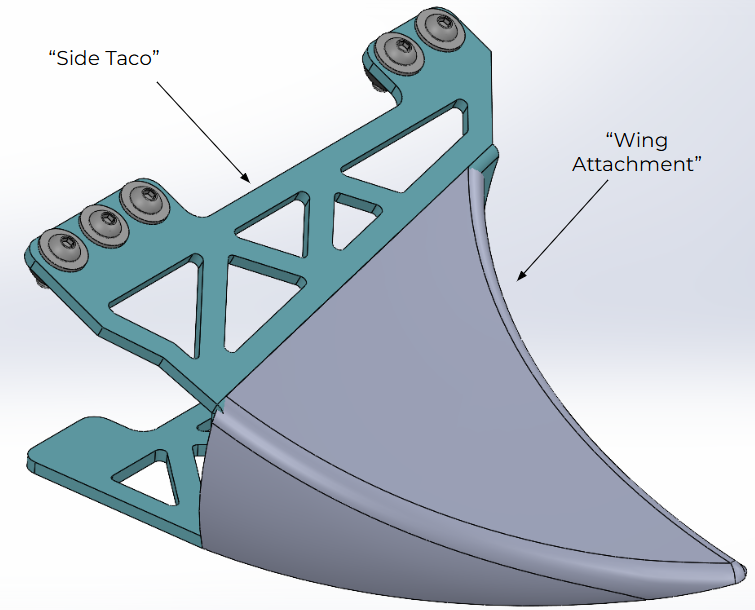
Our first version had a major flaw — the heat-formed UHMW panels were too cantilevered and couldn’t withstand the torque from big impacts around the mounting bolts (turns out, plastic panels don’t exactly scream “armor”). To preserve the wing-like silhouette while improving the overall durability, the team split the side pods into 2 parts: the “side taco” and the “wing attachment”. The side taco would be made from metal to handle the big impacts, while a 3D printed wing attachment could maintain Disarray’s signature shape.
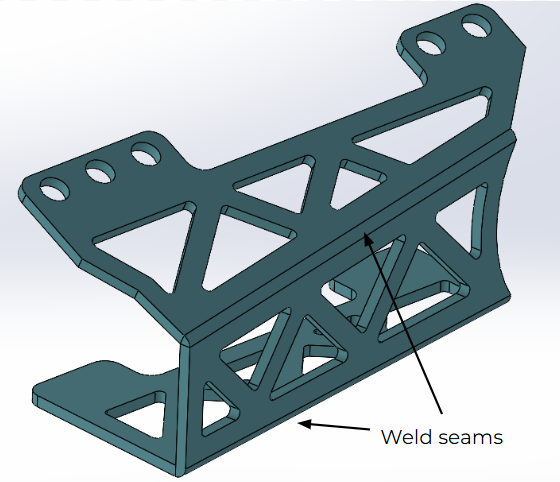
For the side tacos, alloy steel seemed like a strong candidate thanks to its rigidity, but it came with a serious weight penalty. To offset that, we used an isogrid pattern — a cutout design strategy that maintains strength while shedding weight. This new approach eliminated the need for time-consuming forming of the UHMW, but introduced a new manufacturing step: welding together three SendCutSend steel plates into a single structure.
How it performed:
Unfortunately, the isogrid design introduced a new issue — it gave opponents’ spinning weapons something to grip. Instead of glancing off, they dug deep into the cutouts, transferring tons of energy and completely wrecking the entire structure. The panel twisted so badly it left Disarray immobilized.

| Pros | Cons |
| Strong steel construction | Isogrid design pattern allowed weapons to “bite” into the panels |
| Lightweight design pattern | Transferred energy into the chassis |
| Easier to fabricate than UHMW version | Created mobility issues |
Side Armor Version 3: Welded Aluminum Panels
Why we switched:
Without the isogrid pattern, the steel side tacos would have pushed the robot over the maximum weight limit. So for this next revision, the team transitioned to flat-cut aluminum panels with no isogrid cutouts. Aluminum panels kept the assembly lightweight and the material was cheaper than the ballistic steel used in version 2.
Even better, eliminating the isogrid pattern reduced the overall cut length during manufacturing. That meant faster cutting times and even a lower quote from SendCutSend. Sometimes, simpler really is better — fewer features, fewer dollars, and a faster turnaround.
Although it felt counterintuitive at first to replace the steel with aluminum and expect better results, this design focused on controlling a failure rather than trying to prevent it. The team knew that one specific spot would likely only get hit once or twice in a 3-minute match and we were willing to let the aluminum shear away as long as it protected the core components behind it.
As the team gained more experience in the combat environment, even the initial design goals themselves evolved. The shift from “stronger is better” to “controlled failure” showed just how important it is to adapt as you learn.
How it performed:
This version and design philosophy was a solid step forward. The aluminum side tacos absorbed the impacts well, and the lack of isogrid cutouts meant fewer opportunities for weapon teeth to really catch and dig in.
However, the welding manufacturing step still posed challenges. These side tacos took time to fabricate, and with tight match schedules, welds became potential failure points. Making spares quickly wasn’t easy, especially with limited resources while the team was at a competition.
| Pros | Cons |
| Lightweight, simple geometry | Welds took time and resources |
| No isogrid = fewer catch points | Weak points developed at weld joints |
| Quick to cut & ship from SendCutSend | Hard to produce spares under time pressure |
Side Armor Version 4 (Current): Bent Aluminum
Why we switched:
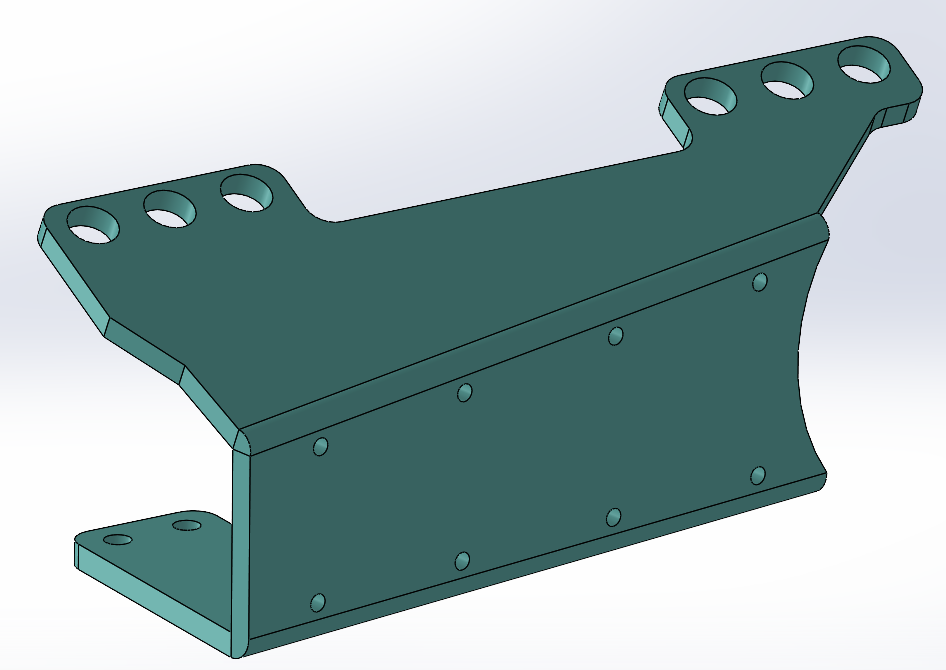
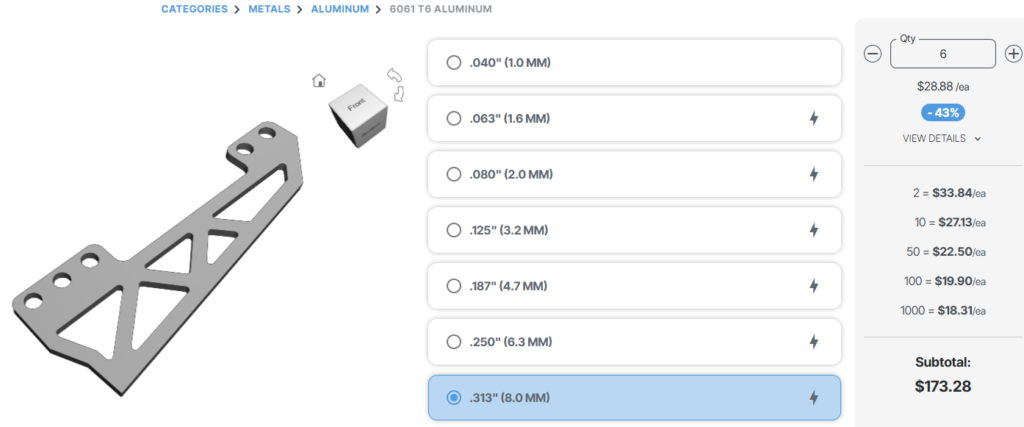
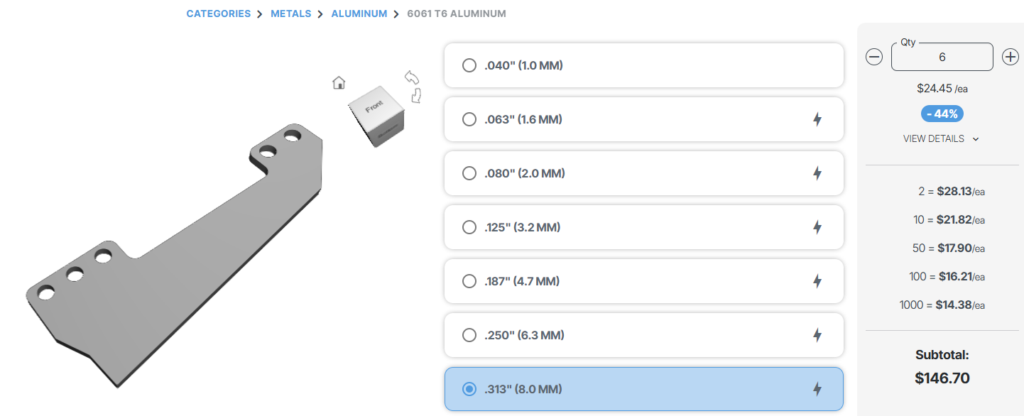
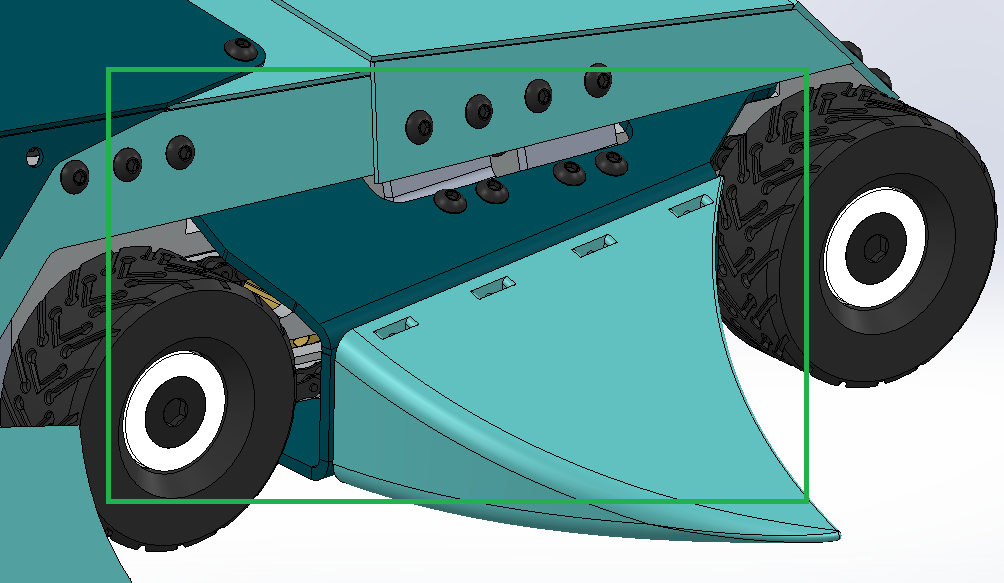
To streamline everything, the team kept the lightweight, cost-effective aluminum material but completely eliminated welding. Instead, we redesigned the side tacos around SendCutSend’s precision bending services, turning what used to be a complex welded assembly into a modular, bolt-together solution.
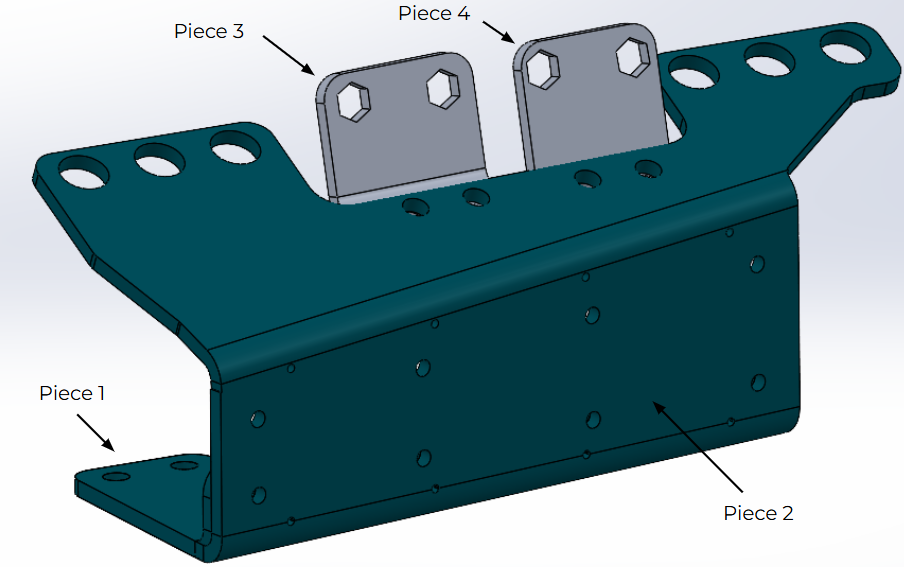
This update solved the final piece of the puzzle — creating a fully integrated armor strategy. The bent tabs on each side taco now bolt directly into the top armor, significantly increasing the overall rigidity. Instead of absorbing all the energy alone, the side tacos now distribute the impacts across multiple panels, reinforcing the entire side and top structures.
How We Used SendCutSend:
Uploading these bent parts to SendCutSend was simple. We exported each unique part as a STEP file, uploaded it to the online quoting tool, and that was it. SendCutSend automatically detected the bends, calculated the flat pattern, and retained the correct bend angles.
The quote tool even includes interactive 2D and 3D viewers, making it easy to inspect each piece before ordering. We could verify every tab, bend, and hole location right there in the browser.
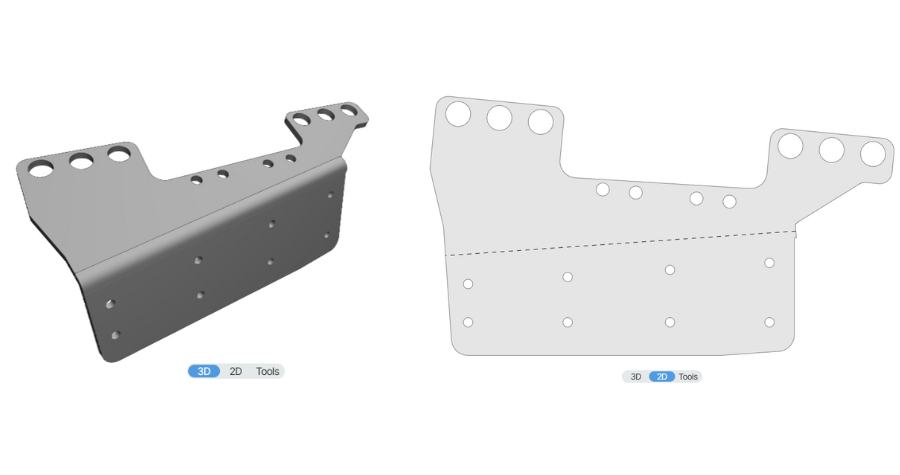
Thanks to this process, we went from CAD to assembled parts without a single jig or weld.
Unboxing & Assembly:
There’s nothing more satisfying than opening a box of freshly cut and bent aluminum and knowing the hard part is already done. No additional prep or fabrication, just bolt everything together.
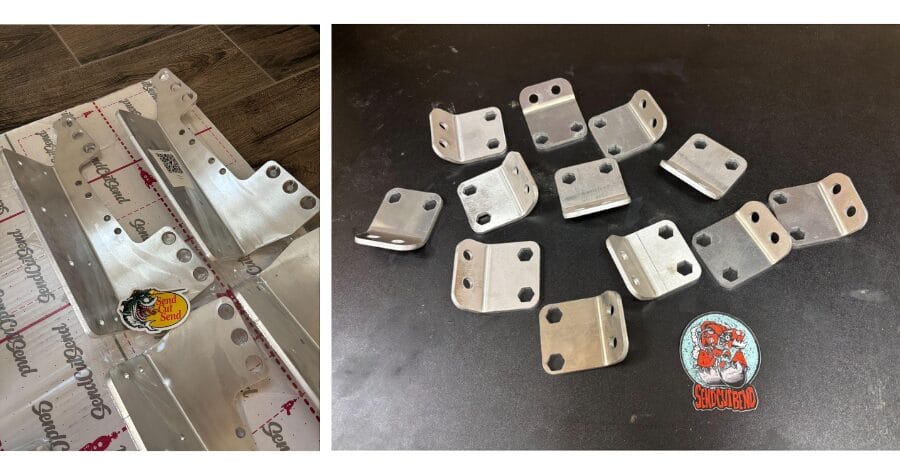
Because each piece was precisely cut and bent, the entire assembly went together in minutes, removing the need for any post-processing.
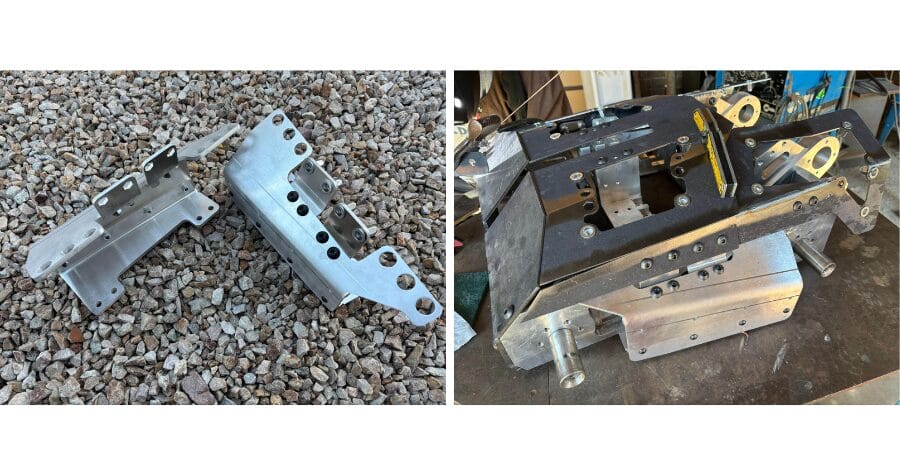
How It’s Going:
This version represents everything the team has learned across all previous iterations. It’s strong where it needs to be, easy to manufacture, and saves critical time in the pits. Although the cost is slightly higher due to the precision bends, the team is happy to make that tradeoff for reliability and reduced prep time between matches.
SendCutSend’s Role in Rapid Iteration
Every version of the side tacos, from hand-formed plastic to precision-bent aluminum, was made possible through SendCutSend’s services. Their speed, material variety, and manufacturing options were critical in helping us iterate quickly between fights and during the offseason.
Having access to laser cutting, bending, and a wide catalog of materials gave us the freedom to test bold ideas and course-correct fast. When something failed (which it always does in BattleBots), we weren’t stuck waiting weeks for a new part. We would upload a revised CAD file, and a few days later, have a new idea to test on our doorstep.
Even the latest design, which included multiple bent components, didn’t slow things down. Despite being more advanced than previous flat-panel versions, ordering through SendCutSend remained quick and straightforward.
For a team working with limited time and budget, that kind of flexibility was a game-changer — turning every failure into a fast, affordable opportunity to learn and improve.
Lessons Learned + Advice to Other Makers
Designing for BattleBots taught us something that applies to nearly every engineering project: failure isn’t just part of the process — it is the process. Each version of the side armor failed in a different way, but each failure pushed us to make something better.
Our biggest takeaway? Don’t be afraid to shift your priorities as you learn more about the real-world environment your design will face. We started off trying to build something that wouldn’t break. Now, we design things that can fail strategically and be replaced quickly, and that shift in mindset has made our robot stronger overall.
To anyone working on high-performance projects: embrace iteration. Use partners like SendCutSend to speed up the process. Don’t get too attached to version 1 (or version 3). Test, break, learn, and repeat.
So the next time you’re starting a project, don’t wait. Begin iterating, embrace the failures, and let SendCutSend help bring your next big idea to life.
*This article was contributed by Al Hurworth


