Adobe Illustrator is an effective, versatile 2D design tool widely used by almost every industry. Utilizing Adobe Illustrator for laser cutting allows you to make precise drawings to ensure an accurate cut every time. Although it’s not the most beginner friendly software to learn and use, our Adobe Illustrator tutorials will guide you through every step of the way. We have a variety of these tutorials available, covering everything from designing text to setting up an AI file for bending, and this article will walk you through how to use Adobe Illustrator with an easy step-by-step guide.
How to Use Adobe Illustrator for Laser Cutting
Adobe Illustrator is a great tool to use in conjunction with laser cutting because it’s already 2D, so you don’t have to worry about creating a 3D model and flattening it the way you normally do with traditional CAD programs. (That is to say, if you already know how to use CAD programs like Autodesk Fusion or Onshape, go for it! Just be sure to check out our tutorials for those as well to make sure your design fits the necessary guidelines.) With its variety of useful tools, large user and knowledge base, and widely accepted file formats, Illustrator is the perfect tool to add to your belt for laser cut parts. It can take some getting used to, but it’s easy to get started with these 5 steps to learning Adobe Illustrator.
1. Object sizing
The first thing you need to do is make sure your measurement units are set to inches or mm. This will make it easier to upload your file to our website and ensure it scales correctly when it’s sent to the laser cutter. You should also make sure your artboard size is just a bit bigger than the final width and height of your piece.
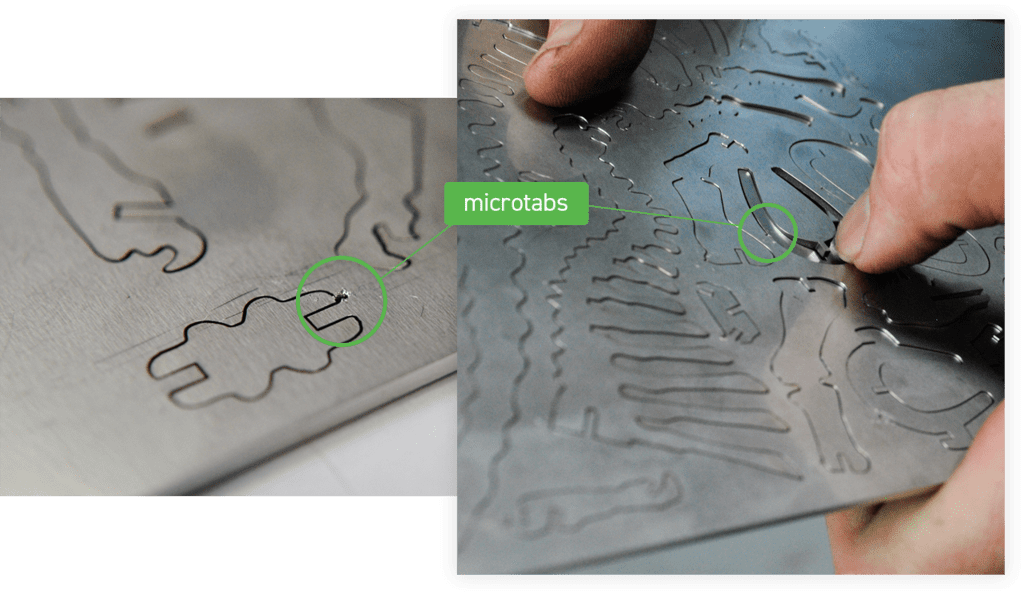
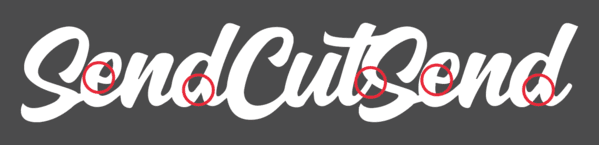
When creating your drawings, keep in mind that each part should have an overall size that meets the minimum requirement for the material thickness. Since each individual part will be laser cut with a microtab, having parts smaller than the minimum size required makes them difficult to separate from the material. Find the flat part size limits for cutting all material thicknesses in our handy charts.
We strongly recommend saving each part into its own individual file. If you plan to save multiple parts into one file, make sure the file meets our Nesting Guidelines.
Be aware of what material thickness you plan to choose when initially designing for laser cutting in Illustrator. Avoid sharp angles and intricate details on smaller objects. Details and small features should never be smaller than the minimum hole size required for the material. Learn how to confirm material details and specifications like minimum hole size, minimum bridging/webbing size, and more.
2. Using shapes, lines, and pen tools
The most important thing to note when using built-in tools in Adobe Illustrator is that all paths, regardless of how they were created, must be converted to vector paths. Vector paths are collections of lines and curves which represent mathematical perfection: a series of equations graphing the path itself. This means that vector paths are completely independent of scale, unlike raster files which are collections of pixels with a definable limit to their scalability. Machining software almost exclusively interprets and processes vector paths so it is important to ensure that all your paths in your file are vectors.
Using the line and pen tools in Illustrator will both create a vector path, but the shape tool is an exception to this. However, creating a perfect circle or square is useful when designing for laser cutting in Adobe Illustrator. To use the shape tool effectively for laser cutting, simply select the shape after you have created it, select Object > Compound Path > Make. This will render a perfect vector path in your final file.
Adding text to laser cut designs
If you’re laser cutting text out of your design, like a stencil, be sure to use a font with stencil properties or be sure to manually create “bridges” to the holes in your letters. We’ve got a more in-depth tutorial on Preparing Your Text for laser cutting in Illustrator here.
To prevent issues when uploading your file, design your objects and text as fills and not strokes. This is critical to designing for laser cutting in Illustrator because when you create an object with stroke, it gives your part an outline that doesn’t register as a cutting path. What we see ends up having 2 outlines: your original planned outline, and the outline the stroke adds to the outside of the part. The automated process cannot accept files like this so it’s easier to skip any strokes from the beginning.
3. Helpful tools and modes
Make sure to view your design in Outline mode multiple times during the process of designing your parts for laser cutting. Outline mode allows you to see every path you have created as complete paths, showing all the potential intersections, overlaps, or missing connections you may have missed in your initial viewing of your design. This will make it easier to catch empty objects or stray points that could potentially create problems down the road.
Another helpful tool you should use, especially if your design contains multiple elements to be joined together, is the Align and Distribute tool. Using this tool, you can select two or more objects in your design and distribute the spaces between them evenly, align them to one side or the center of the artboard, or perfectly arrange the elements of your design. Once you have them all arranged, just be sure to connect them through shared material so your design doesn’t accidentally become multiple parts!
4. Cleaning up your file
Before you export your file to upload to us, be sure to remove everything that is not going to be laser-cut. This includes empty shapes, boxes, stray points and text areas. If you click on your Select Menu, and hover over “Object,” you’ll see a list of things you can select. We suggest selecting each of the following: “Clipping Masks,” “Stray Points,” and “All Text Objects.”
By selecting these options, you’ll be able to quickly spot stray geometry that could cause errors when laser cutting.
To find duplicate objects or empty shapes, select a single object and move it slightly. View in “outline” mode and you’ll quickly see if you have any double lines or extra objects. Duplicate objects are sometimes created when using Pathfinder tools such as “combine” or “exclude.” Make sure all your objects are on the same layer.
In addition, none of your objects should have open contours. In other words, all shapes should have a fully connected outline. Once again viewing your file in Outline mode allows you to see these open contours so you can then join all broken paths back together. You can see how to join these contours together with our helpful Finding and Fixing Open Contours in Illustrator tutorial.

Make sure you design your parts as a single object, and not multiple shapes overlapping each other. Make use of your “Pathfinder Palette” to weld or exclude multiple objects. Check out our tutorial on Welding and Merging Shapes in Illustrator to get all the information you need.
5. Exporting your design
We have several different file types we accept for processing for laser cutting, but for designs created in Adobe Illustrator, we require your exported file type to be a native .ai file. Do not attempt to export your file as any other file type as many tools used in Adobe Illustrator will not export correctly to .dxf or .eps files. You can see the full list of file types we accept from other programs here.
To export your file from Adobe Illustrator, select File > Export > Export As and choose the “.ai” option. We suggest reopening your saved .ai file in Adobe Illustrator to make sure it exported correctly, using the Outline mode viewing option again.
Native .ai files are one of the file types we accept for instant quoting, so all you have to do now is upload it to our instant pricing tool, fill out your material and service options, and you’ll get a quote generated instantly. We take care of all further file processing on our end, so you just get to sit back, relax, and wait for your custom laser cut parts to arrive!
