Tab and slots are a great way to make sure your parts fit well together. This is particularly useful for welding projects and bolt assembly. In this video, Jake discusses tab and slot laser cut designs for SendCutSend and some tips for designing. Watch the video or read the script below.
Video Guide for Designing Laser Cut Tab and Slot Parts
We use and cut a lot of these designs here at SendCutSend, but maybe you’re not familiar with laser cut tab and slot parts so let’s talk about what they are first.
What are laser cut tab and slot parts?
Tab and slots are temporary fixtures you can use in your design to hold it together during welding or assembly.
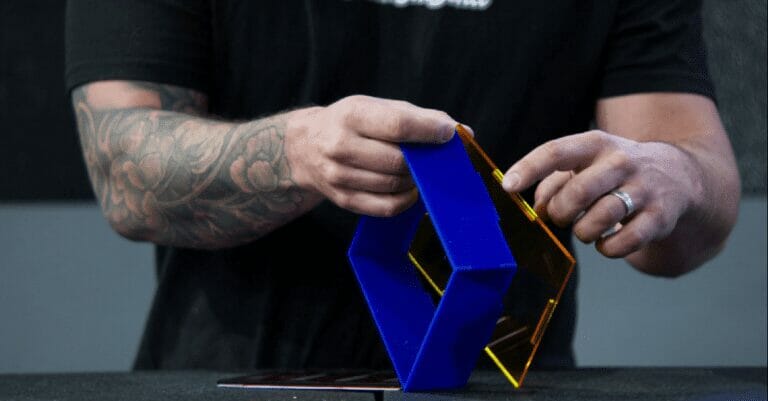
In your design, you’ll have a female slot that’ll locate into a male tab and hold the part together. In this box we’re showing here, we have four tabs and slots in each corner. If we put it together, it holds itself together really nicely. That’s the beauty of using tabs and slots: if you need to weld something or hold it when you bolt it together, it’s a great fixturing mechanism that you can incorporate into your design.

Tips for tab and slot designs with SendCutSend
As you’re designing this, it’s important to remember a couple of things in regards to the slot size and style.
Any time you add a hole to a part, you’re introducing a new area in which the part is weak. If it’s prone to high vibration or a lot of stress, you might see cracking in the corner of the slot, especially if it’s a square shape. If you have a squared slot, you will eventually see some cracking in the corners.
There’s an easy way to reduce this stress and cracking in the corners: simply just throw a little radius in the corner. Just by putting in a small radius, you reduce the stress in the corners substantially and you won’t see as much cracking.
One important thing to note is if you do put a radius in the corners of the slot, you have to increase the size of the tab by the radius in order to make sure that the tab still fits into the slot. You can also chamfer the edge of your tab if you want to do it that way, but you are going to be prone to a little bit of a sloppier fit with this design.
The next best thing that you can do is put a full radius in the corner. To do this, make a full half-circle in each corner. That half-circle reduces the stress exponentially on this part and you won’t see as much, if any, cracking or stressing, especially in a high vibration situation. Same as the first solution, you also have to increase the diameter and width of your tab to match the full radius of the corners in your slot to ensure that it slides in and fits. A lot of people don’t like this because then you end up having a little more slop in your design, and that slop in the design sometimes makes it harder for things to fit correctly.
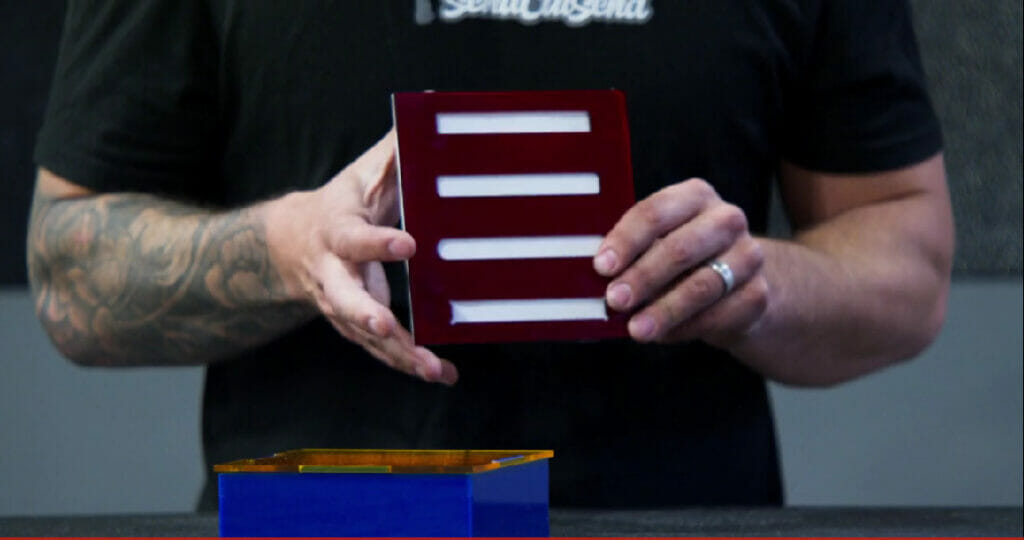
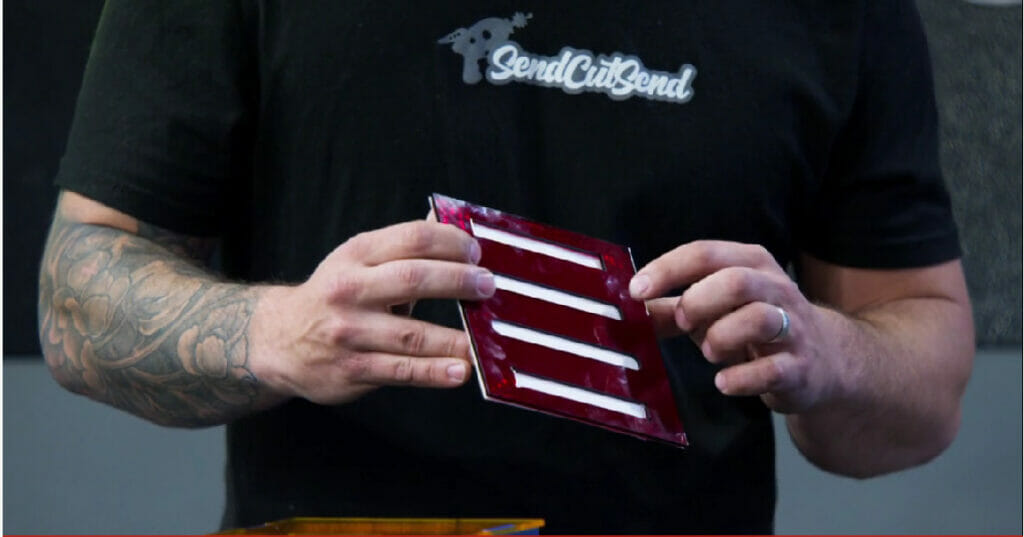
The next best thing is to do a dogbone design, and that’s simply putting a hole in each corner, and then softening those edges into the corners. This allows you to have a square hole that has a softened up radius so you’re able to make the slot the same exact dimension as the tab.
These corners that we’re doing to the slots we can also do to the tabs. We can soften those radii on the corners of those tabs to create less stress in those corner joints.
Understanding materials for your laser cut tab and slot parts
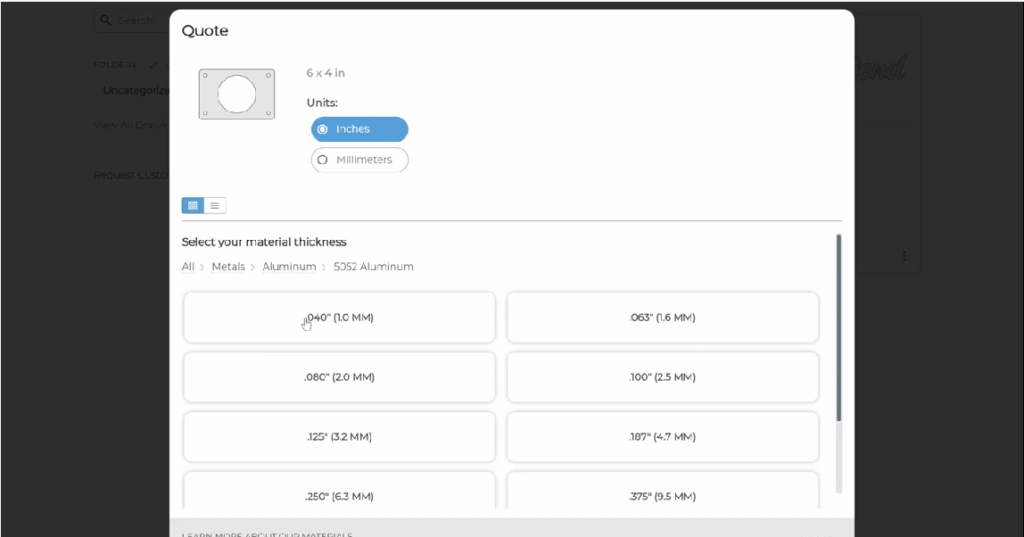
It’s important to note the dimensional thickness of your material when designing tab and slots. You can go into our quote tool, and when you select the material, you’ll see the dimensional thickness in both imperial and metric units to suit your needs. The thickness of your material is going to be the width of your slot. Make sure you’re at least 0.010″ larger than that and you’ll have a nice slip fit. When you’re designing that slot, we recommend the slot also being at least 0.010″ larger in diameter and width than your tab. This is due to tolerance considerations for each material.
Understanding tolerances for your laser cut tab and slot parts
Material cut and thickness tolerances play a significant role in the design of tab and slot parts. We cover this in detail in our Basic Tolerances and Cut Feature Relationships and Designing Sheet Metal Parts with Tab and Slots guides. For the material you intend to use, be sure to check its material page and scroll down to the Material Details. There, you’ll see the cut and thickness tolerances for each material thickness.
If you do want it to be a tighter, more functional joint, reach out to our support team to connect with our team and make sure that what you get is exactly what you want.


