Exporting your design from AutoCAD is quick and easy! AutoCAD’s native format (.dwg) is accepted by SendCutSend’s instant pricing tool, so no special conversions or processes are required. In this article, we’ll go over a couple ways to export and a few checklist items for preparing your AutoCAD file for our services.
How to Export 2D Designs from AutoCAD for Upload to SendCutSend
AutoCAD is a great tool for drafting your parts in 2D, with just a few simple considerations to go over before uploading.
- Confirm units and scale
Make sure your part is designed at 1:1 scale in either mm or inches. You’ll be able to toggle between those two options during quoting.
- Separate and turn off non-cut geometry
To quote and manufacture your design, all we need is a vector outline of your part and its cut features (bend lines can stay too – we’ll get to that next)! No dimensions, annotations, construction geometry, or drawing borders are required. Make sure all of these elements are on separate layers from your cut and bend geometry.
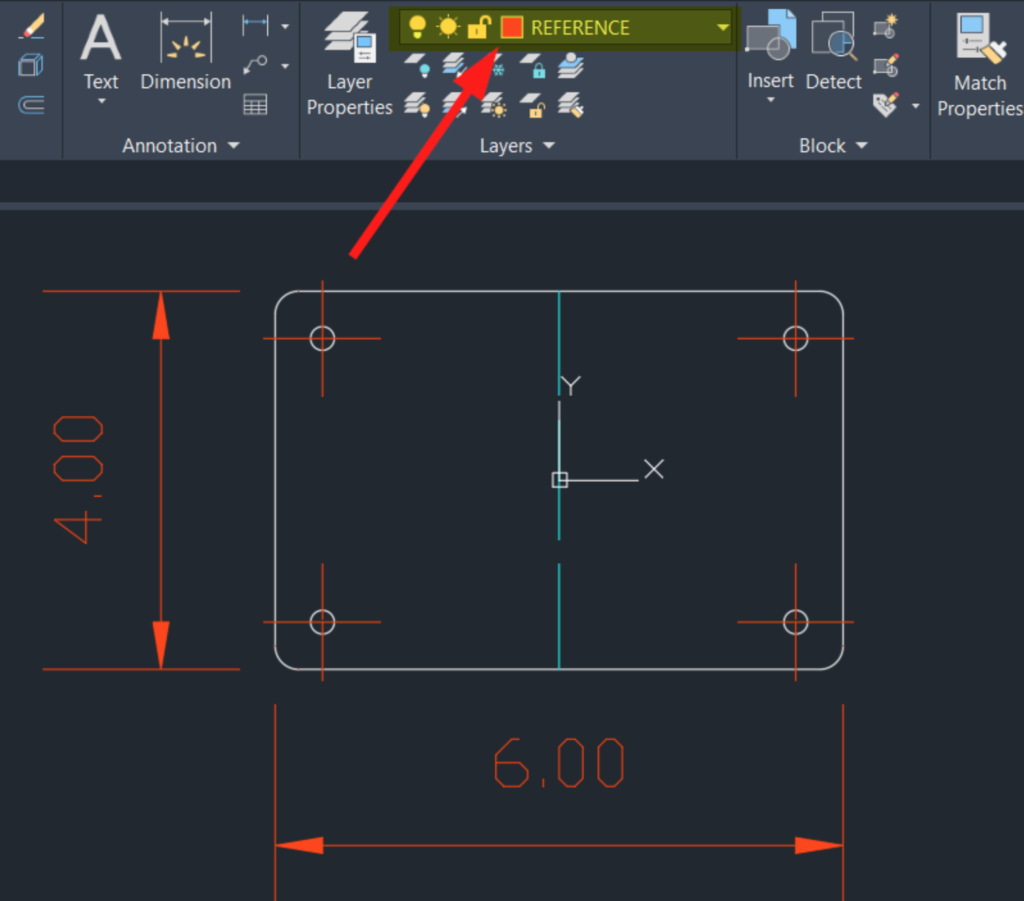
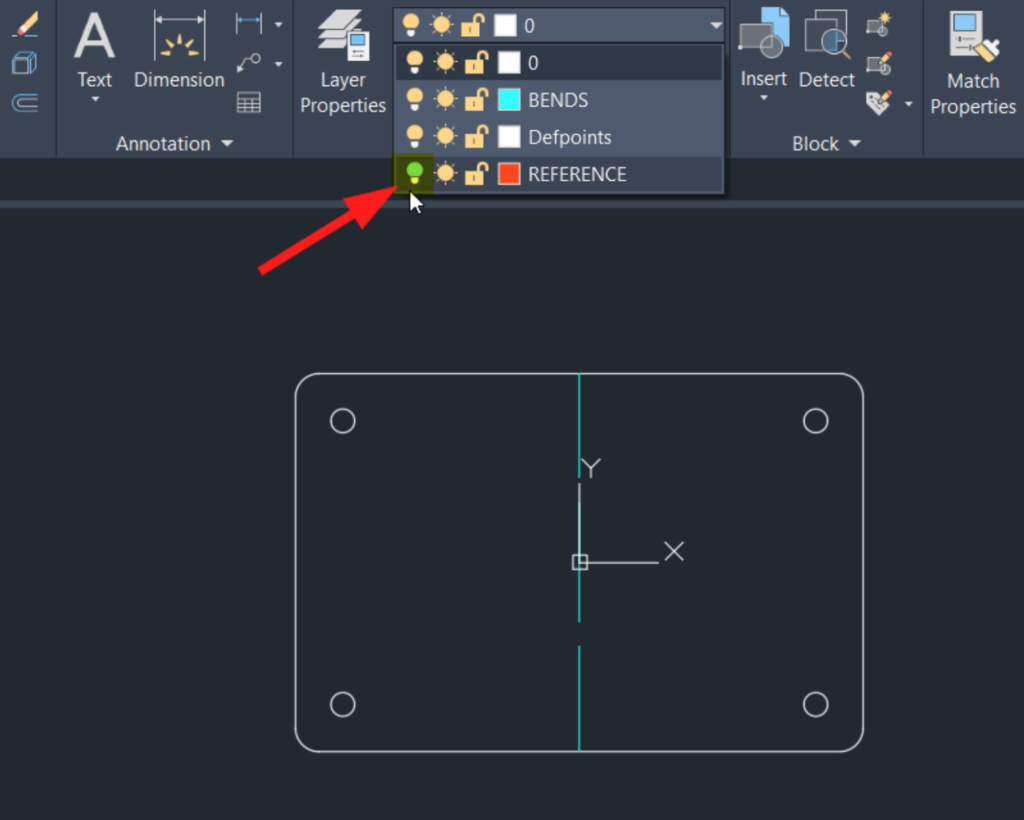
Once that’s done, turn off the layer(s) containing these elements. You’ll still have them saved for later.
- Check bend properties and set bend lines to a dashed line type
If you’re designing a bent part, it’s important to consider the bend radius and K-factor we can offer for your desired material. Check out our Bending Calculator and Material Catalog to make sure your design will work flawlessly!
Next we’ll need to differentiate cut versus bend geometry. Dashed lines help our instant pricing tool separate the two. Select all bend lines and set them to a dashed line type.
Once you have your bend lines selected, you can use the right click->Properties->Linetype route. Layer grouping and customization may be easier for large or complex designs.
Many dashed line types will work, but the simple “DASHED” option is the gold standard!

- Other considerations
If you’re adding single-line etching or no-kerf cuts to your design, now is a good time to set up those layers. Take a look at our single line etch and no kerf file setup instructions.
- Save and upload
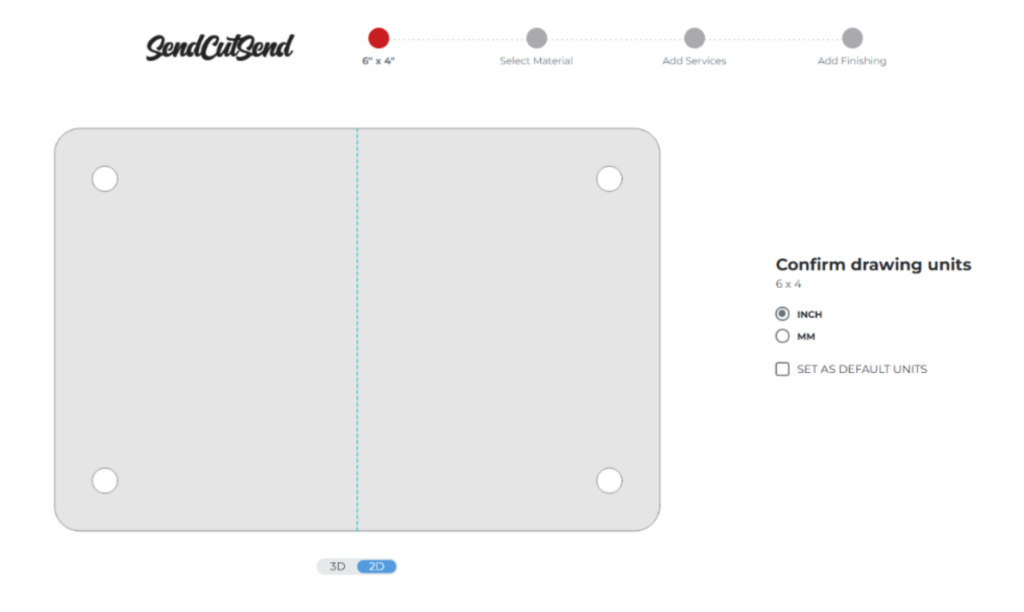
At this point, you’re ready to go! Save your file in its current state, navigate to our instant pricing tool, and upload. Make sure everything looks right during the quote process – are the dimensions what you expect? Is your part colored in gray, with bend lines shown in blue? Double check your design or chat with our support team for any concerns.
Exporting 3D Designs in AutoCAD for Upload to SendCutSend
Flat parts
- Remove 3D machined features, if applicable
If you’ve designed a sheet or plate part that will be laser cut, waterjet cut, or CNC routed, remove 3D features that would require machining. You can also leave out countersinks, threads, and PEM hardware; you’ll be able to select these options during quoting.
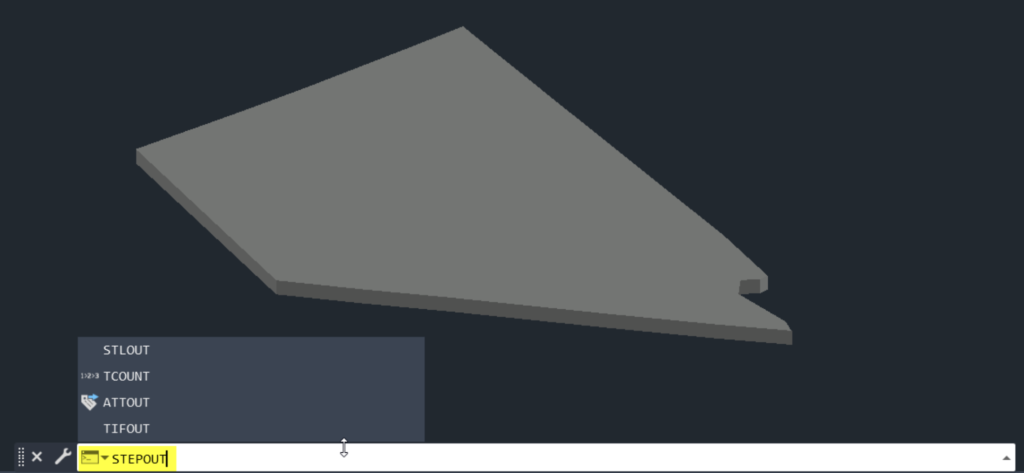
2a) Export to .step format (AutoCAD Mechanical only)
If you have AutoCAD Mechanical installed, you can enter “STEPOUT” into the command line to bring up a save dialog box and export to .step format.
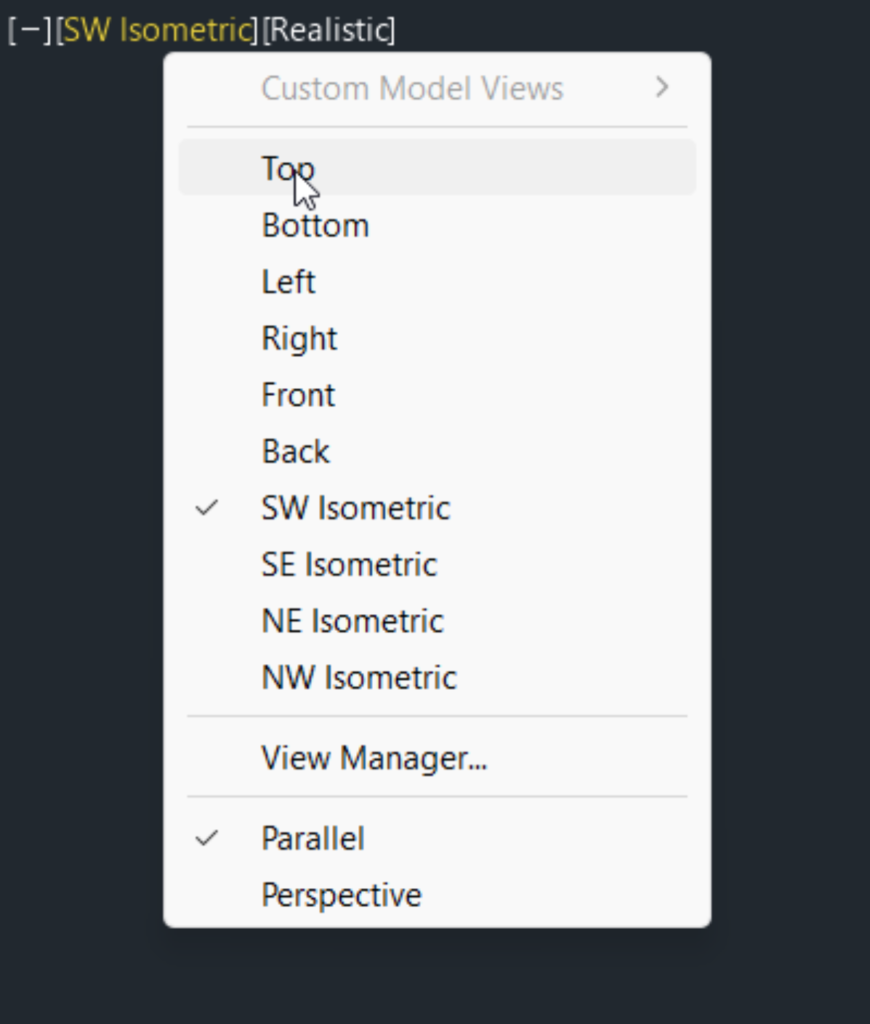
2b) Flatten to XY plane and save as .dwg
Another option is to flatten your 3D geometry to the XY plane and save as a .dwg file. To do this, enter the top-down view.
Then enter “FLATTEN” into the command line, select your part, and Enter.
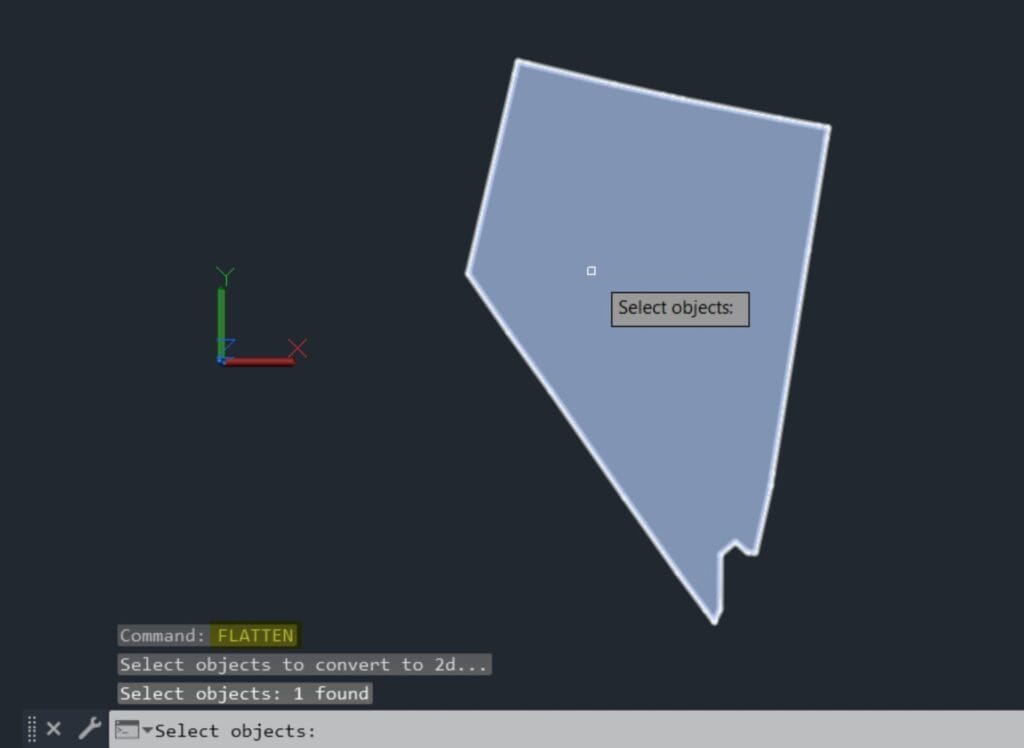
You should now see your part return to 2D vector geometry. At this point you are ready to save in dwg format and use our instant pricing tool!
Designing Bent Parts in AutoCAD
While we love AutoCAD, its 3D modeling and export options are limited. We don’t recommend it for designing bent parts in 3D because the software lacks native tools for creating accurate bend radius geometry, and for creating flat patterns from 3D models.
As an alternative for 3D bent designs within the Autodesk suite, we highly recommend Inventor or Fusion (which has a free license option)! We offer a variety of tutorials on Fusion and Inventor on our blog.
Our Bending Calculator can also help translate your bent 3D design to 2D format.
Final Considerations When Exporting from AutoCAD
AutoCAD is a great 2D editor, and its native .dwg files work well with our services. There are just a few things to keep in mind for your next AutoCAD upload:
- Use either millimeters or inches at 1:1 scale
- Separate and turn off all annotations aside from cut and bend geometry
- Ensure all bend lines are a dashed linetype
- Extruded designs can be flattened to 2D before saving
If you have reviewed our service guidelines along with these export tips, seeing your designs come to life will be a breeze! If you have any questions, don’t hesitate to reach out to our top notch Support team. We’re here to help!
