Sheet metal fabrication can achieve a lot when building anything custom. Especially after hours of scouring ready made products only to turn up with nothing useful.
Some basic skills, tools and a little time can create the perfect piece for most projects. But, when does a simple piece turn into a complex one? At what point are the basic tools unable to accomplish the proper fit, or even finish? And how can the average person overcome these obstacles?
Keep reading to see DIY brackets taken to the next level by using easy to learn skills, a fresh set of basic tools and services provided by SendCutSend.
Who Am I and Why Am I Qualified to Talk about Sheet Metal Brackets
My name is Tylor. I am an automotive fabrication hobbyist. I enjoy building custom cars out of my home garage and I have been using laser cutting services for years when the need arises.
I am currently retrofitting off the shelf suspension for my vehicle as there are currently no options being manufactured for my low production car. Because of this, one issue that I have encountered is improper placement of a brake hose bracket or a lack of one entirely. This is a safety concern and needs to be corrected.
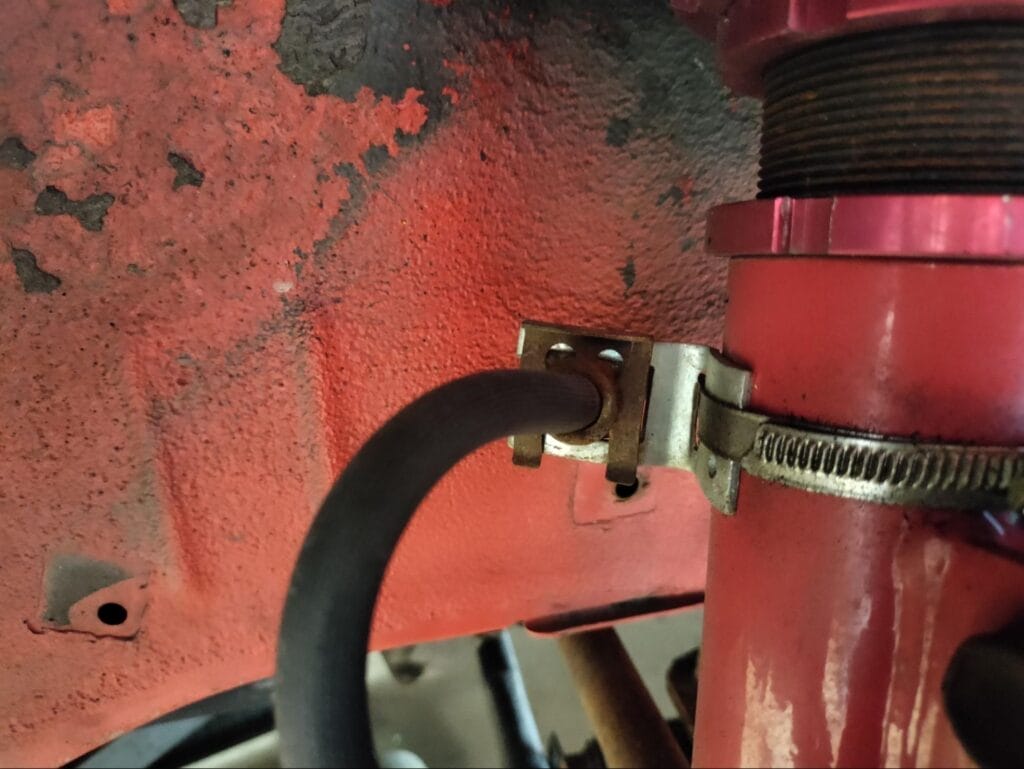
With some scrap steel and various cutting tools, I set out to correct this issue. However, the results were less than pleasing. Follow along as I
- Identify the issues around a hand cut bracket
- Use basic measurement skills and tools to note important features
- Design and Draft a replacement
- Transfer the draft to computer software
- Use the SendCutSend website to place an order
- Compare and explain differences of fit and finish
Identifying The Shortcomings of My Homemade Sheet Metal Bracket

While I was able to create a functional bracket, I noticed a few key issues.
The pair of brackets worked the way I needed them to. However, as a pair, it was very difficult to get them to look identical. A pair or more of anything hand made is going to be difficult to duplicate perfectly.
Making identical quantities is definitely something that laser cutting is going to accomplish easily.
I was also unhappy with the jagged edges and miscuts. I attribute that to the small size of the bracket and the difficulty of getting those precise, clean cuts. Once again, something that laser cutting is not going to struggle with.
I could perhaps start over, and over and over until I get something I am satisfied with. Yet, it still won’t be as nice or quick as laser cutting.
My last issue, I used a scrap piece of zinc treated steel to make these. Zinc is a durable finish that can be used aesthetically and as a corrosion inhibitor. However, since I had cut into the zinc to create this, there are portions that will no longer have that protection. In the short time I was using the brackets they had already started to rust.
SendCutSend offers various metal treatments and finishes to battle corrosion that happens after the cutting process to ensure that the items look good and last a long time.
For all of these reasons, and more, I decided to use SendCutSend to cut these brackets for me. I will show how easy it is to do even as a beginner.
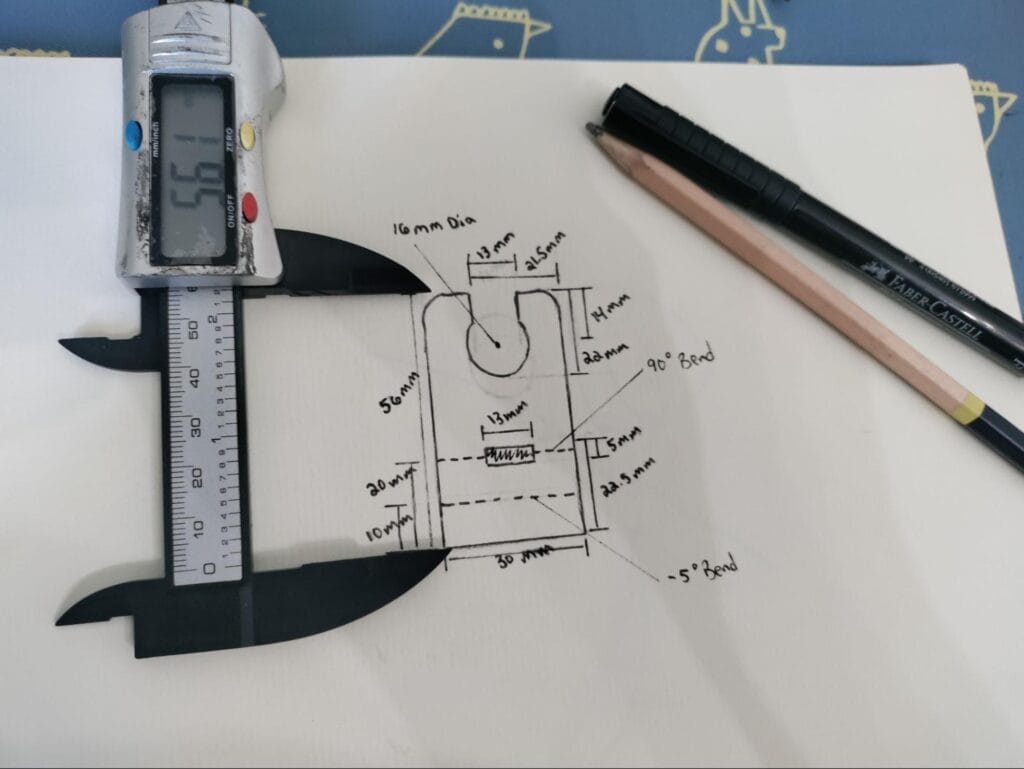
Taking Notes And Drafting A CAD Design

Any good design is going to start with taking measurements and notating them. I start by measuring several things with my caliper.
- Diameter of the shock body
- Diameter of the brake hose
- Space between the shock and the body of the vehicle
- Width of the band clamp
- Width of the retaining clip and anything else I think will be useful information.
I carefully write them down and add any additional descriptions which I think might be helpful.

Next I plan to move these measurements to a drawing of the bracket to help me navigate the design more easily while duplicating it in digital format.
When possible the drawing can be done to scale to utilize services and features talked about in the next subheading.
I use simple markings in my drawing like those outlined in SendCutSends guidelines.
Drafting and designing items to be laser cut by SendCutSend does not require advanced technical drawing notations. Anyone can prepare a design to be rendered digitally and use SendCutSend to make their ideas a reality.
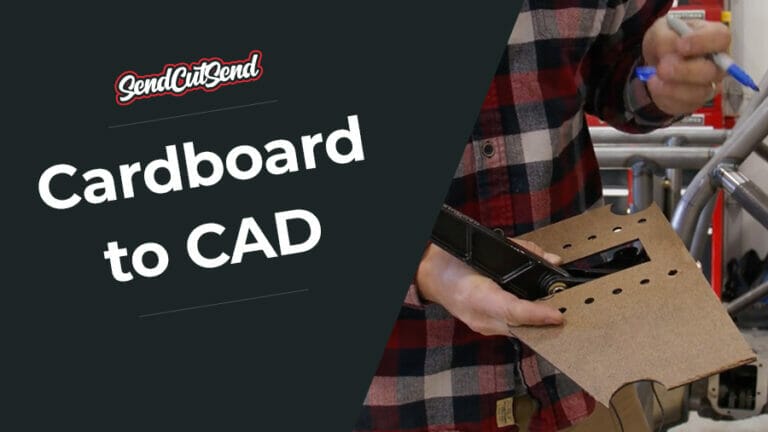
Creating a Sheet Metal Bracket From Sketch to CAD
There are many options ranging in price from Free and up available to create the files that SendCutSend requires to cut a design. These files include, STEP, DXF, or EPS.
As mentioned earlier, without CAD (Computer Aided Design) software SendCutSend provides Design Services to create the necessary file type from the drawing made earlier.
Another option without CAD software is vector imaging software. This is a good place to start for beginners. Most often this is done with basic shapes and lines on a 2D plane and can even accept a scanned image of the drawing from earlier to use a template. Once again, there are many options for these. Some like Inkscape are free or low cost like Corel Vector.
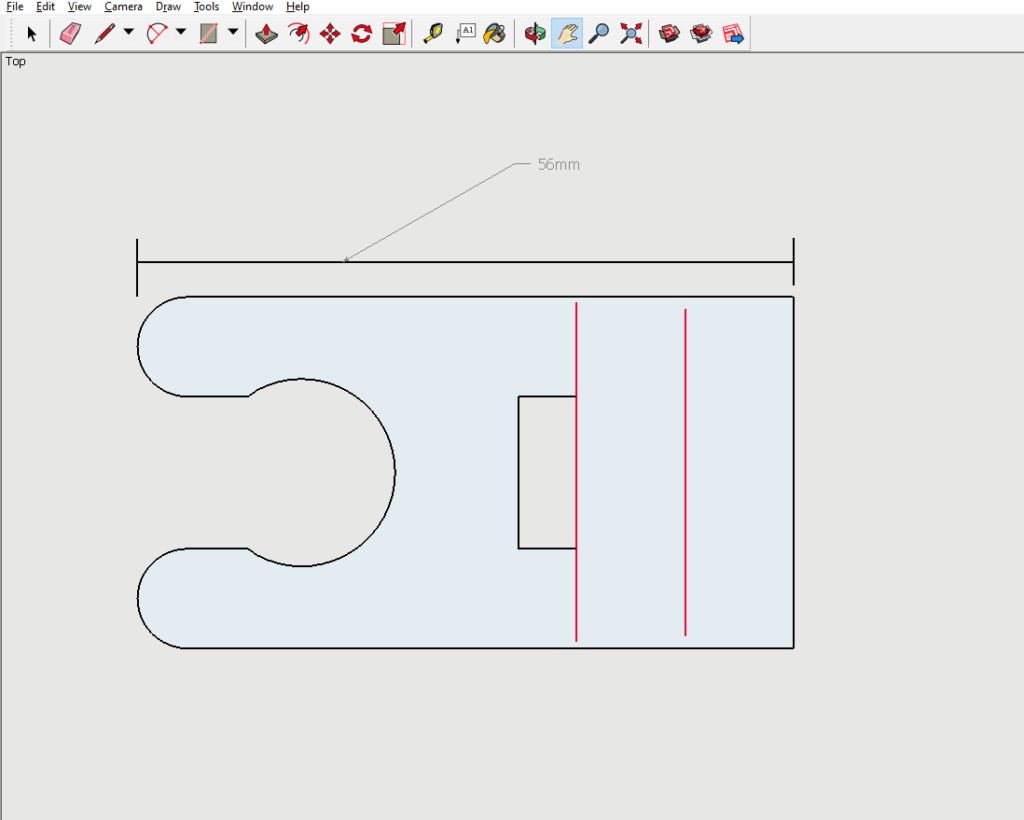
The step into 3D modeling software can seem huge but there are many benefits to using it and there is software available for all skill levels and budgets. One such is Sketch Up which is what I like to use.
I like Sketch Up because it is low cost and beginner friendly. It’s not saturated with complicated tools. It has just what I need and It’s a good gateway into using other CAD software in the future.
I create the drawing in Sketch Up much in the same way I did on paper. While drawing I am prompted for measurements of each line and shape. Sketch Up will draw these to scale. Soon this will create a replica in digital form for me to export.
It is also possible as mentioned before to upload a to scale drawing into many CAD programs and trace them over. Of course while still making sure your measurements are coming out accurate.
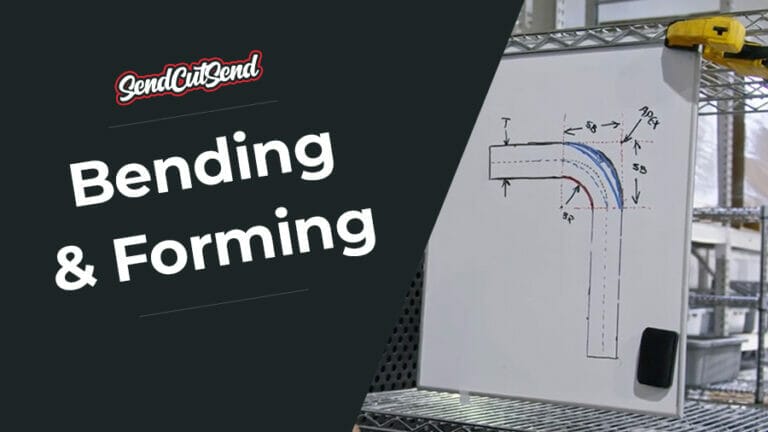
Another benefit of CAD software is the ability to visualize the design in a 3D space. Depending on the software things like bends or rigidity can be simulated from the flat drawing. 3D software can also be used to make sure the design will work as intended within a certain space. This can save time from having to make multiple revisions after test fits.
Once I am satisfied the drawing gets exported into a .DXF file.
Simplicity of SendCutSend
SendCutSend has made a powerful and easy to use tool for ordering laser cut components. Blog posts like this one act as a guide in the process, there are also simple instructions on the order screen and all the way through with links to various related content.
Steps to Uploading and Ordering from SendCutSend
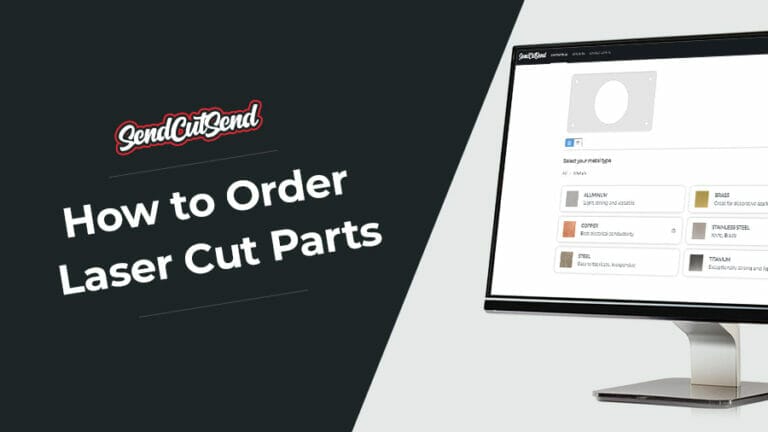
I begin by uploading my file in the SendCutSend app. If there are any issues I will be notified so I can make changes as needed. I am also asked to confirm the dimensions.
Next, the selection of materials. SendCutSend has a multitude of materials available to suit many needs. I am looking for something that is corrosion resistant and strong in extreme conditions. Being that this is a safety component I am going to choose a 304 stainless steel in 1.9mm thickness.
If there are any additional services required, they are selected now. Like bending, countersinking or any finishes desired. I have designed and drawn in some bends so I select the bends and degrees I want.
On the left hand side I am shown live changes in 3D so I can make sure the ordered product will arrive as expected.
On the right hand side live changes are shown in the price based on the options selected.
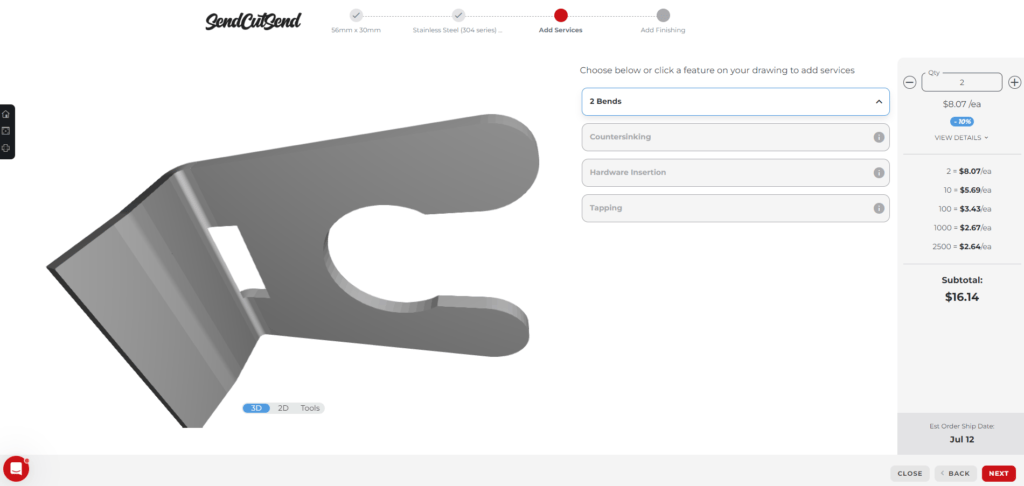
All that’s left to do is add the needed quantity to the cart. SendCutSend adds a discount for bulk orders and free shipping after the order minimum is met.
Last I check out and get updates via my selected method.
SendCutSend Sheet Metal Bracket vs Homemade Brackets
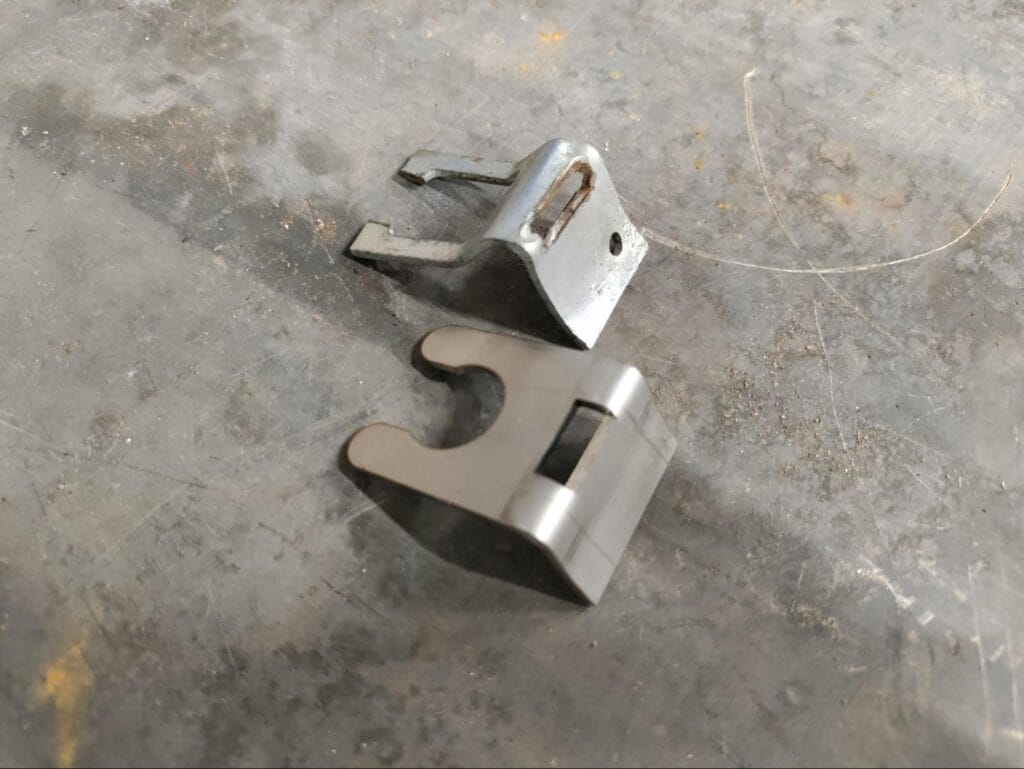
After a few short days I received my order thanks to SendCutSends efficient and innovative process. A perfect match of the 3D example shown on the website. No surprises here.
Off the bat it’s easy to see the improvement in the finished product from SendCutSend. Smooth cuts, smooth bends, smooth finish.

The fit is perfect as well. I was able to maximize the strength by making tighter tolerances where the hose fits, thus creating more material without the bracket being physically larger. This also allows more surface area for the brake line retaining clip to sit on. The rounded edges of the bracket ensure that the rubber hose doesn’t get damaged with subsequent removal and installation. Last, but still very important is the rust resistant stainless steel material used. This will keep the brake line safely in place for years to come.
It’s hardly a comparison. The SendCutSend piece is by far the better option when you consider how little time and effort it took to achieve.
In the end, I was not willing to compromise on the quality of a safety component. I noticed where my initial attempt fell short and saw the need for a revision. I wasn’t afraid to learn new skills or further advance old ones. I used resources provided by SendCutSend to make it easy from start to finish.
There are many things to consider when building or designing something. Hopefully, my experience with SendCutSend helps make some considerations easier. Like when it can be beneficial to use a laser cutting service and which steps can be taken to start doing so.