Dimple forming has been a vital tool in metalworking since the early 1900s, significantly impacting industries like automotive and aerospace by enhancing the structural integrity and aesthetics of sheet metal components. In this article, we’ll explore the history, applications, and benefits of sheet metal dimple dies, along with practical tips for using them effectively in your projects.
Key Points Addressed in the Article:
- Dimple Die Process: A step-by-step explanation of how dimple dies work, from material selection to the final product.
- Types and Materials: Overview of the various shapes, sizes, and materials compatible with dimple dies, with a focus on what SendCutSend offers.
- Benefits of Dimple Dies: How dimples improve strength-to-weight ratios, increase rigidity, and enhance the visual appeal of metal parts.
- Design Considerations: Important tips for positioning dimples and combining them with other processes like bending, tapping, and finishing.
- Service Integration: How SendCutSend’s dimple die services can be seamlessly combined with other metalworking services to produce high-quality, custom parts.
Video Guide: Sheet Metal Dimple Forming
A Solution for Lightweight and Strong Aircraft Components
Although the concept of creating depressions (or dimples) in metal to reinforce and facilitate fastening likely emerged earlier, the dimple die was first patented around 1903. By the 1910s dimple dies were on their way to becoming an important part of the mass production phenomenon that was the automotive industry.
With the advances in the aircraft industry during and just after WWI, dimple forming became more widespread in the 1920s and 1930s, being used by aircraft manufacturers to create lightweight and strong aircraft components. Because material could be removed while simultaneously rigidizing the component, the engineers were able to improve structural integrity and aerodynamic performance.
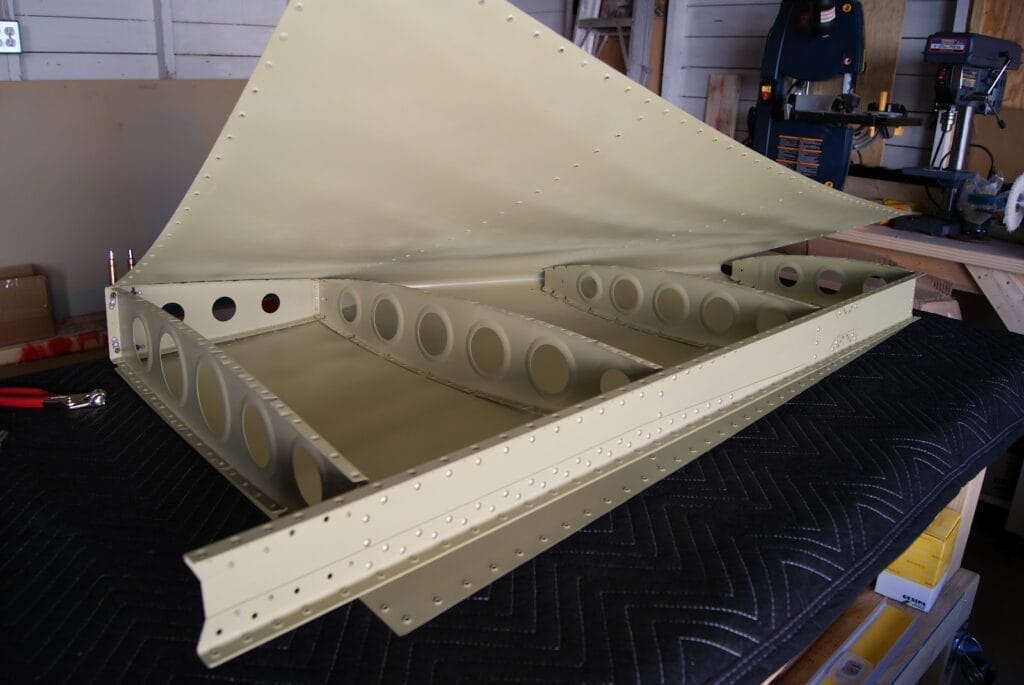
Dimple die forming is still used today, not only in automotive and aerospace, but electronics, consumer appliances, and many other industries.
While forming with a dimple die is a relatively simple process, it’s important to use the correct tools and techniques to avoid damaging the metal sheet.
How Does the Process of Sheet Metal Dimple Forming Work?
The depth and shape of the dimple are determined by the design of the die.
In simple terms, two dies are brought together on either side of a piece of sheet metal into which a hole has been drilled.
Using a hydraulic press, bench vise, or even a nut and bolt, the compression force of the punch, or male side of the die pair, forces the sheet metal into the female die, forming the dimple. The shape and depth of the dimple are determined by the design of the male and female parts of the die.
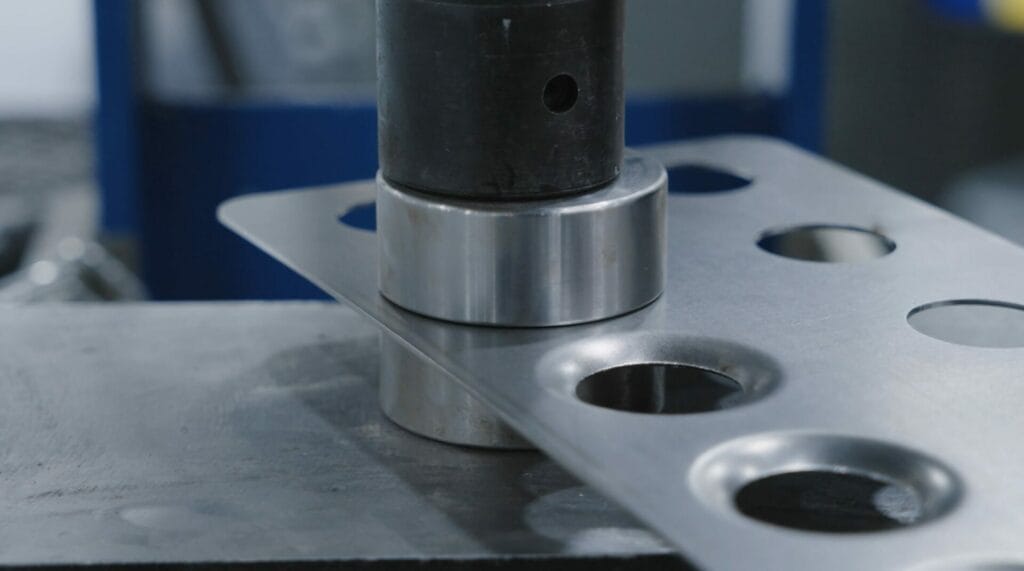
Different types of Dimple Dies and what SendCutSend uses
Dimple dies are typically made of tool steel that is then face hardened for maximum durability. The die has a projecting punch that is shaped like the desired dimple. This die can either be centered over an existing hole, or can include a knockout punch as the first operation. In either case, the punch is forced into the sheet, creating the dimple.
Although dimple dies are available in a variety of shapes; from ovals, to squares, to triangles, by far the most common is the classic circle, which is exactly what we offer.
While not every size is available in every material and thickness, we are able to offer a wide range of diameters to fit the size and scope of your laser cut sheet metal project.
| Dimple Tool OD | Dimple size Major | Dimple Minor | Advertized Dimple size | Minimum distance to other features | Minimum distance to the same dimple |
| 1.200 | 0.850 | 0.515 | 0.500 | 0.600 | 1.200 |
| 1.450 | 1.150 | 0.765 | 0.750 | 0.725 | 1.450 |
| 1.950 | 1.575 | 1.015 | 1.000 | 0.975 | 1.950 |
| 2.450 | 1.875 | 1.265 | 1.250 | 1.225 | 2.450 |
| 2.700 | 2.200 | 1.515 | 1.500 | 1.350 | 2.700 |
| 3.200 | 2.500 | 1.765 | 1.750 | 1.600 | 3.200 |
| 3.470 | 2.900 | 2.015 | 2.000 | 1.735 | 3.470 |
| 4.450 | 3.600 | 2.515 | 2.500 | 2.225 | 4.450 |
| 5.200 | 4.375 | 3.015 | 3.000 | 2.600 | 5.200 |
Like our other services, sheet metal dimple forming is performed with top quality machinery so we can deliver consistent quality, with low additional lead time requirements per Service.
And of course, our pricing is simple and transparent, with prices starting at $9, with no minimum quantity. With prices as low as $0.40 per part for higher quantities.
Benefits of Using Dimple Die on your Sheet Metal Parts

Improved Strength-To-Weight Ratio
Dimples are often used in parts that are subjected to high loads, solely to increase the strength of the sheet metal by distributing stresses more evenly. The weight part of the equation comes in because dimples can be used to remove unnecessary material from a sheet metal, which can be beneficial for parts that need to be lightweight, such as aircraft and automotive components.
Increased Rigidity
If you’ve ever wondered why thin sheet metal parts (think, ductwork) often have an “X” pressed into them, it’s to increase the rigidity, or the ability of the part to withstand flexing and warpage.
Strategic placement of dimples in your parts can have the same effect–increasing the rigidity of the part–without adding excess material. Dimples even do the job without warping the whole part, IF other structural features are added to ensure that things don’t get out of hand. More on that in the next section.
Alternative to Countersinking
Particularly for thinner materials, where a countersink isn’t possible, dimples can also be used to create a location for a screw or rivet. This can be helpful for parts that need to be assembled together with a strong and secure connection, such as automotive parts or construction materials.
Visual Effects
If you’ve ever seen an offroad vehicle or motorcycle frame that employed them, you know that in addition to their structural chops dimples can also look pretty great. They can be used to create a wide variety of decorative effects on sheet metal parts such as a honeycomb pattern or used as a spacing feature to give some depth to the assembly.
Improved Material Flow (edit)
Ever met a smooth golf ball? Dimple dies can shape and contour the metal to improve the flow of materials in specific areas, making them more suited for certain applications, such as forming ductwork. In applications involving fluid flow, such as in aircraft or automotive components, dimple dies can be used to improve the aerodynamics and reduce drag, resulting in better fuel efficiency and performance.
Design Considerations When Using Our Sheet Metal Dimple Forming Services
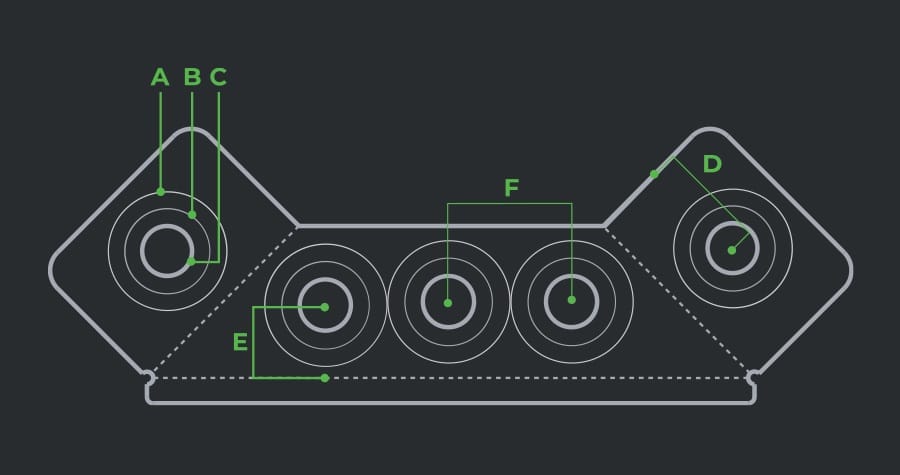
Before you take advantage of our dimple forming services, read through our dimple forming guidelines to make sure your file is set up for success. Here are a few things to note.
Location, location, location!
The location of the dimple: It is important to locate the dimple in a place where it will not interfere with other features of the part. It is also important to make sure that the dimple is away from the edge.
Certain distance from any bends. Reference our Bending Guidelines for feature spacing requirements.
Look and feel
Because dimple dies are made of hardened tool steel, they will leave a witness mark on the part which may be visible through most finishes. Since the dimple die process happens after deburring, these marks will show up even if deburring is selected. As a general rule, the harder the material, the less you’ll notice these marks.
Like all of our processes, if the part needs to be completely free of tool marks, a little elbow grease and abrasive pads (or break out the polishing wheel) will go a long way to clean things up, since witness marks are typically not very deep.
Best Materials for Sheet Metal Dimple Forming
We like being able to offer lots of options to our customer base, and right out of the gate we’re able to offer dimple forming services in many of our most popular laser cut metals, including:
- Mild and galvanized steels up to 0.119” thick,
- Aluminum Grades 2024, 5052 and 6061 up to 0.125”
- Stainless (304 and 316) up to 0.125”
What other services can you combine Dimple Die with?
Dimple forming services pair well with any other service available for the material and thickness you select, for instance: If we decide 5052 aluminum in a 0.125” thickness is the right choice for a particular part, a quick look at the Material Details tells us that we have seven other Available Operations including deburring, bending, countersinking, tapping, hardware, and a couple finishes.
When you upload your design to our app, selecting a material and thickness will determine what other operations are available and those that aren’t will be grayed out. It’s that simple. That said, a couple notes on recommended Service combinations:
Bending
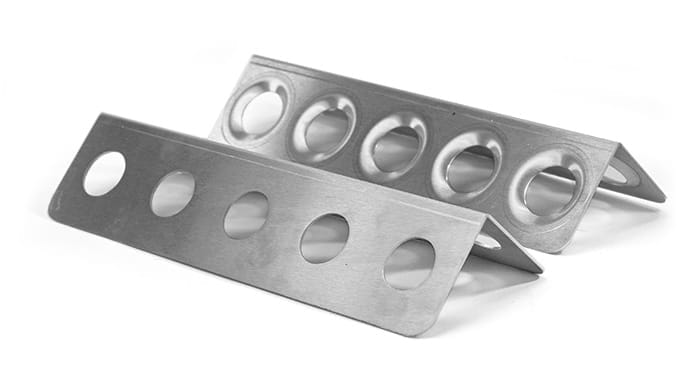
When you combine strategic bends with dimple die features the result is greater than the sum of its parts. Why? When you deform metal, whether that’s with a weld, a pinch roll, or in our case, a dimple die, the natural tendency of the metal is to want to curl.
Although most of that stress is taken care of with the material relieved from the center of the dimple (that big hole), there’s still material being displaced, which translates into slight deformation. Severity depends on the design of the part, material selection, and thickness: if it’s really thick, it’s going to be more severely affected.
But this is where our Bending Service can save the day: the bend serves as a rigid “spine” which flattens the material immediately adjacent to either side of the bend feature. What’s the takeaway? If you have a long edge in a sheet with a lot of dimples, add a bent flange on that edge and your part will stay put, and stay flat. Take a look at our Guide to Planning Features Around Bend Lines to ensure correct placement.
Tapping, Hardware
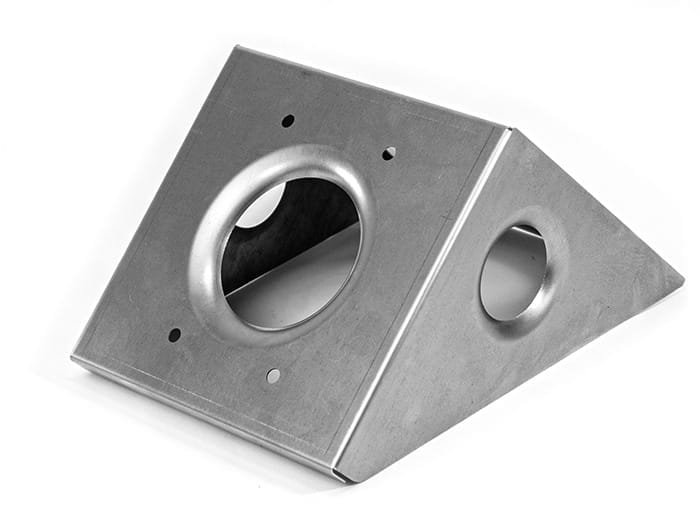
When you combine dimple dies with Hardware Insertion or our Tapping Service, it’s possible to make some amazing parts that can literally bolt right into your larger assembly. A big consideration when adding multiple features, let alone different types of features, is “how far apart do things need to be?” We’ve put together a Basic Tolerances page to address this, and every one of our Materials comes with a list of Design Considerations like, “Min Hole to Edge Size”, “Min Flange Length” or “Die Width”.
Countersinking
This is really more of an either/or situation: Dimple die features can be a great alternative in applications where you need hardware to mount flush with the front face, but don’t have the material thickness to make a proper countersink operation happen.
Finishes
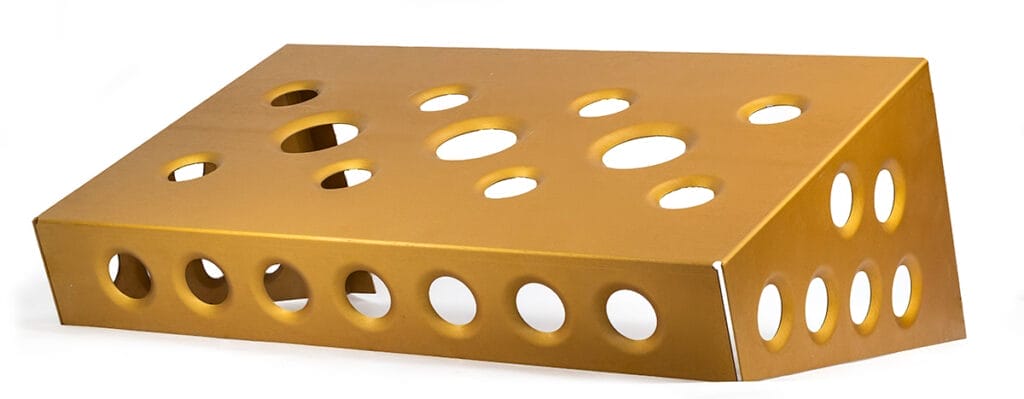
There’s nothing better than a great looking finish on your freshly laser cut parts, except maybe, the added protection against corrosion, improved durability, or the fact that you don’t have to apply it yourself? So maybe looks aren’t everything after all. Any of our finishing options can be applied over dimples, whether that’s Zinc Chromate Plating on steel, anodizing on those aluminum parts, or a Powder Coat on just about any metal we can dimple die. Be aware that witness marks may show up through thinner finishes, like anodizing or plating, but in general are hidden under a powder coat.
Save Time and Money with SendCutSend’s Sheet Metal Dimple Forming Services
Could you buy your sheet metal parts from SendCutSend with the holes all laser cut and dimple them yourself? Absolutely, and many of you have been doing an awesome job at just that, but when you have a small run of parts, or need several different dimple sizes for a single project, the tooling costs can add up really fast.
That’s where we’ve seen the opportunity to provide another valuable service to you: At $9 to start and as low as $0.40 per dimple at higher volumes, we’ve tried hard to make dimple die accessible to anybody.
Now go grab some cardboard, a pen and paper, or your favorite CAD program and get those parts uploaded to our app!


