Configuring bends for your STEP file is easy after you upload your part design to SendCutSend’s website. Just make sure to check the bend definitions for accuracy and save them before adding parts to your cart!
If there is trouble uploading your STEP/STP files successfully, please see our 3D File Guidelines for sheet and plate parts.
Important: set up your parts with SendCutSend’s bending specifications
Bending specifications like bend radius and K factor are set per sheet thickness and we do not offer custom bend radii at this time.
Be sure to design using our material bending specifications so your parts turn out as expected! You can confirm bending specifications in our Material Catalog or Bending Calculator.
- Using Autodesk Fusion or SolidWorks? Download our gauge tables to easily apply the latest specs.
Configuring bends for STEP/STP file parts
1. Upload your STEP/STP file to SendCutSend’s website and choose a material that is eligible for bending services. See our Bending and Forming Design Guidelines if needed.
Please note, our system will automatically display your part’s overall flat dimensions in inch units and this cannot be changed for STEP/STP format files.
2. After you select a sheet thickness, your flanges should automatically preview as bent using definitions you saved when designing your part. Expand the Bend dropdown to double check and confirm that all definitions are correct.
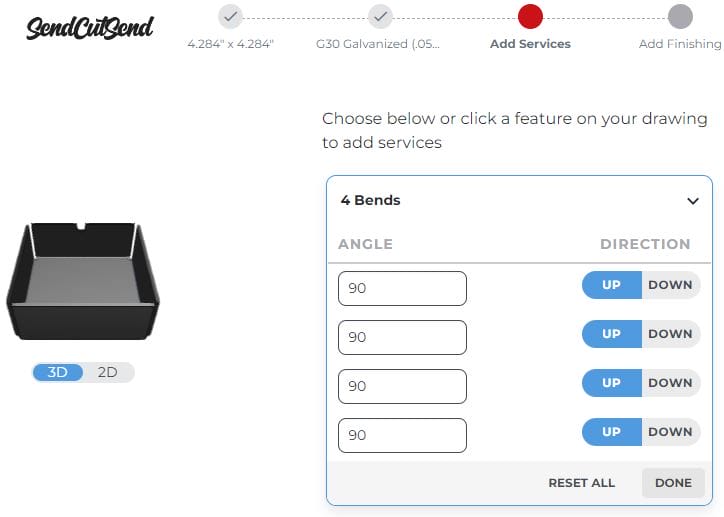
Once you have confirmed the angle and direction for all definitions, click Done. Then click Next!
4. You’ll then see that bending services have been added, so the definitions have been configured and saved for your parts.
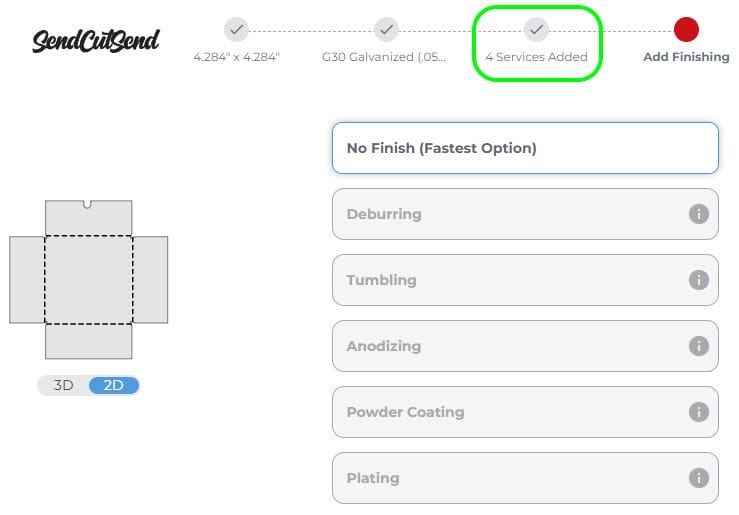
5. If everything looks good, click Add To Cart!
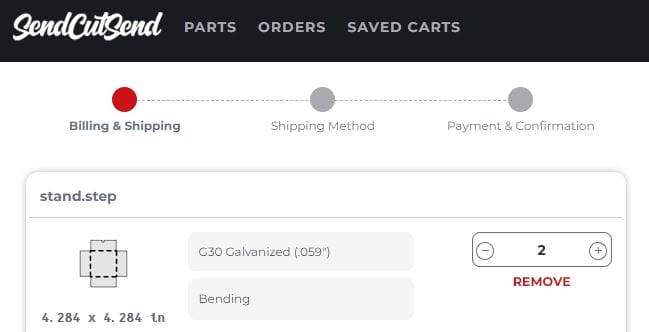
6. You’ll see that bending services are included for your parts. You can review and revise your service configurations for parts anytime before checking out by clicking Bending on the line item.
If there’s trouble configuring bends for your STEP/STP file parts after reviewing this guide, please contact our Support team. We’ll be happy to help!