Exporting a STEP file from Autodesk Fusion is easy! Just make sure your part design is set up for success with SendCutSend first and you’ll be good to go.
Please note: files must be set up using inch or millimeter units in 1:1 scale per our guidelines. After uploading your STEP file to our website, the overall dimensions displayed will be shown in inch units, but the overall part size should be correct regardless of whether you used inch or millimeter units in your design.
Check our design guidelines before exporting
Before exporting your design for a part that will be cut from a sheet material, check that your design meets our 3D file guidelines for sheet material parts.
If you’ve designed a CNC machined part that will be cut from billet material, review our CNC machining guidelines before exporting.
Use SendCutSend’s material bending specifications for parts with bending services
If your sheet material part will require bending services, be sure to use SendCutSend’s specifications for bending the material in your design.
You can either set up a sheet metal rule with our K factor and bend radius for the material manually, or you can import our ready-made sheet metal rules for Fusion.
Using our material bending specifications ensures your parts will turn out as expected within our bending tolerances.
How to export a STEP file from Autodesk Fusion
1. From the File menu, click Export.

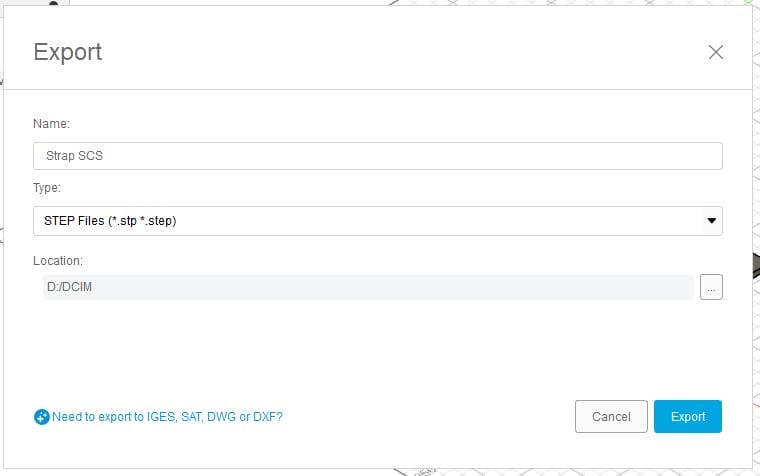
2. This will open the Export window.
Name your file. Then, in the Type drop down menu, choose STEP Files (*.stp *.step)

3. Confirm the location you want to save your file to. Then click Export.
That’s it! You should see a notification from Fusion in the upper right hand corner indicating that your STEP file export is ready.
If you’ve followed the tips in this guide, your STEP file should upload successfully to our website so you can order your parts. Please contact our Support team if any issues arise!


