Use our Online Parts Builder to create and price parts in minutes. Here’s how!
Before starting the part building process, log into your SendCutSend account. This will allow you to save any parts you create and reorder them anytime in the future.
Tip: if you plan to add bends, first use our Bending Calculator to confirm what flat dimensions are needed to result in the final formed dimensions you want (within our tolerances).
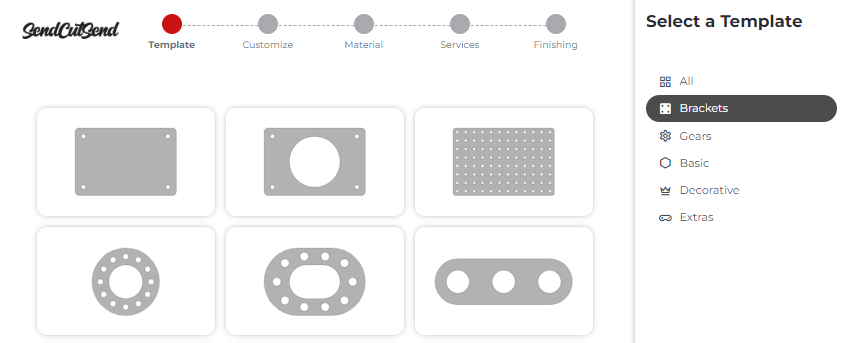
1. Select a template
Choose from brackets, gears, basic shapes, and more!
Each template will have different options for customization so you may need to try a few out.
If the templates don’t allow for features you require, our Design Services may be a better fit for your project! Design Services can help with fully dimensioned mechanical parts (not text, décor, or signage).
Please note, templates with text only include the fonts listed in the available options. If you need a decorative item with more customization or a different font, check out our trusted Design Partners!
2. Adjust units, dimensions, and feature placement
To change units between Imperial and metric, click the units indicator by the overall part dimensions to switch between inches and millimeters.

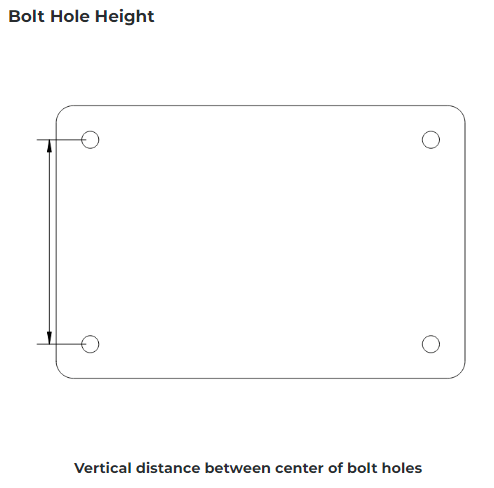
Hole width and height distances are always measured from the center of each hole.
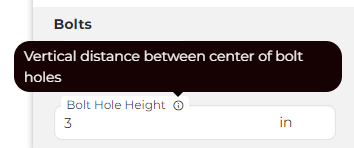
You can click the exclamation point on each dimension to see an illustration of what the dimension represents.
Tip: if you want to effectively remove holes from a part, you can set the diameter to zero.
Reference our Design Guidelines during this step!
Make sure the overall part size, feature sizes, and distances between cut features will meet the required specifications for the material thickness and any post processing services you plan to use.
You’ll be able to directly measure features in your part once it’s saved.
3. Add bend location lines if needed
Before adding bends, use our Bending Calculator to confirm what flat dimensions are needed to result in the final formed dimensions you want (within our tolerances).
Once you know your flange dimensions, click + Bend Line to add a bend location line to your part. Bend lines mark the center of each bend and are required if you plan to add bending services later.
Review our Bending Guidelines during this step. Ensure your bend lines are far enough away from the nearest edge so that your flanges will meet the minimum length required for the material and avoid feature distortion.
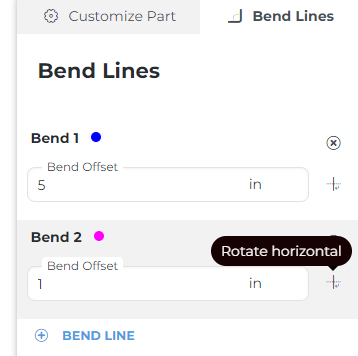
Not all templates include a bend line option. This is because not all template shapes are compatible with our bending services, since we require at least one flat edge parallel to the bend line. Learn more about our flange shape requirements.
4. Save & Continue to start quoting!
When your part is ready, click Save & Continue!
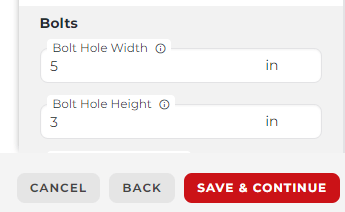
If you’ve entered a value that is outside the limits for any of the fields, the Save & Continue button will be greyed out.
5. Choose a material from our catalog
Choose an option from our Material Catalog to get instant pricing!
If some materials are unavailable, it may be due to the part’s overall size.
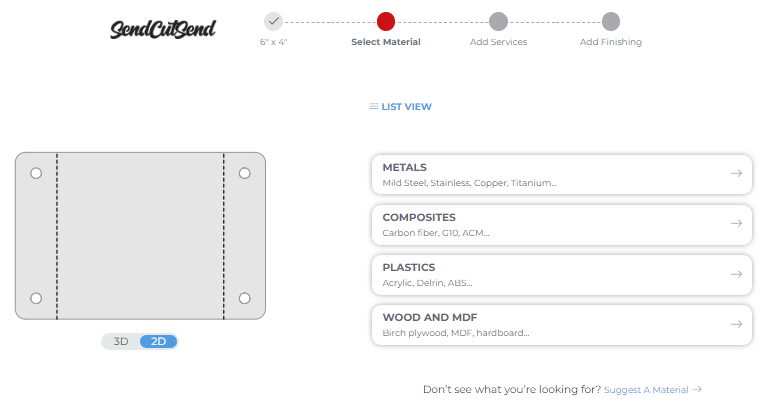
6. Measure features and check specs with preview tools
After you choose a material and proceed to the Add Services step, a Tools option will be available on the part preview.
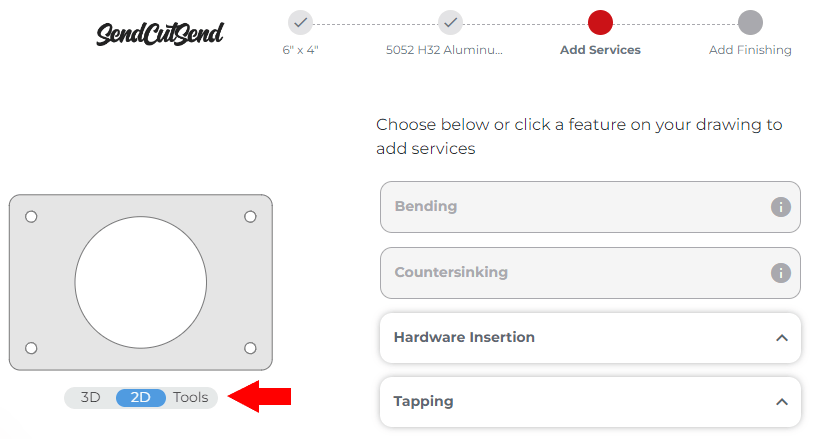
If you toggle the Tools view, it will allow you to
- zoom in and out by scrolling if the measuring tool if off,
- directly measure features if the measuring tool is on,
- view your part with a grid,
- move the part around the preview space,
- reset the preview, and
- quickly access material info including specifications and properties.
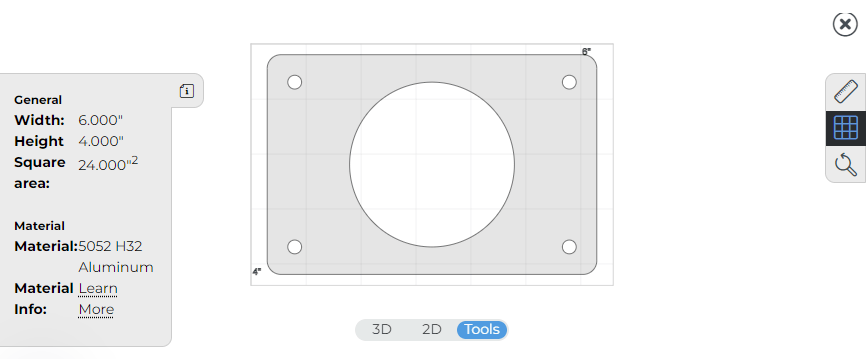
You can access these tools for any part saved to your account. Just click the preview image on the part to access the tools!
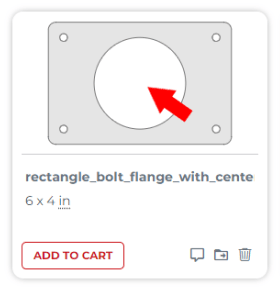
7. Add available services
Add bending, tapping, countersinking, hardware installation, and/or finishing services if your part is eligible! Please note, your part must have bend lines included when the part is created if you want to add and configure bending services.
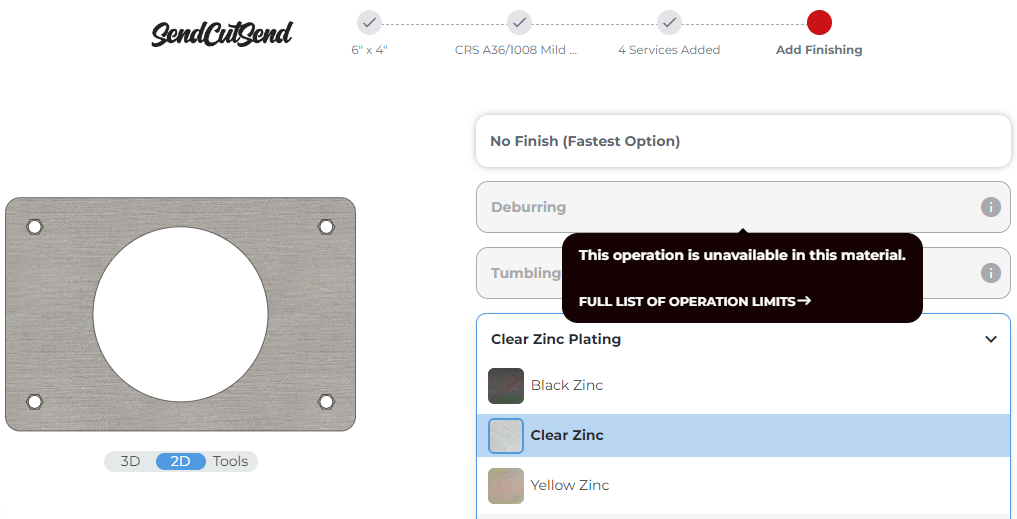
If an operation is unavailable, you’ll see a tooltip explaining why with a link to our full list of operation limits. Select the tab for the service you want to add.
Then you’ll see a list showing which material thicknesses are available for the service and the overall flat part size constraints for each thickness.

8. Proceed to checkout!
Once your part is all set, you can place an order. See our complete guide on ordering parts for more detail on our options at checkout!
Parts Builder considerations
Parts you’ve created using the Parts Builder will remain in your SendCutSend account so you can reorder them anytime in the future. Learn how to reorder instant-priced parts with one click!
It’s not possible to directly edit or update files in your account on our website. If you need to make a change to an existing Parts Builder part, you’ll need to recreate it in the Parts Builder with your desired revisions.
Although we can cut parts up to 44″ x 30″ in most materials, some templates are limited in the maximum size possible. Typically, rectangular and square shapes like the Rectangle Bolt Flange allow parts up to our maximum instant priced and custom quote sizes.
It’s not possible to add your logo, graphic, or personal design to a Parts Builder template. If you would like a part that requires more customization, consider using a free design software program or working with a Design Partner.
Want to use the Parts Builder fonts in a custom design? The fonts in our text-based Parts Builder templates are available to download for free!
Build it, price it, send it!
If there’s any trouble using the Parts Builder our Support team will be happy to help. Keep in mind that if the templates available don’t allow for functional features that you need, Design Services may be a better fit for your project! For any decorative or text-based customizations, check out our Design Partners.
